BigRep ONE 4 Installation and Commissioning
63
6. Normally you will have to repeat all eight points two or three times until you
get a precise calibration.
Setting the correct distance between nozzles and bed
1. Turn on the main switch (O) and start the printer. (& Chap. 5 and & Chap. 6).
2. Go to the Temperature Menu
a. Preheat the print bed to 60° C. For better leveling results,
wait 30 minutes aer the bed reaches 60° C.
b. Heat extruders T0 and T1 to 205° C.
3. Open the Control Menu in the interface, select HOME ALL
4. Go to the Terminal Menu, enter T0 and click on send to activate T0
5. Type in G1 X200 Y200 Z0.5 in the console and confirm by clicking on
SEND. The printer will proceed until the distance between the print bed and
extruder T0 amounts to 0.5 mm in the Z-axis.
6. Place the delivered feeler gauge (0,5 mm) between extruder T0 and the print
bed.
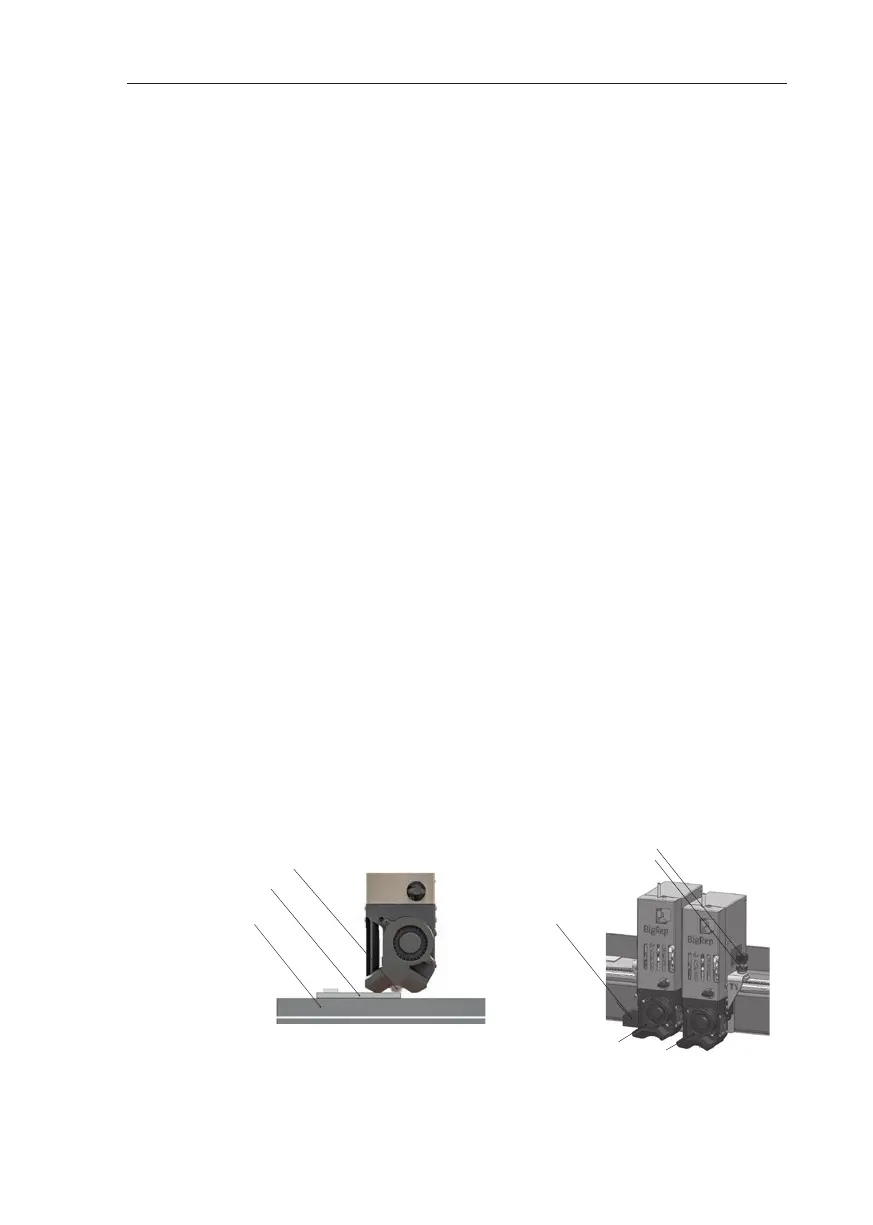
7. Loosen the locking nut on extruder T0 and adjust the distance between the
nozzle and the spacer with the adjustment knob. The nozzle should barely
touch the spacer. (Fig 4-7)
8. Tighten the locking nut.
9. Go to the Terminal Menu again, enter T1 in the console and click SEND.
10. Repeat steps 5 to 8 for extruder T1.
Tipp
Instead of the delivered 0.5 feeler gauge you can use another spacer with a dier-
ent value. Make sure that you change the Z-Oset value under step 5. in accor-
dance with the new spacer.
Fig. 4-7: Leveling
Adjustment knob
Locking nut
T0
T1
Laser sensor
Nozzle
Feeler gauge
Print Bed