BigRep ONE 7 Retrofitting
85
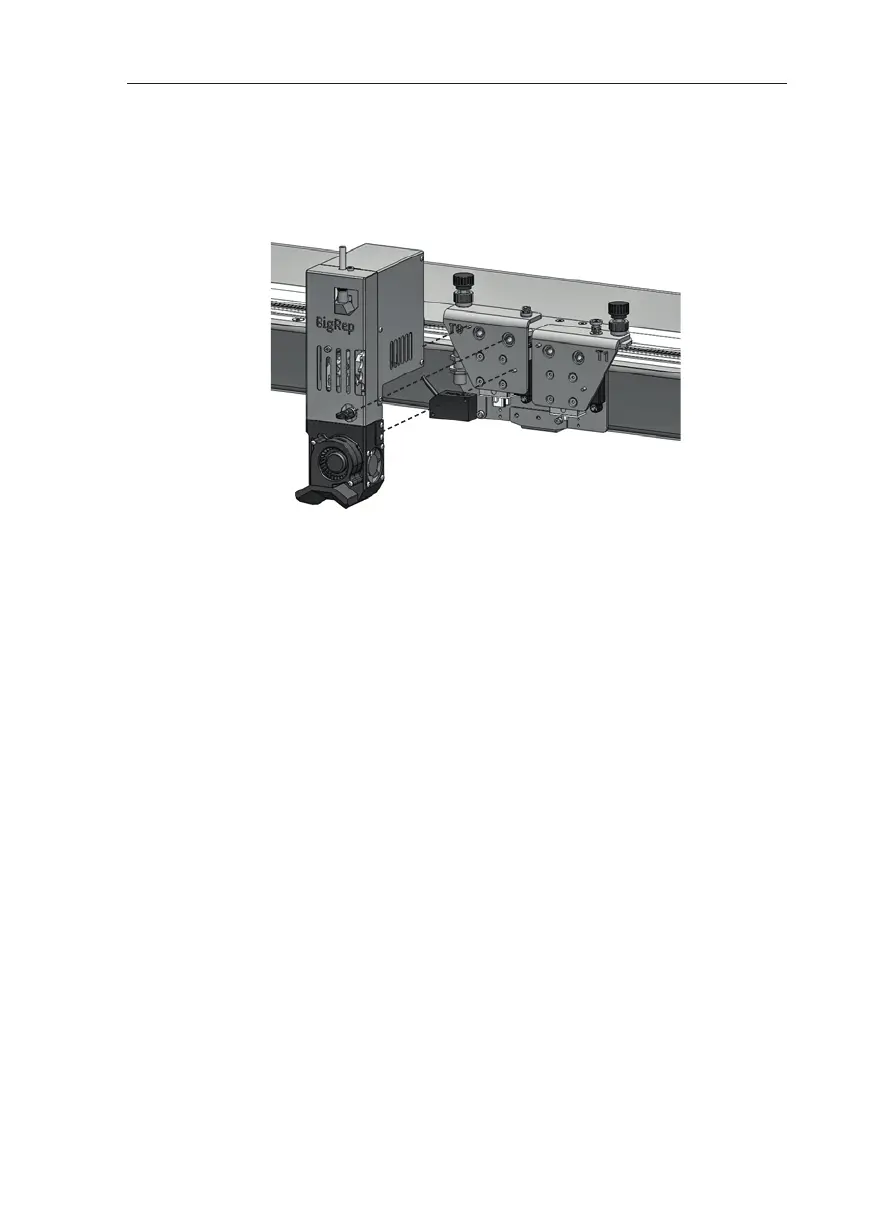
Mounting the Extruder
Slide the extruder onto the X-stage mount horizontally to ensure that the pins line
up with the extruder hole/slot (see Fig. 7-6)
Tighten the attachment screw (f) by hand to secure the extruder.
Connect the electrical connectors to the back of the extruder. Carefully check that
each pair of cables is assigned to one extruder, they may not be interchanged.
Secure the connectors by turning the inner ring clockwise until you feel a gentle
click.
Initializing
Do not set the main switch (O) to On before both connectors are firmly connected
to the extruder.
The BigRep logo at the front lights up when initializing was successful.
We recommend resetting the distance between nozzle and bed aer exchanging
one or both extruders. & Chap. 4.4 Aligning / Leveling Bed and Frame
Also note that the distance between the extruders’ two nozzles may change
during the replacement of an extruder. In this case the distance needs to be re-
aligned by running a test print.
Fig. 7-6: Mounting the Extruder