16 billygoat.com
17
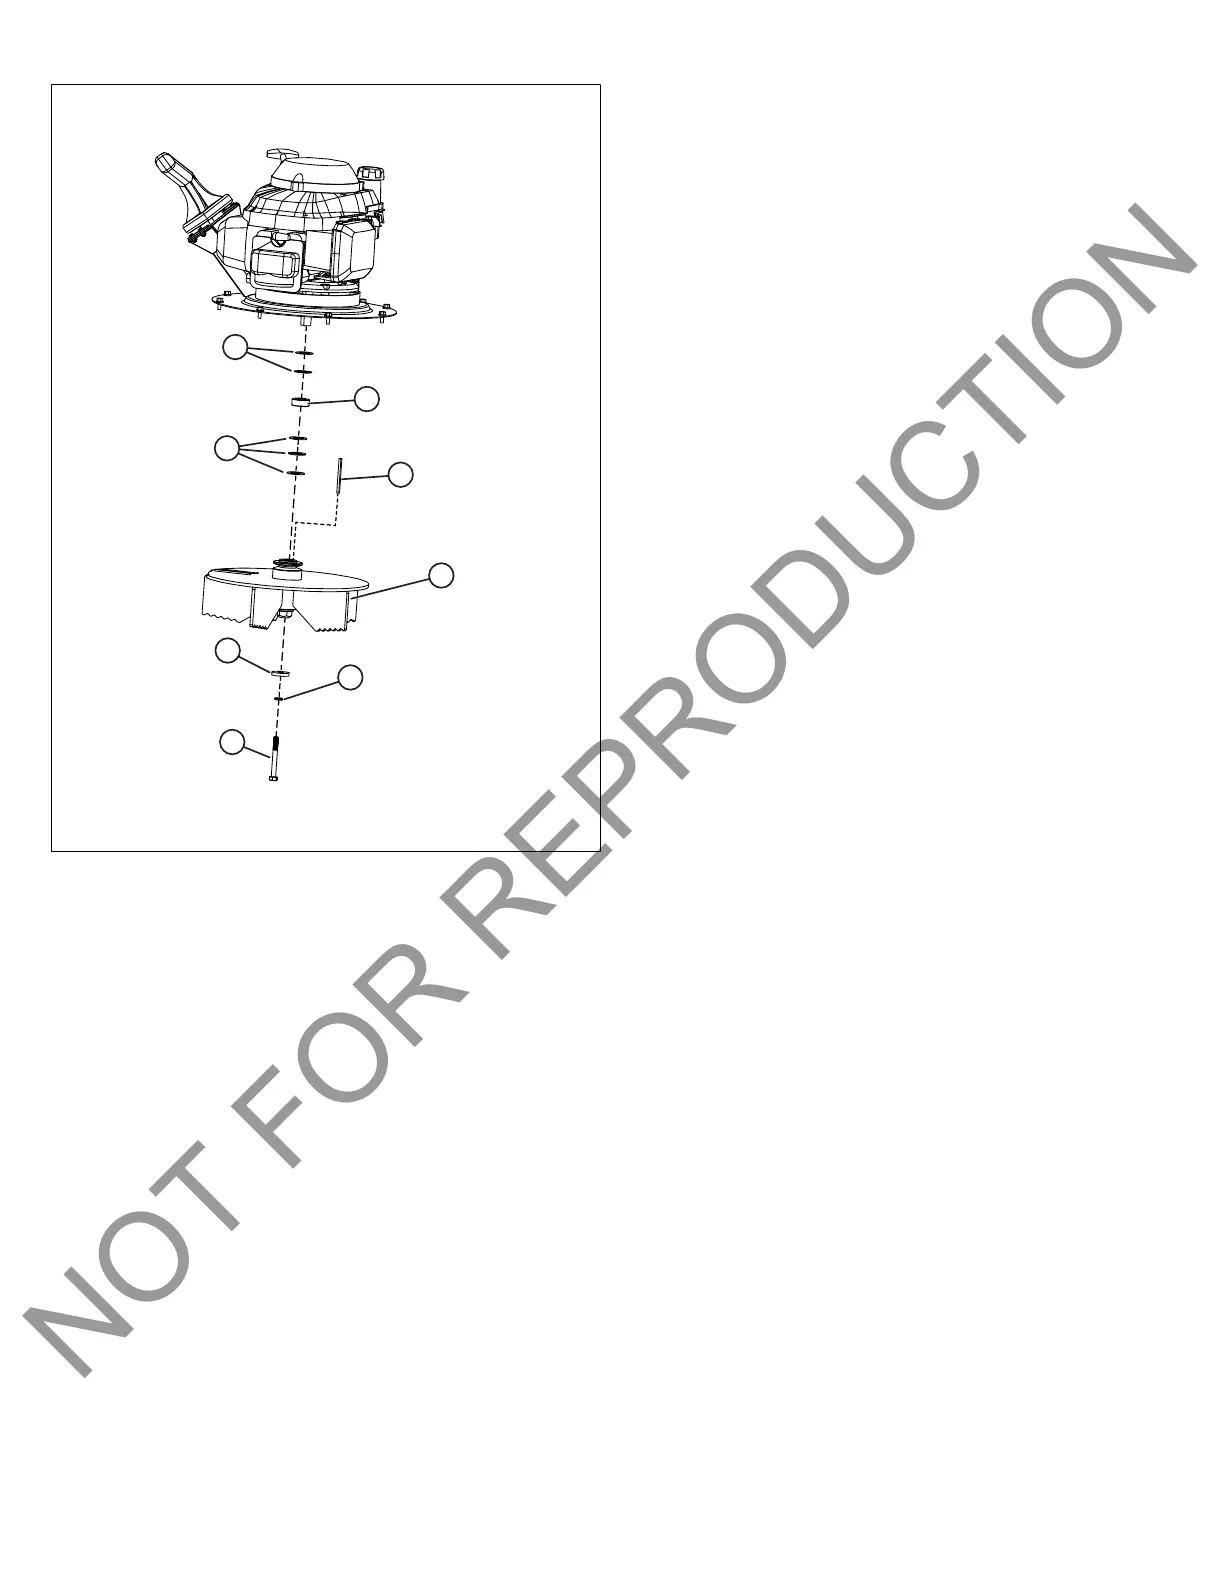
Figure 17 displays the TKV impeller and impeller
hardware. See the Illustrated Parts Book for impeller and
impeller hardware configurations for KV models.
11. Install the new impeller. Use a new impeller bolt and new
lock washer. Be sure the impeller key (E), washers (F
and H), and spacer (G) are properly installed. See the
Illustrated Parts Book for proper hardware orientation as
units may vary. Tighten the impeller bolt to 33-40 Ft. Lbs.
12. Reverse steps 3-9.
13. Reconnect the throttle cable to the engine. Add oil and
refuel the engine before attempting to start.
Replacing the Drive Chain
Self-Propelled Units Only
1. Shut down the unit, wait for the impeller to stop, allow the
engine to cool, and disconnect the spark plug wire.
2. Uninstall the debris bag and quick disconnect scoop.
Reverse the steps 2-5 found in the Install the Debris Bag
and Final Setup section to uninstall the bag and quick
disconnect scoop.
3. Uninstall the upper handle assembly. Reverse the steps
found in the section Assemble the Handles.
4. Prop up the rear of the unit so that the rear wheels are
off of the ground. Use appropriate tools such as blocks or
jacks.
5. Remove the transmission cover. See Step 5 of the
Replacing the Impeller section for instructions to remove
the transmission cover.
6. Uninstall the drive chain (C,Figure 13). Loosen and
remove the nut (B) that secures the back wheel (A).
Remove the wheel and chain (C). Replace the chain and
reassemble the wheel drive. Repeat procedure on the
opposite side, if necessary.
7. Manually rotate the wheels to be sure they turn freely.
If not, loosen the bearings and shift them until the chain
runs straight up and down.
8. Reverse steps 2-5 to reassemble the unit. Reconnect the
spark plug wire. Check engine oil and fuel levels before
starting.
Replacing the Drive Belt
Self-Propelled Units Only
1. Shut down the unit, wait for the impeller to stop, allow the
engine to cool, and disconnect the spark plug wire.
2. Drain the oil and fuel from the engine.
3. Uninstall the debris bag and quick disconnect scoop.
Reverse the steps 2-5 found in the Install the Debris Bag
and Final Setup section to uninstall the bag and quick
disconnect scoop.
4. Uninstall the upper handle assembly. Reverse the steps
found in the section Assemble the Handles.
5. Uninstall the impeller. See the Replacing the Impeller
section, follow steps 5-9 to remove the impeller.
6. With the impeller uninstalled, place the new drive belt
onto the impeller shaft.
7. Reinstall the impeller with new bolt and lock washer.
See the Replacing the Impeller section for torque
specifications.
8. Verify that the new belt is properly seated in the groove
on the impeller. Feed it through the hole in the top plate.
9. Reinstall the engine onto housing in reverse order of
removal. Be sure the belt is inside the two fingers on
the belt plate. Verify that the belt is on the transmission
pulley, then secure the transmission.
10. Reverse steps 3-4.
11. Refuel and add oil to engine before attempting to start.
Clearing a Clogged Chipper
TKV Units Only
1. Shut down the unit, wait for the impeller to stop, allow the
engine to cool, and disconnect the spark plug wire.
2. Remove the action spring buckle strap that secures
thequick disconnect scoop to the debris bag. Uninstall
the debris bag, then disconnect the quick disconnect
scoop from the housing.
 Loading...