18
CAUTION
1) Confi rm the powder cap is attached fi rmly. An unstable attachment will cause the powder cap to undo during use and may
cause injuries or powder scattering.
2) Make sure the powder stirring cap is attached. Improper attachment will lower the cleaning effi ciency.
3) Remove powder remaining in/on the screw threads of the main body, powder cap, and sealing surface of the powder seal.
If the powder adheres fi rmly and is hard to remove, clean the remaining powder according to the instructions in “8.1 3)
Cleaning and disinfection”. As the remaining powder may cause premature wear of the threads and insuffi cient sealing
which may cause powder scattering.
4) Before each use, check if the screw threads of the main body and powder cap have any damage such as wear, crack,
deformation, etc. If the main body or powder cap has a damage, do not use and ask your dealer for repair together.
5) If the triangle symbol on the powder cap lies outside of the mounting position mark while the polisher is in use, this may
cause trouble like crack, damage or premature wear of the threads of the main body and powder cap.
ATTENTION
1) Remove water, oil, or powder remaining in/on the head, coupling of chamber unit, powder chamber, and powder cap.
Otherwise, the powder will get damp and cause clogging.
2) Do not overfi ll with powder.
3) Do not shake polisher after fi lling the powder. The powder may leak from the nozzle.
4) Always use dry compressed air and dry powder. Use of air and powder containing moisture or oil will cause powder
clogging.
19
7.8 Confi rming correct operation and water volume
1) Insert your coupling on your turbine hose into the joint of
polisher until you hear a locking sound. Confi rm the
handpiece is fi rmly seated.
2) Direct the nozzle to your cuspidor.
3) Depress the foot control of your dental unit one or two
times for about one second and confi rm if:
- - air, water, and powder are sprayed,
- - water supply is suffi cient,
- - no leak of air, water, and powder from polisher.
4) If you have trouble, refer to “11. TROUBLE
SHOOTING”.
For water supply adjustment, use the water volume control
of your dental unit.
CAUTION
1) When connecting your coupling to this product, confi rm secure connection after hearing a locking sound. Make sure the
head and powder cap are fi rmly screwed in. A failure to attach correctly may cause injury due to instrument becoming
disconnected or powder being scattered.
2) Confi rm no damage, no cracks, no breakage or no major corrosion is present on the product and it is safe to use.
ATTENTION
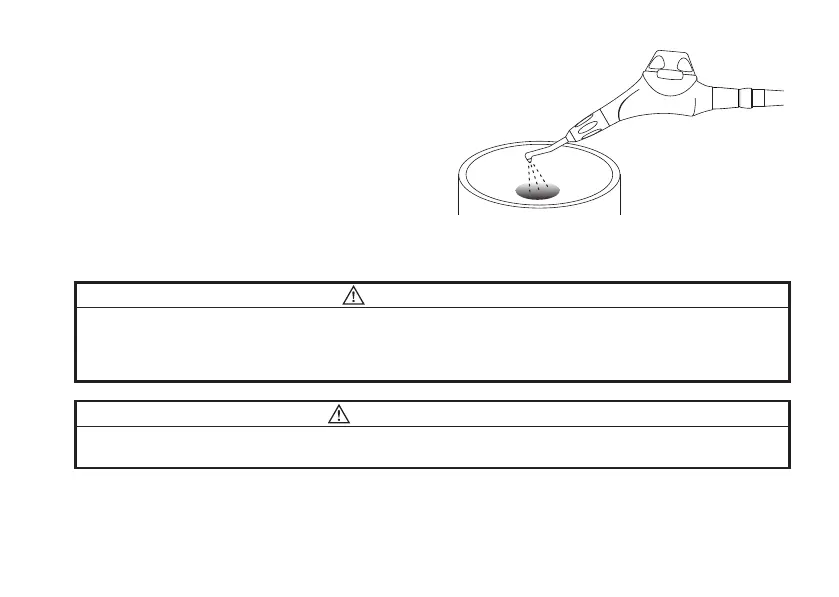
A lot of powder might be sprayed immediately after fi lling powder. Before using on a patient, spray into your cuspidor for one
second one or two times to confi rm operation.
Spray for about 1 sec.
1 or 2 times.
19
7.8 Confi rming correct operation and water volume
1) Insert your coupling on your turbine hose into the joint of
polisher until you hear a locking sound. Confi rm the
handpiece is fi rmly seated.
2) Direct the nozzle to your cuspidor.
3) Depress the foot control of your dental unit one or two
times for about one second and confi rm if:
- - air, water, and powder are sprayed,
- - water supply is suffi cient,
- - no leak of air, water, and powder from polisher.
4) If you have trouble, refer to “11. TROUBLE
SHOOTING”.
For water supply adjustment, use the water volume control
of your dental unit.
CAUTION
1) When connecting your coupling to this product, confi rm secure connection after hearing a locking sound. Make sure the
head and powder cap are fi rmly screwed in. A failure to attach correctly may cause injury due to instrument becoming
disconnected or powder being scattered.
2) Confi rm no damage, no cracks, no breakage or no major corrosion is present on the product and it is safe to use.
ATTENTION
A lot of powder might be sprayed immediately after fi lling powder. Before using on a patient, spray into your cuspidor for one
second one or two times to confi rm operation.
Spray for about 1 sec.
1 or 2 times.