How to use BFM-900L 29
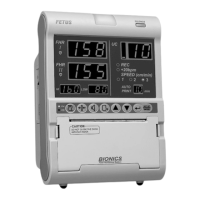
BFM-900L
FETAL MONITOR
(
Ver 1.1
)
28 How to use BFM-900L
■FHR Measurement
(1) Touch the patient’s belly and search for the fetus°Øs back and place the DOP Probe. If the
fetus is positioned facing left or right, place the probe as shown on the picture.
If the probe is placed on the front of the fetus instead of the back, the focus tends to often
disrupt, and you may not get an accurate reading.
If the fetus is facing up or down, take extra caution to place the probe. Place the probe around
the patient’s navel.
(2) Move the probe slightly around and locate the area where the fetus’s heartbeat sounds the
loudest, and then use the belt to fasten the probe.
Do not adjust the volume until you have located an exact position with the probe.
Place the probe at the exact location, that is, an area where the heartbeat is heard loud and
strong, and the FHR heartbeat rhythm symbol blinks in sync with the fetus’s heartbeat, and then
adjust the volume.
(3) When using the belt to fasten the probe, make sure it does not slip.
As shown above, the probe cable going up in the direction of the patient’s head can prevent
damage to the cable and the probe does not move as much.
(4) It is important to apply ample amount of Supersonic gel on the probe surface to get rid of air
bubbles in between the abdomen and the probe.
(5) BFM-900L uses a Button-Top styled DOP Probe. Insert the protruding buttons on the opposite
side of the DOP Probe surface to the Button-Hole on the belt under the patient.
(6) It takes 4 to 5 seconds for the heartbeat to show. Once a stable heartbeat is displayed the
printing begins.
■UC Measurement
UC measurement uses an external attachable pressure sensor. Once the UC Probe is placed on the
patient’s abdomen, the pressure fluctuation of the patient°Øs uterus enables the contraction level.
(1) Place the belt underneath the back of the patient.
(2) Place the UC Probe on the highest point of the patient’s belly (Fundus: Usually about 10 cm
above the navel) or, the point on the patient’s belly where it has become the first place to
harden up.
(3) Insert the protruding buttons on the opposite side of the UC Probe surface to the Button-Holes
on the belt under the patient. The recommended tightness on the fastening of the belt is from
20 to 90.
(4) If the UC Probe is attached but not in use, a meaningless number displays on the screen. When
using the UC Probe, press the “Reference” key to reset the default value of 10 on the front
panel before use. BFM-900L shows the LED bar of uterine contraction level.
(5) Once a stable UC value is found, the printing begins.
5.6 How to use Event Mark
The purpose of the marking is to record the moment when the patient senses the start of the fetal
movement. When you press the Mark switch during printing an arrow shows on the printing
paper. Mark Jack is connected to the left connection terminal of the device.