MAINTENANCE
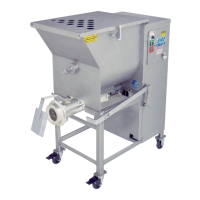
A. MIXING PADDLE INSTALLATION
1. Check that mixer paddle drive pin (Item No. 53516) in the mixer paddle drive shaft (Item No. 53955) is
positioned vertically.
2. Holding the mixing paddle by the center shaft and with the front blade up carefully t drive receiving
collar onto the end of the drive shaft. Insert paddle lock arm assembly (Item No. 53852) into the front of
the mixing tub and onto the front of the mixing paddle.
3. When fully seated, turn the lock arm counterclockwise so the protruding arm is behind the lock set screw
bracket. Tighten the mixer paddle lock set screw (Item No. 53568).
B. LUBRICATION
1. MOTOR: This machine has pre-lubricated motor bearings. These bearings should be relubricated
annually with a good grade of bearing grease, such as POLYREX EM (EXXON-MOBIL).
Do not over-grease.
2. MAIN BEARINGS: The main bearings are housed in an enclosed and sealed journal box. Relubricate
semi-annually with a good grade of bearing grease. Do not over-grease.
8
• ALWAYS Turn Off, Unplug Machine From Power Source and Perform Lockout/Tagout
Procedure to this Machine BEFORE Servicing.
• NEVER Touch This Machine without Training and Authorization by Your Supervisor.
• NEVER Place Hands into Machine Input or Output Openings.
• NEVER Bypass, Alter, or Modify This Equipment in Any Way From Its Original Condition.
• PROMPTLY REPLACE Any Worn or Illegible Warning Labels.
• USE ONLY GENUINE BIRO Parts and Accessories Properly Installed.
ROTATING GRINDING AUGER & ROTATING MIXING PADDLES
TO AVOID SERIOUS PERSONAL INJURY
3. TRANSMISSIONS: This machine is equipped with two Euclid gear reducer transmissions- one for the
mixer drive (No. 300V) and one for the auger drive (No. CH300V). The mixer drive (300V) and the
auger drive (CH300V) hold 1¼ pints of oil each. This amount brings the lubricant level up to the side
“ll level” hole. Oil should be changed after six (6) weeks of operation initially and subsequently every
six (6) months thereafter using Mobilgear 630 oil or equivalent.
C. MIXER DRIVE SHAFT SEAL REPLACEMENT
1. See page 27 for instructions and drawing.
 Loading...