40 KT-200-2
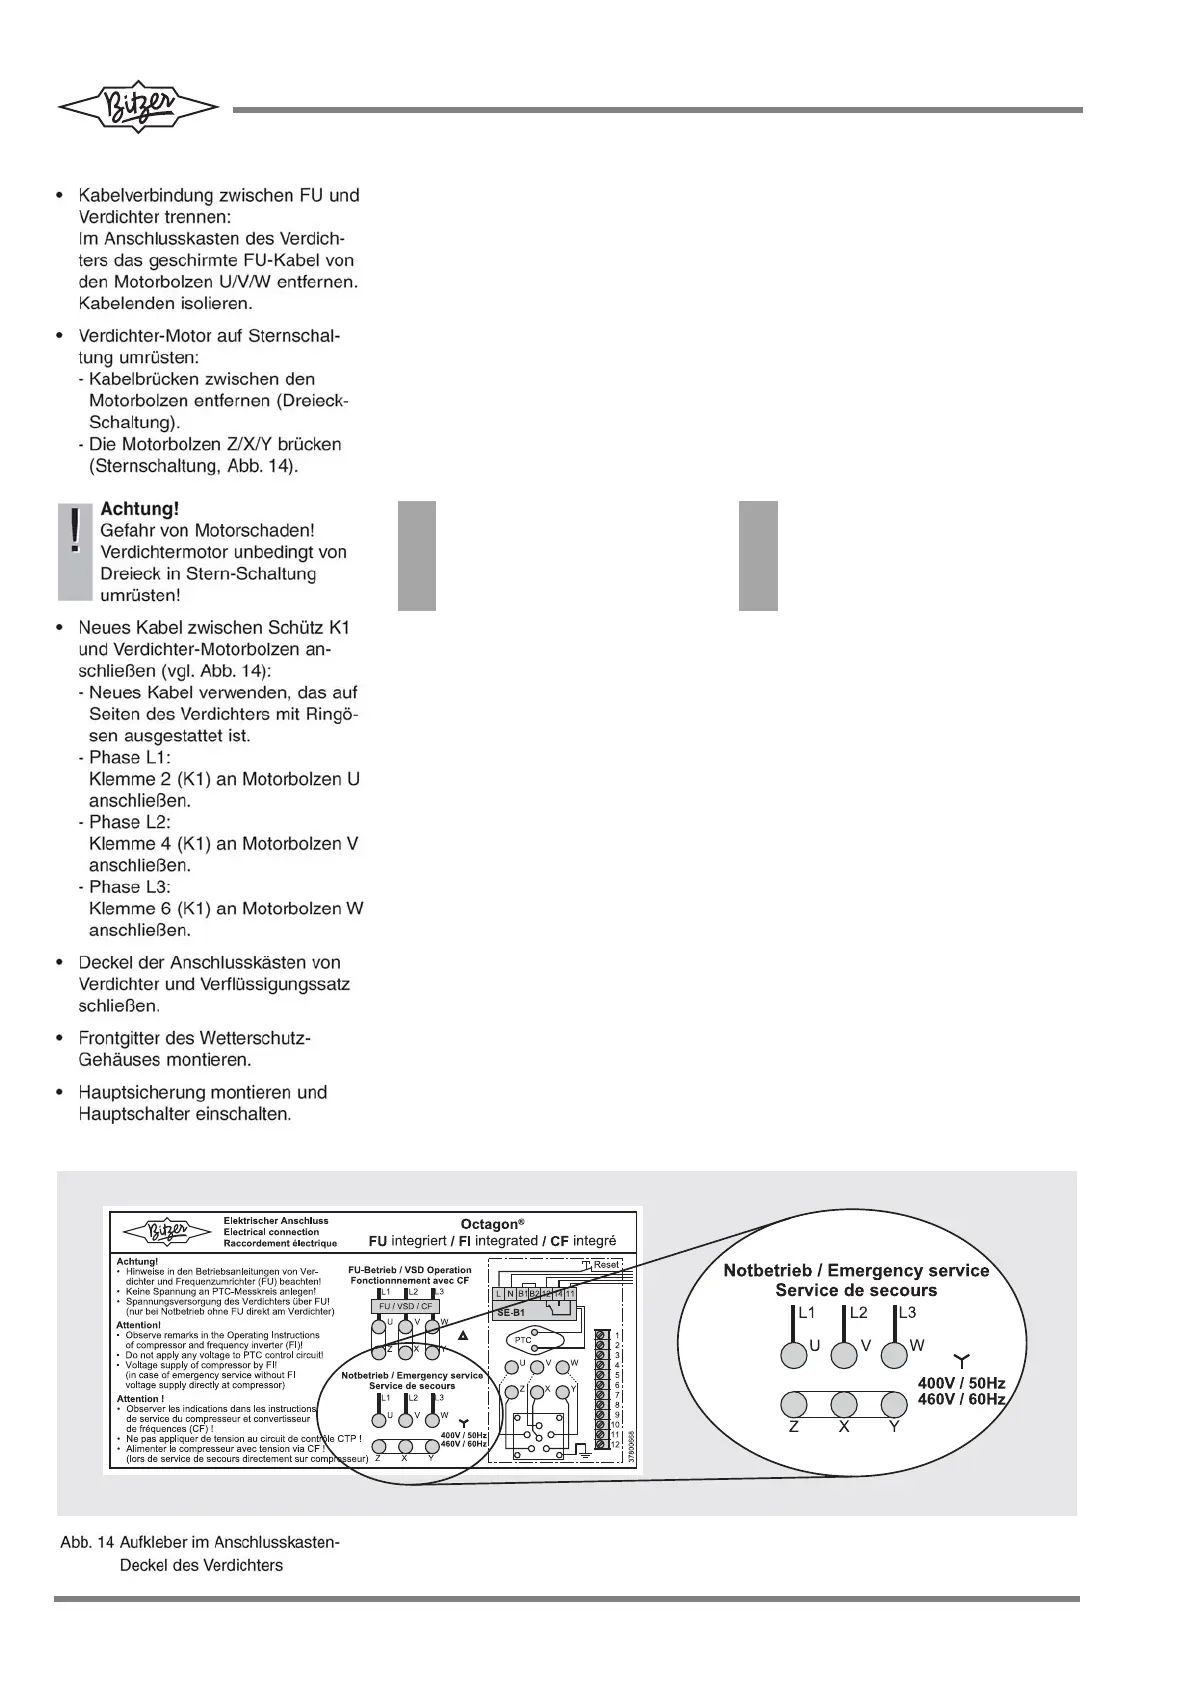
y Disconnect the cable connection
between FI and compressor:
Remove the screened FI cable from
the motor pins U/V/W in the terminal
box of the compressor. Insulate the
cable ends.
y Change the compressor motor to
star wiring:
- Remove the jumper between the
motor pins (delta wiring):
- Bridge the motor pins Z/X/Y (star
wiring, fig. 14).
y FI とコンプレッサー間のケーブルの
接続を外します。コンプレッサーの
端子ボックスのモーターピン U/V/W
から FI シールドケーブルを外し
ます。ケーブル端部を絶縁します。
y コンプレッサーモーターをスター配
線に変更します。
- モーターピン間のジャンパーを外し
ます(デルタ配線):
- モーターピンZ/X/Y をブリッジし
ます(スター配線、図14)。
!
!
Attention!
Danger of motor damage!
It is absolutely necessary to
change the compressor motor
from delta to star wiring!
!
!
注意!
モーターが損傷するおそれがあります!
必ずコンプレッサーモーターをデルタ配
線からスター配線に変更してください。
y Connect a new cable between
contactor K1 and motor pins of the
compressor (see fig. 14):
- Use a new cable that has an eye
on compressor side.
- Phase L1:
Connect terminal 2 (K1) to motor
pin U.
- Phase L2:
Connect terminal 4 (K1) to motor
pin V.
- Phase L3:
Connect terminal 6 (K1) to motor
pin W.
y Close the cover of the terminal
boxes of compressor and
condensing unit.
y Mount the front grating of the
weather protective housing.
y Mount main fuse and switch on main
switch.
y コンプレッサーのコンタクターK1 と
モーターピン間に新しいケーブルを
接続します(図 14 を参照):
- コンプレッサー側にリングアイの
付いている新しいケーブルを使用し
てください。
- 位相L1:
端子2(K1)をモーターピンUに接続
します。
- 位相L2:
端子4(K1)をモーターピンVに接続
します。
- 位相L3:
端子6(K1)をモーターピンWに接続
します。
y コンプレッサーとコンデンシングユ
ニットの端子ボックスのカバーを閉
じます。
y 耐候性ハウジングのフロントグリル
を取り付けます。
y メインヒューズを取り付けて、メ
インスイッチをオンにします。
Fig. 13 View into the terminal box of the
condensing unit
図 13 コンデンシングユニットの端子ボックス
 Loading...