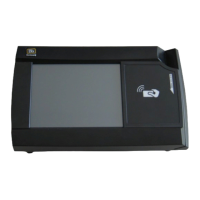
T ABLE TOP MOUNT INSTALLATION
PRINTED N OVEMBER 3, 2009
1-10
TABLE TOP MOUNT INSTALLATION
MF4100 table top mounting installation options:
• Table Top Mount With The VESA Mounting Bracket (Page: 10)
•
Table Top Mount Without The VESA Mounting Bracket (Page: 12)
Table Top Mount With The VESA Mounting Bracket
1 Fin
d a location on a table or elsewhere to mount the MF4100.
Ensure there is enough clearance for the operato
r to access the touchscreen and swipe cards.
2 Install the rubber feet provided in the hardware kit to each corner of the base extensions.
The rubber feet are self-adhesive. Use the holes in the base extension to center each foot.
Figure 1-16 VESA Bracket Rubber Feet
3 Route the required cables through the VESA bracket cable hole, and then the pivot bracket hole.
4 Install cables to the connectors of the MF4100.
See: MF4100 Cable Ports (Page: 7).
5 Place
the security plate onto the MF4100, and then route the cables through the plate opening.