26
8. Place an ample amount of gel midline on the patient’s abdomen approximately 1 inch (3 cm) above the
symphysis pubis.
Note: Do not spread the gel over the patient's abdomen, and use a sufciently thick quantity to ensure
proper transmission of ultrasound waves.
9. Place the scanhead on the gel on the patient’s abdomen, ensuring that on the scanhead, the head of the
patient icon ( or ) points toward the head of the patient.
10. Aim the scanhead toward the expected location of the bladder, as illustrated in the following gures. For
most patients, this means aiming the tip of the scanhead toward the patient’s coccyx.
Figure 6. View from Patient's Right Side
Scanhead
(Patient's feet)(Patient's head)
Bladder
Field of vision
Symphysis pubis
Figure 7. View from Patient's Feet
Scanhead
Scan button
Bladder
Field of vision
(Patient's right side) (Patient's left side)
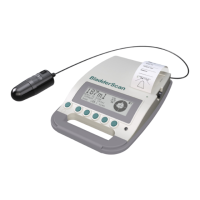
11. On the scanhead, press and release the scan button. The scan initiates.
12. Hold the scanhead steady throughout the scan. The scanhead clicks once at each of the twelve scan
planes. When the scanhead beeps, the scan is complete, and the Aiming screen is displayed.
DONE SCAN X
READY TO SCAN
CURRENT = 132ml
13. If the instrument detects radio frequency interference that could compromise measurement accuracy, the
screen displays RESCAN. Attempt to locate or disable the source of the outside interference. For more
information, see Electromagnetic Compatibility on page 54.
14. Continue to the following procedure, Verify Aim & Accuracy.