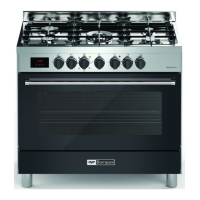
27
FOR COOKERS EQUIPPED WITH ELECTRIC HOTPLATES
The different heat settings are obtained as follows:
- 1 = minimum setting for all hotplates;
- 6 = maximum setting for normal and rapid hotplates (with red disc);
- 0 = off.
Pans must never be smaller in diameter than the hotplates and
their bottoms must be as flat as possible (see fig. 12).
IMPORTANT:
- Never leave hotplates on without pans, except when first used;
leave for about 10 minutes to dry oil or moisture residues;
- if the hotplate is to be out of use for a long time, apply a little
grease to its painted surface;
- do not allow spills to burn onto the hotplate, requiring the use of
abrasive cleaners.
HOW TO USE THE GAS OVEN
- After igniting the burner, leave the oven to heat up for about 10
minutes;
- place the food for cooking in an ordinary oven dish and place it
on the chrome-plated shelf;
- place in the oven on the highest possible runners, and turn the
knob pointer to the setting required;
- cooking can be observed through the window in the door with
the oven light on. This will avoid opening and closing the door
frequently, unless oil or fat has to be added to the dish.
N.B.: For cookers without thermostat:
a) oven burner 5 kW:
- with the knob on the maximum setting
= 280 degrees C
- with the knob on the minimum setting
= 160 degrees C
b) oven burner 3,3 kW:
- with the knob on the maximum setting
= 275 degrees C
- with the knob on the minimum setting
= 160 degrees C
Never leave the knob in positions between the maximum symbol
and the off setting ( ).
HOW TO USE THE GAS GRILL WITH GAS OVEN
- fit the knob guard (see fig. 13);
- light the burner and wait a few minutes to give the burner time to
warm up;
- place the foods on the chrome-plated shelf;
- insert on the highest runner;
- insert the drip tray on the bottom runner;
- gently close the oven door, resting it against the knob guard;
- after a few minutes, turn the food to expose the other side to the
infrared radiation (the cooking time depends on the type of food
and personal taste). To see table "Food to be grilled" .
Food to be grilled Time (minutes)
1st side 2nside
Thin pieces of meat
Fairly thick pieces of meat
Thin fish or fish without scale
Fairly thick fish
Sausages
Toasted sandwiches
Small poultry
6
8
10
15
12
5
20
4
5
8
12
10
2
15
N.B.:
The first time the grill is used smoke will come out of the oven.
Before inserting foods for cooking, wait until any oil residues on the
burner have completely burnt away.The grill must only be used at
its full rated heat. Accessible parts may be hot when the grill is in
use! Keep children well away.
IMPORTANT: on some models of cooker without knob guard, the
door has to be closed during grilling.
HOW TO USE THE ELECTRIC GRILL WITH GAS OVEN
- ignite the grill heating element;
- place the foods on the chrome-plated shelf;
- insert on the highest runner;
- insert the drip tray on the bottom runner;
- gently close the oven door,;
- after a few minutes, turn the food to expose the other side to the
infrared radiation (the cooking time depends on the type of food
and personal taste).
To see table " Food to be grilled"
The grill element in the top of the oven is switched on by turning the
thermostat knob clockwise to the grill symbol on the control panel.
The red light will come on to show the element is in operation.
MULTI-FUNCTION ELECTRIC OVEN
With
different heating elements controlled using a selector switch
and regulated by a thermostat, this oven offers various cooking
methods. There are three principle sources of heat:
a) Forced heat diffusion (fan oven)
b) Spontaneous heat diffusion (static oven)
c) Infra-red rays (grill)
Starting from the 0 (off) position and turning the selector knob
clockwise, the following settings are obtained:
- symbol
: oven light and red light on, fan running.
- symbol
: conventional oven cooking without fan, the oven
temperature is regulated by means of the thermostat knob.
- symbol
: fan oven cooking on one or two levels, the oven
temperature is regulated by means of the thermostat knob.
- symbol
: fan oven cooking on one or two levels, the oven
temperature is regulated by means of the thermostat knob.
- symbol
: grill (in top of oven) on, the thermostat knob must
be on the maximum temperature setting.
GB
For the user
- symbol : grill (in top of oven) on, the thermostat knob must be
on the maximum temperature setting. The roaster is in operation.
- symbol : fan oven cooking and grill (in top of oven) on, the
oven temperature is regulated by means of the thermostat knob.
The roaster is in operation.
In all positions except zero (0) the red warning light and the oven
light are on.The yellow warning light comes on according to ther-
mostat variations. Before putting food in to be cooked, the oven
should be pre-heated for at least 10 minutes.
MULTIFUNCTION ELECTRIC OVEN WITH 6 COOKING PRO-
GRAMS
With different heating elements controlled using a selector switch
and regulated by a thermostat, starting from the 0 (off) position,
the knob can be turned clockwise to the following settings:
- symbol
- symbol
:oven light and red warning light on
:oven light and red warning light on, operation of fan.
- symbol
:conventional “static” oven cooking, the oven tem-
perature is controlled using the thermostat knob.
- symbol
: cooking with fan oven,on one or two levels, the oven
temperature is controlled using the thermostat knob.
- symbol
:grill on (on oven top element), the thermostat knob
must be set at maximum temperature.