Do you have a question about the Bosch Compress 7400i AW and is the answer not in the manual?
Installation instructions for plumbers, installers, and electricians.
Details on connecting various components.
Safety precautions for electrical work on the unit.
Hazards and actions related to refrigerant leaks.
Detailed technical specifications for the heat pump.
Defines the operational limits without auxiliary heating.
Diagram and components of the refrigerant circuit.
Electrical wiring schematics for the unit.
This document serves as an installer guide for the Bosch Compress 7400i AW air-to-water heat pump, available in 5 OR and 7 OR models. It provides comprehensive instructions for installation, commissioning, and maintenance, ensuring safe and efficient operation.
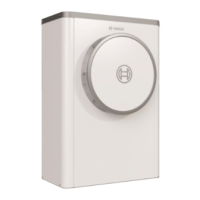
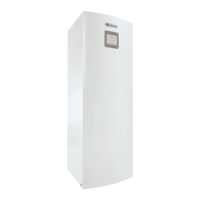
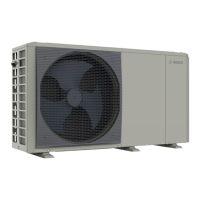
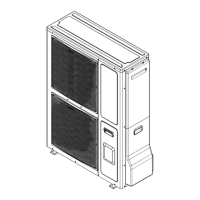
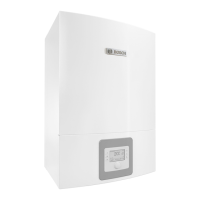
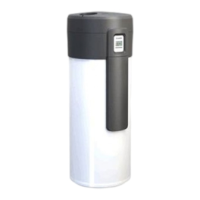
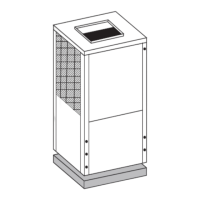
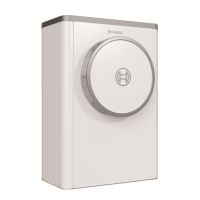
The heat pump is designed for use in closed heating systems within households. It is intended to be connected to various indoor units, including AWM, AWMS, AWMB, AWE, and AWB models, each offering different functionalities such as integrated electric booster heaters, solar heat exchangers, or buffer cylinders. The outdoor unit itself is a compact, freestanding appliance, featuring a compressor, inverter, electronic expansion valves, and a fan, all encased within a durable housing.
The installation process begins with selecting a suitable outdoor location. The heat pump should be placed on a flat, stable surface, ensuring adequate clearances for maintenance and optimal performance. Specific clearance requirements are provided to prevent noise nuisance to neighbors and to ensure proper airflow around the unit. For instance, a minimum clearance of 1200 mm is required above the unit, and 2000 mm on the sides, with a reduced clearance of 800 mm or 500 mm possible on one side depending on the model. The unit should not be installed in corners flanked by three walls, as this can increase noise levels and evaporator soiling. If a protective roof is installed, a minimum clearance of 500 mm (or 400 mm if the roof is removable) is necessary above the heat pump.
The heat pump must be securely fixed to the ground to prevent tilting. It is crucial to ensure that the unit's inclination in both horizontal and vertical directions does not exceed 1% to avoid installation problems with side panels, covers, and condensate drainage. Adjustable feet are provided for leveling.
A critical aspect of installation is the condensate drainage. The heat pump generates condensate, which must be routed away via a frost-free drain, potentially equipped with pipe trace heating. The drain pipe, typically a 32 mm plastic pipe, must slope sufficiently to prevent water accumulation and can be directed to a gravel bed, stone box, or rainwater gully. Pipe trace heating is recommended in areas prone to ice formation to prevent damage to the evaporator.
Connecting the heat pump to the indoor unit involves careful pipework. The installer guide emphasizes the use of suitable insulation (at least 19 mm thick) for outdoor pipework and connections to prevent freezing and UV degradation. Drain valves should be installed to allow water drainage from the lines if the heat pump is not in use or if there is a risk of frost. UV and moisture-resistant insulation are mandatory.
All heat-conducting pipework must be thermally insulated according to applicable regulations. In cooling mode, all connections and lines must be insulated to prevent condensation. The document recommends using PEX pipes for all pipework between the heat pump and indoor unit to minimize pressure drops and damp vibrations. If other materials are used, a particle filter suitable for outdoor use must be installed in the return line to the heat pump, insulated, and connected using a vibration-damping hose. When tightening pipe connections, a torque of no more than 150 Nm should be applied to avoid damaging the heat exchanger.
Electrical connection requires adherence to safety guidelines. High-voltage lines should be routed separately from communication lines (sensor, EMS-BUS, and shielded CAN-BUS cables) with a minimum distance of 100 mm to prevent malfunctions. A separate safety switch must be installed to disconnect all power to the heat pump. The appropriate conductor cross-sections and cable types must be selected, and a type B residual current device is recommended. The heat pump and indoor unit communicate via a CAN-BUS line, which requires careful connection to avoid system damage. The CAN-BUS signal cable, with minimum dimensions of 4 x 0.75 mm² and a maximum length of 30 m, must be routed between the units.
To ensure optimal function, prevent excessive start/stop cycles, incomplete defrosting, and unnecessary alarms, the heating system must have a sufficient water volume to store energy. For underfloor heating systems without a buffer cylinder, a room temperature-dependent control unit should be installed in the largest room. A minimum floor area of 6 m² (recommended 30 m²) is required for models 5 OR – 7 OR. For systems with radiators without a mixer and buffer cylinder, radiator thermostats must be fully opened, and a minimum of one 500 W radiator (recommended four 500 W radiators) is needed. Heating systems with underfloor heating and radiators in separate circuits also require a room temperature-dependent control unit in the largest room. For heating circuits with a mixer, a buffer cylinder with a minimum volume of 50 liters is essential. Fan convectors require a buffer storage tank of at least 10 liters.
Water quality in the heating system is critical for the heat pump's longevity and performance. Heat pumps operate at lower temperatures, making the thermal de-airing less effective and increasing susceptibility to corrosion from aggressive water. Preventive actions, such as supplementing the system with a magnetite filter and a de-airing valve, are necessary if recurrent filling is needed or if water samples are unclear. Limits for water quality, including hardness, oxygen content, carbon dioxide, chloride ions, sulphate, conductivity, and pH, are provided. If these limits cannot be met, a system separation with a heat exchanger may be required. Additional water treatment may be necessary to prevent lime-scale deposits and sludge formation. The use of anti-freeze/glycol products is prohibited.
Maintenance and service must be performed by authorized personnel using original spare parts. Electrical work requires authorized electrical installers, who must disconnect mains voltage on all poles and ensure it cannot reconnect before commencing work. The heat pump contains current-carrying components and a capacitor that must be discharged before electrical work. A waiting period of at least five minutes after disconnecting the power supply is mandatory.
The refrigerant circuit contains substances that can transform into poisonous gas if exposed to air or open fire. In case of a refrigerant leak, the area must be ventilated thoroughly, and the installer must leave immediately. The electronic expansion valves are highly sensitive to impacts and shocks and must always be protected. During soldering work, insulation material (EPP) must be protected from high temperatures with heat-resistant materials or a moist cloth to prevent deformation.
The installer guide also outlines the process for installing side panels and covers, which is crucial for meeting the heat pump's IP rating and preventing hand injuries from the fan. The unit should not be commissioned without the front plate.
Upon handover, users must be instructed on operating the heating system, safety actions, and the importance of annual inspections, cleaning, and maintenance. Modifications and repairs should only be carried out by approved contractors. The installation and operating instructions must be left with the user for safekeeping.
| Refrigerant | R32 |
|---|---|
| Type | Air to Water |
| Operating temperature range | -20°C to 35°C |
| Sound power level | 55 dB |
| Energy efficiency class heating, 35 °C | A++ |
| Energy efficiency class heating, 55 °C | A+ |
| Energy Efficiency Class (Cooling) | A++ |
| Noise Level (Indoor Unit) | 35 dB |
| Noise Level (Outdoor Unit) | 55 dB |
| Power Supply | 230 V |