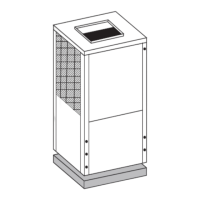
Preparing for installation
7
Compress 7400i AW – 6721833372 (2021/09)
3.7 Clearances during setup
Fig. 6 Clearances during setup
[*] The clearance can be reduced on one side. This may however lead
to a higher noise level.
[A] Installation clearances of heat pump.
4 Preparing for installation
4.1 Installation locations
▶ Place the heat pump outdoors on a flat stable surface.
▶ When setting up the heat pump, make sure it can be accessed at all
times in order to carry out maintenance work. If access is restricted,
e.g. due to installation on a roof, suitable measures must be taken to
ensure that maintenance work can still be carried out without
additional time expenditure or costly assembly aids.
▶ Bear in mind the sound propagation of the heat pump when placing
it, particularly in view of avoiding of noise nuisance to neighbours.
▶ Whenever possible, do not place the heat pump in front of rooms
sensitive to noise.
▶ Do not place the heat pump in a corner where it is flanked by walls on
3 sides. This can increase the noise level and soiling of the
evaporator.
Fig. 7 Avoid setting up in locations surrounded by walls
▶ With a freestanding installation (not near the building):
– Do not install the heat pump so the intake side faces directly south
to avoid the effects of the sun on the air temperature sensor.
– Use a wall wall or similar object to protect the intake side.
Fig. 8 Free standing heat pump
▶ Whenever possible, set up the heat pump so that the front is not
directly facing the wind.
▶ Position the outdoor unit of the heat pump so that no snow or water
from the roof drips or slides onto it. If this cannot be avoided, a
protective roof must be installed.
If a protective roof is installed above the heat pump, bear in mind that it
must be possible to lift the thermal insulation material of the heat pump
up and off.
▶ With the models 5 OR–7 OR, make sure there is a clearance of at least
500 mm between the roof and heat pump.
▶ If the roof can be removed, the minimum clearance above the heat
pump for all models is 400 mm.
4.2 For drainage
Remove condensate via a frost-free drain of the heat pump, possibly
equipped with pipe trace heating. The drain must slope sufficiently to
prevent water from accumulating in the pipe.
The condensate can be routed to either a gravel bed, a stone box or into
a rainwater gully.
H
努 1200
H
努 1200
努 2000
努 400
努 400
努 2000 努 2000
努 800) 努 500)
努 2000
努 2000 努 2000
A
 Loading...
