DSA E-Series (E2700) Installing the E2700 controller-drive tray | en 25
Bosch Sicherheitssysteme GmbH Installation manual 2015.10 | V2 | DOC
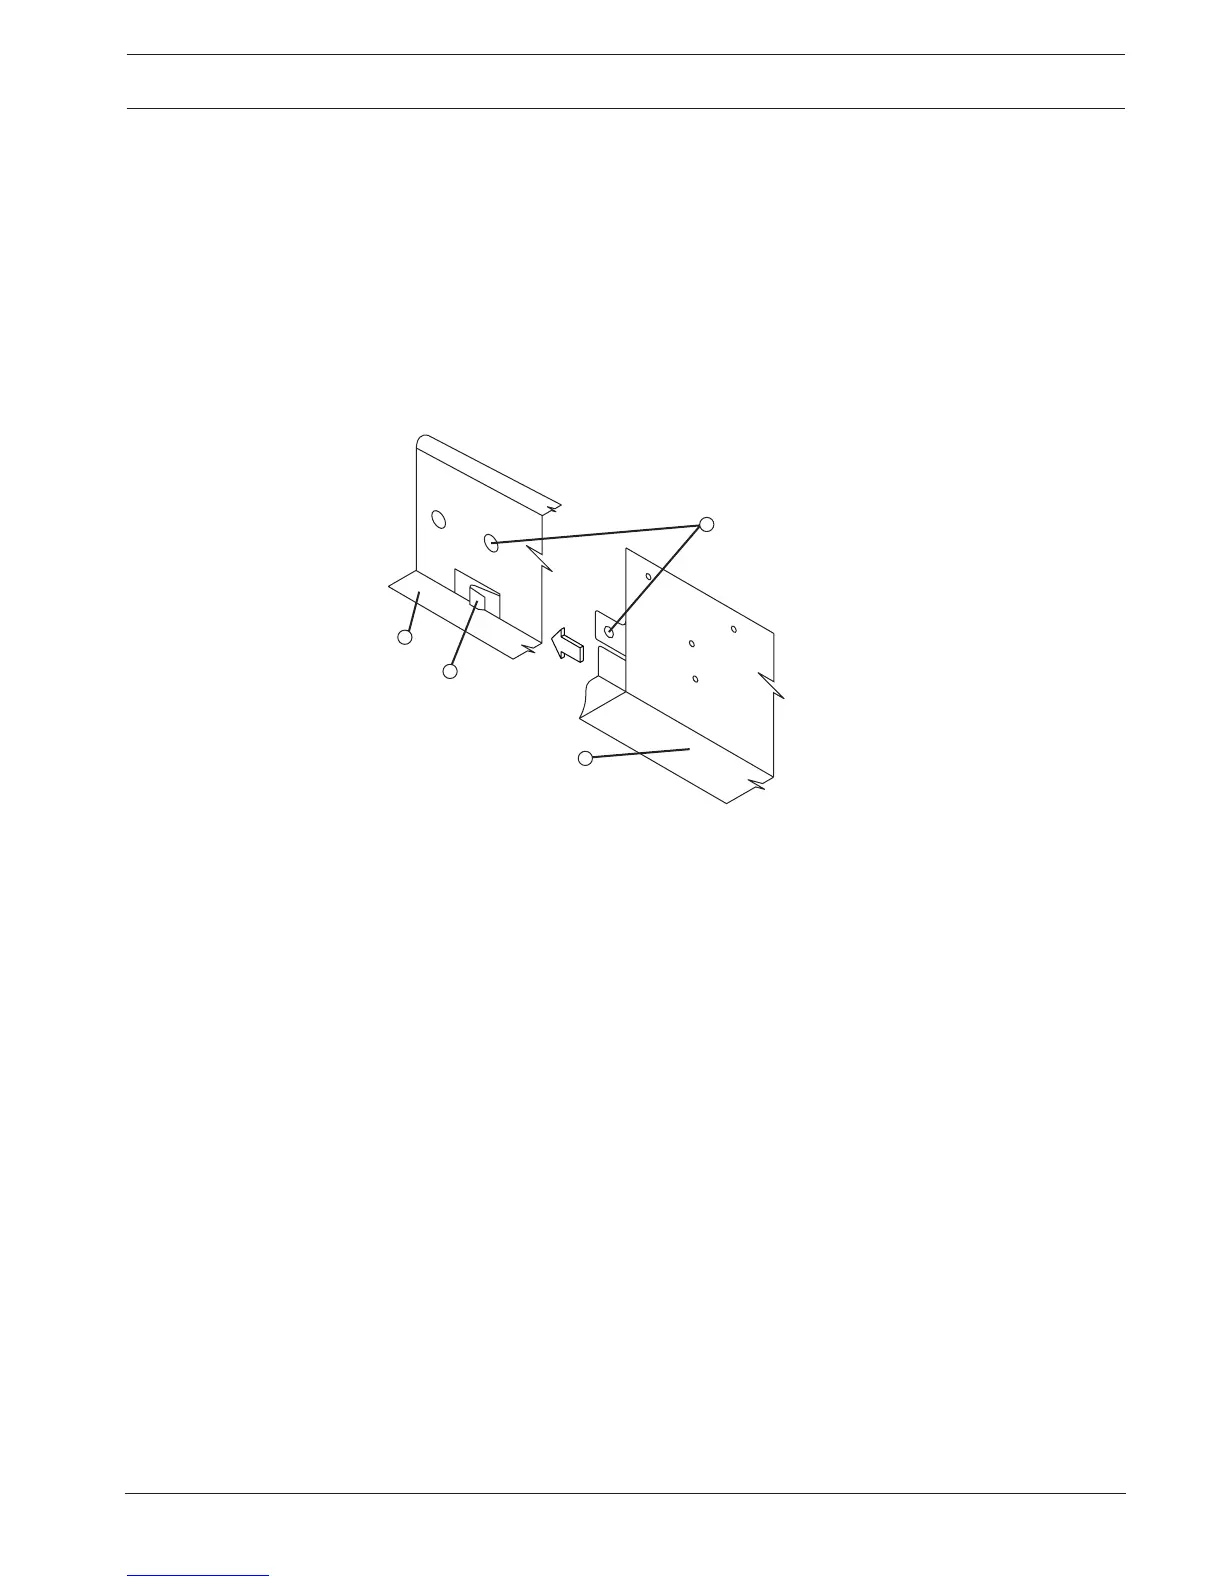
6. With the help of one other person, slide the rear of the controller-drive tray onto the
mounting rails. The rear edge of the controller-drive tray must fit into the clip on the
mounting rail. The controller-drive tray is correctly aligned when these conditions are
met:
– The mounting holes on the front flanges of the controller-drive tray align with the
mounting holes on the front of the mounting rails. Refer to item 4 in the following
figure.
– The rear edge of the controller-drive tray sheet metal fits into the clip on the
mounting rail.
– The holes in the controller-drive tray sheet metal for the rear hold-down screws align
with the captured nuts in the side of the mounting rails.
1 - Mounting rail
2 - Clip
3 - Partial view of the controller-drive tray rear sheet metal
4 - Mounting holes
7. Secure the front of the controller-drive tray to the cabinet. Use the two screws to attach
the flange on each side of the front of the controller-drive tray to the mounting rails.
– Insert one M5 screw through the bottom hole of a flange on the controller-drive tray
so that the screw goes through the cabinet rail and engages the bottom captured nut
in the mounting rail. Tighten the screw.
– Repeat substep a for the second flange.
Note: The rear of the controller-drive tray contains two controllers. The top of the
controller-drive tray is the side with the labels.
8. Secure the side of the controller-drive tray to the mounting rails by performing these
substeps:
– Insert one M4 screw through the side sheet metal of the controller-drive tray into the
captured nut on the side of the mounting rail. Tighten the screw.
– Repeat substep a for the other side.
9. Attach the plastic end caps onto the front of the controller-drive tray.
– Put the top of the end cap on the hinge tab that is part of the controller-drive tray
mounting flange.
– Gently press on the bottom of the end cap until it snaps into place over the retainer
on the bottom of the controller-drive tray mounting flange.
10. Install the drive trays.