579604 | REV. C | June 2020
Bosch Automotive Service Solutions Inc.
EV2000 Series Wallbox Charger Installation and Operation Manual|
5
|
en
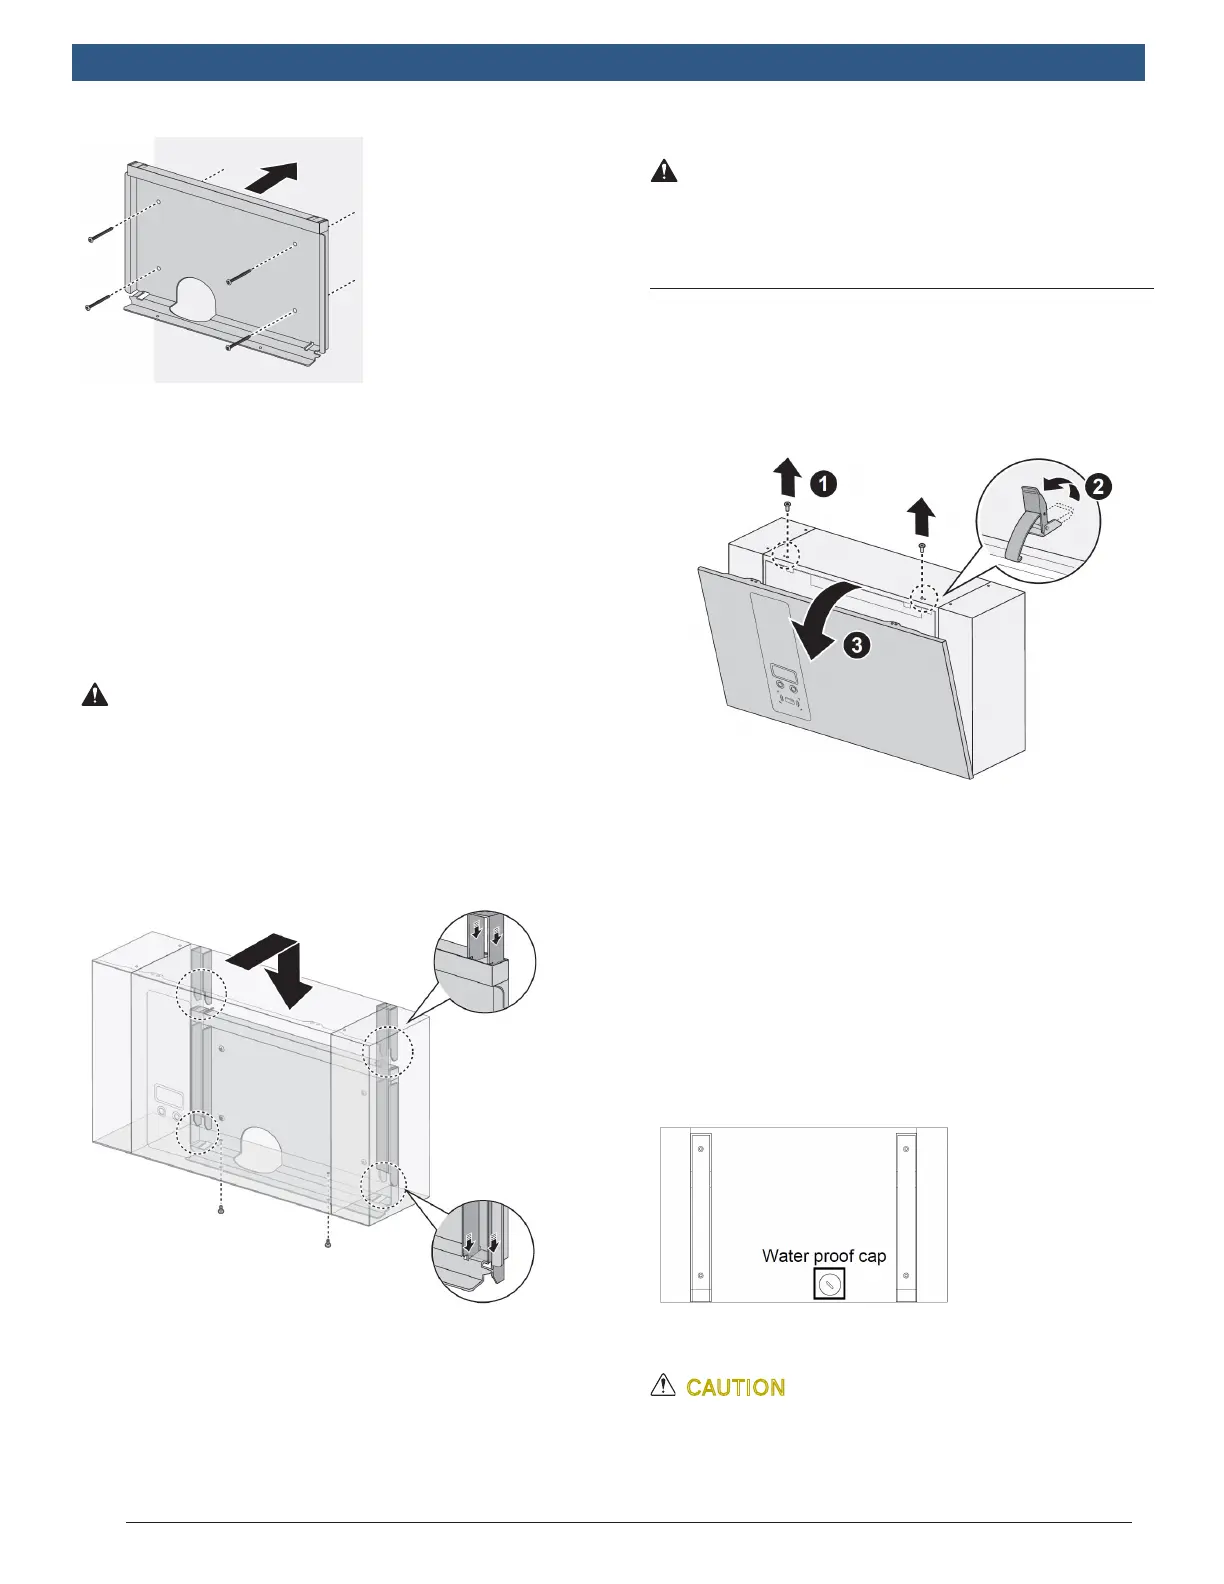
2. Mount bracket onto the wall.
NOTE:
` The unit must be mounted on a solid wall (concrete or
metal preferred).
` Use the expansion bolts in the accessory kit or choose
proper mounting screws for different types of wall. A
drilling machine might be needed for certain conditions
` Follow applicable accessibility requirements for the
mounting position. The unit shall be mounted at a suf-
cient height from grade such that the height of the stor-
age is located between 60 mm (24 inches) and 120 cm
(4 feet) from grade per NEC Article 625.
WARNING! To ensure adequate ventilation
and maintenance space, leave a minimum
of 45 cm (18 inches) on both sides of the
charger.
3. Place unit onto bracket. Align the back chassis of unit
with the corresponding slot on the bracket. Slowly slide
down the unit until it sits rmly on the bracket. Fasten
two screws from the bottom.
4.
NOTE:
` The bottom xing screws are in the accessory kit.
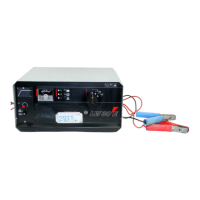
5.0 Making the Connection
WARNING! Only use a Torx® Tamper-
Resistant T15 screwdriver to secure or
remove the screws. Use of any other tool
may damage screws and panel.
5.1 Power Wiring
1. Do the following to open the front cover for wiring:
a. Release the two screws on top.
b. Release the latches to open front cover.
c. Pull down front cover gently.
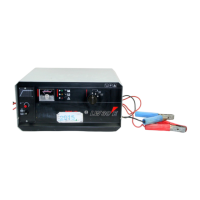
2. Routing the power wires is possible through the
bottom or rear of the enclosure. Select the location
to route the power wiring.
Bottom-fed Wiring
a. Feed the wires from the underside. Make sure
the wiring can sufciently reach the connectors
before securing.
b. Continue with the fastening of the wires, see the
following step.
Rear-fed Wiring
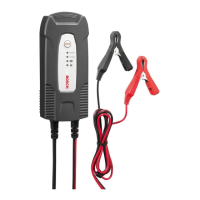
a. Remove the waterproof cap from the back of the
enclosure and insert the waterproof cap in cable
access location on the bottom of the enclosure.
b. Proceed with the following steps.
CAUTION BACK-FED WIRING MAY CAUSE
THE RISK OF WATER LEAKAGE. DO NOT
CHOOSE THIS WIRING CONNECTION IN
OUTDOOR LOCATIONS.