12 | English
Basic settings
Unit for angle °, %, mm/m,
inch/ft
All basic settings except for the continuous laser beam set-
ting are saved when switching off the tool.
Continuous laser beam
u Do not direct the laser beam at persons or animals and
do not stare into the laser beam yourself (even from a
distance).
In this setting, the laser beam remains switched on even
between measurements; measurement simply requires one
brief press of the measuring button (2).
Measuring functions
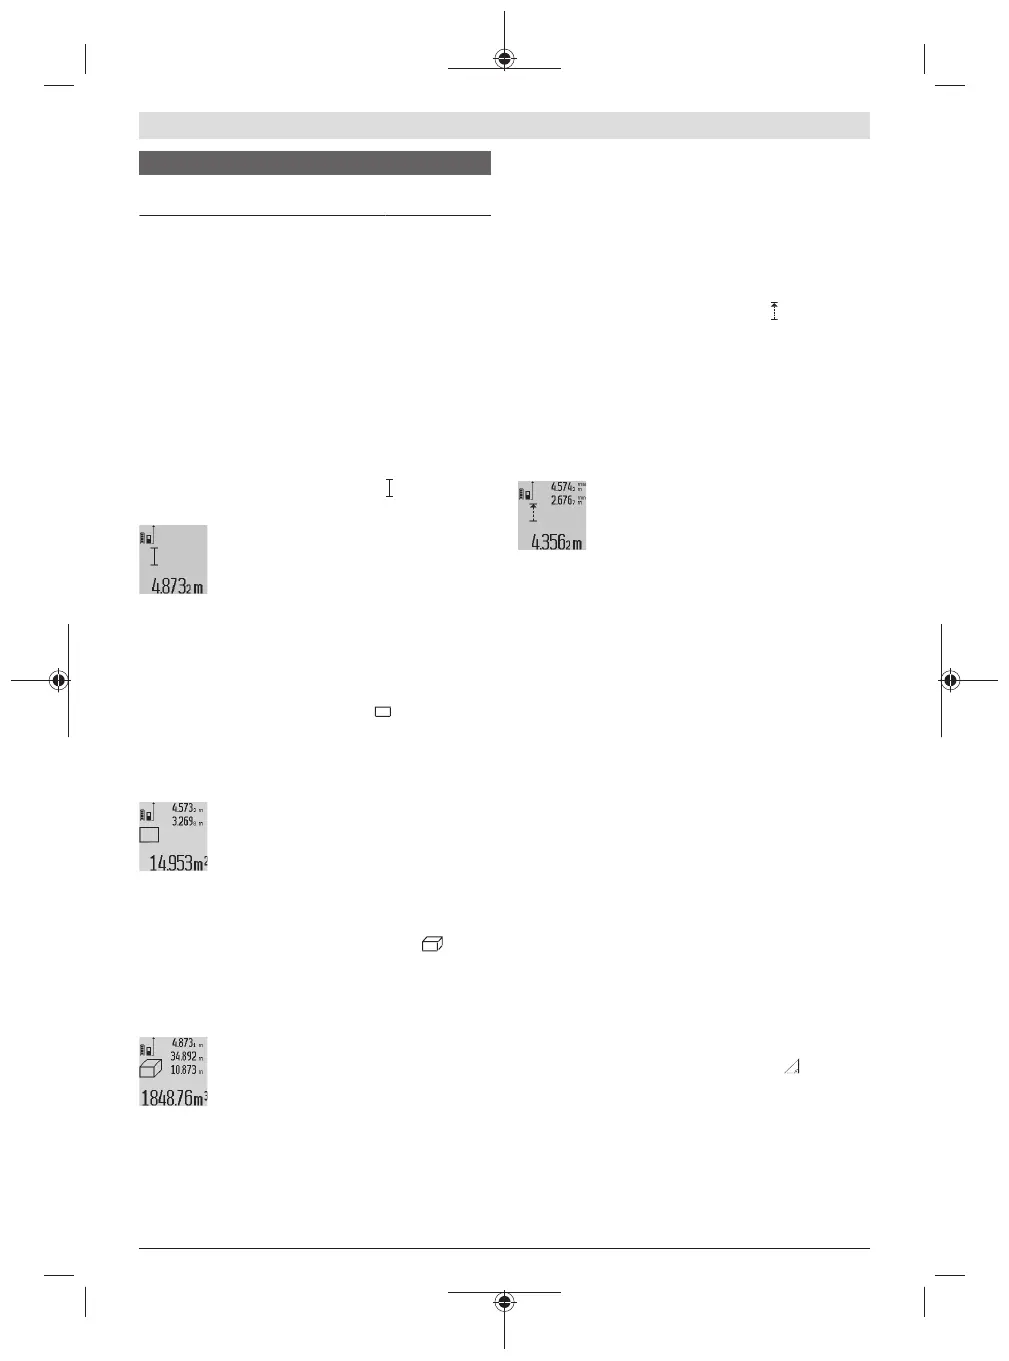
Simple length measurement
For length measurements, repeatedly press the button (12)
until the indicator for length measurement appears on the
display.
Briefly press the measuring button (2) once to
switch on the laser and once to measure.
The measured value is displayed in the result
line (c).
For multiple consecutive length measurements, the results
of the last measurements are shown in the measured value
lines (a).
Area measurement
For area measurements, repeatedly press the button (12)
until the indicator for area measurement appears on the
display.
Then measure the width and length one after the other as
with a length measurement. The laser beam remains
switched on between the two measurements.
Once the second measurement has been com-
pleted, the area is automatically calculated and
displayed in the result line (c). The individual
measured values can be found in the measured
value lines (a).
Volume measurement
For volume measurements, repeatedly press the button
(12) until the indicator for volume measurement ap-
pears on the display.
Then measure the width, length and depth one after the
other as with a length measurement. The laser beam remains
switched on between the three measurements.
Once the third measurement has been com-
pleted, the volume is automatically calculated
and displayed in the result line (c). The indi-
vidual measured values can be found in the
measured value lines (a).
Values over 999,999m
3
cannot be displayed; "ERROR" will
instead appear on the display. Divide the volume to be meas-
ured into individual measurements, the resulting values of
which you can calculate separately and then combine into an
overall total.
Continuous measurement and minimum/maximum
measurement (see figureB)
In continuous measurement mode, the measuring tool can
be moved relative to the target, during which the measured
value will be updated every half a second. You can, for ex-
ample, move a desired distance away from a wall while read-
ing off the current distance at all times.
For continuous measurements, repeatedly press the button
for changing function (4) until the indicator for continuous
measurement appears on the display. To start the continu-
ous measurement, press the measuring button (2).
The minimum measurement is used to determine the
shortest distance from a fixed reference point. For example,
it can help in determining verticals or horizontals.
The maximum measurement is used to determine the
greatest distance from a fixed reference point. For example,
it can help in determining diagonals.
The current measured value is shown in the
result line (c). The maximum ("max") and min-
imum ("min") measured value appear in the
measured value lines (a). It is then always
overwritten if the current length measurement
value is smaller or larger than the previous minimum or max-
imum value.
Press the memory deletion button (8) to erase the previous
minimum or maximum values.
Press the measuring button (2) to end the continuous meas-
urement. The last measured value is displayed in the result
line (c). Pressing the measuring button (2) again starts a
new continuous measurement.
Continuous measurement automatically switches off after
fiveminutes. The last measured value remains displayed in
the result line (c).
Indirect distance measurement
The indirect distance measurement is used to determine dis-
tances that cannot be measured directly, due to an obstacle
that would impede the path beam or the absence of a target
surface that could serve as a reflector. This measuring pro-
cedure can only be employed vertically. Any horizontal devi-
ation will lead to measurement errors.
The laser beam remains switched on between the individual
measurements.
For indirect length measurements, three measuring modes
are available. Each measuring mode can be used for determ-
ining different distances.
a) Indirect height measurement (see figureC)
Repeatedly press the button for changing function (4) until
the indicator for indirect height measurement
appears on
the display.
Ensure that the measuring tool is at the same height as the
lower measuring point. Then tilt the measuring tool around
the reference level and measure distance (1) as for a length
measurement.
1 609 92A 544 | (27.05.2019) Bosch Power Tools
 Loading...