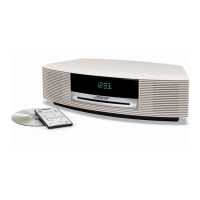
14
DISASSEMBLY/ASSEMBLY PROCEDURES
Note: Refer to Figures 2 and 3 for the
following procedures. Numbers in paren-
theses correspond to the item callouts in
Figures 2 and 3.
1. Top Cover Removal
1.1 Grasp the cover (1) by the edges and
work it up to release the christmas tree
fasteners from the superstructure (2).
This might take some effort. Using a flat-
blade screwdriver may be helpful. Take
care not to damage the top cover.
2. Top Cover Replacement
2.1 Align the cover's christmas tree fasten-
ers with the holes in the superstructure (2).
Push the cover (1) down until it is fully
seated.
Note: Align the cover so that the BOSE
®
logo is in the left corner.
3. Display Window Removal
3.1 Grasp the top edge of the display
window (3) and pull it forward.
4. Display Window Replacement
4.1 Align the display window (3) so the
catches are facing up.
4.2 Align the display window with the LCD
and press it into the superstructure (2).
5. Superstructure Removal
5.1 Perform procedures 1 and 3.
5.2 Remove the door spring (7) from the
superstructure (2) and door assembly (8).
5.3 Remove the ribbon cable (6) from the
super structure and disconnect it from the
PCB (18).
Note: Make a note of how the ribbon cable
was dressed in the rear channel of the
superstructure.
5.4 Remove the three screws (4) from the
superstructure.
5.5 Place a flat-blade screwdriver into each
of the four slots (5) on the superstructure
and push away from the center of the unit
to release the catches.
5.6 Lift the superstructure away from the
base (9).
6. Superstructure Replacement
6.1 Lower the superstructure (2) onto the
base (9) and pull the ribbon cable through
the large opening.
6.2 Push down on the superstructure
(2) until it snaps into the base (9).
6.3 Redress the ribbon cable in the
channel at the rear of the superstructure
(2). Connect the cable to the PCB.
6.4 Replace the three screws (4) that
secure the superstructure to the base.
6.5 Replace the door spring (7) to the
superstructure and door assembly (8).
6.6 Perform procedures 2 and 4.
7. Door Assembly Removal
Note: Refer to Figure 3 for the following
procedures.
7.1 Perform procedure 5.
7.2 Lift the door assembly (8) straight up.
8. Door Assembly Replacement
8.1 Lower the door assembly (8) into the
base (9) aligning the post (10) on the door
assembly to the holes (11) in the base.
Also rotate the hinge (12) on the left side of
the door so that the groove fits into the slot
on the hinge holder (13).
8.2 Perform procedure 6.