45
TEST PROCEDURE
2. Line Input / Output Verication Tests
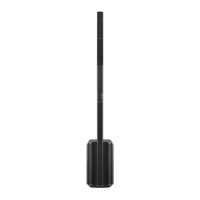
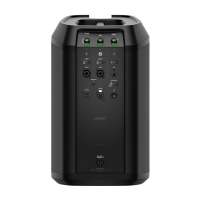
Refer to the Connections and Controls diagram on the previous page for the following tests.
Note: DO NOT assemble the line array to the power stand. The below test would be very loud with
the array connected to the power stand.
2.1 Connect the AC power cord to the power stand and to AC Mains. Press the STANDBY button (11)
to turn on the power stand. The button should illuminate white.
2.2 Set the channel 1 volume control (1) to 50%. Set the Channel ToneMatch button (4) and the Mute
button (3) to OFF.
2.3 Apply a balanced, 150mV, 1 kHz audio signal to the Channel 1 XLR audio input (5).
2.4 Measure the output level at the Line Out jack (8). This is a balanced output. Output level should
be 11.0 dBV ± 2 dB, THD <1%.
2.5 Change the input frequency to 20 Hz. Measure the output level at the Line Out jack (8). Output
level should be 11.0 dBV ± 3 dB, THD <1%.
2.6 Change the input frequency to 20 kHz. Measure the output level at the Line Out jack (8). Output
level should be 11.0 dBV ± 3 dB, THD <1%.
2.7 Repeat steps 2.2 to 2.6 for the Channel 1 TRS input. Output levels should be -3.2 dBV ± 2 dB at
1 kHz input, ± 3 dB at 20 Hz and 20 kHz inputs.
2.8 Repeat steps 2.2 to 2.7 for the Channel 2 XLR and TRS inputs.
2.9 Apply a balanced, 150mV, 1 kHz audio signal to the Channel 3 Aux 1/4” input.
Note: The Channel 3 Aux 1/4” input is a mono balanced TRS input.
2.10 Measure the output level at the Line Out jack (8). Output levels should be -16.5 dBV ± 2 dB at
1 kHz input, ± 3 dB at 20 Hz and 20 kHz inputs.
2.11 Apply 150mV, 1 kHz stereo (left/right) audio signal to the Channel 3 Aux 1/8” input.
Note: The Channel 3 Aux input is a stereo unbalanced TRS input.
2.12 Measure the output level at the Line Out jack (8). Output levels should be -4.0 dBV ± 2 dB at
1 kHz input, ± 3 dB at 20 Hz and 20 kHz inputs.
3. System Sweep Test
3.1 Assemble the line array to the power stand. Connect the AC power cord to the power stand
and to AC Mains. Press the STANDBY button (11) to turn on the power stand. The button should
illuminate white.
3.2 Set the Channel 1 volume control (1) fully CCW. Set the TREBLE and BASS settings to mid and
the REVERB to minimum. Set the Channel 1 ToneMatch button (4) and the Mute button (3) to OFF.
 Loading...
