47
TEST PROCEDURE
5.2 Connect an audio input to the T4S/T8S. Verify that you can play the audio from the T4S/T8S
through the power stand with no noticeable distortion.
6. Phantom Power Test
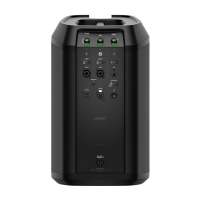
6.1 Press the STANDBY button (11) to turn on the power stand. The button should illuminate white.
6.2 Press the Phantom Power button (6) on the power stand. It should illuminate white.
Note: You can use a condenser microphone for this test. Connect to the Channel 1 input XLR Combo
jack. Speak into the microphone and verify that you can pass audio. Repeat for Channel 2.
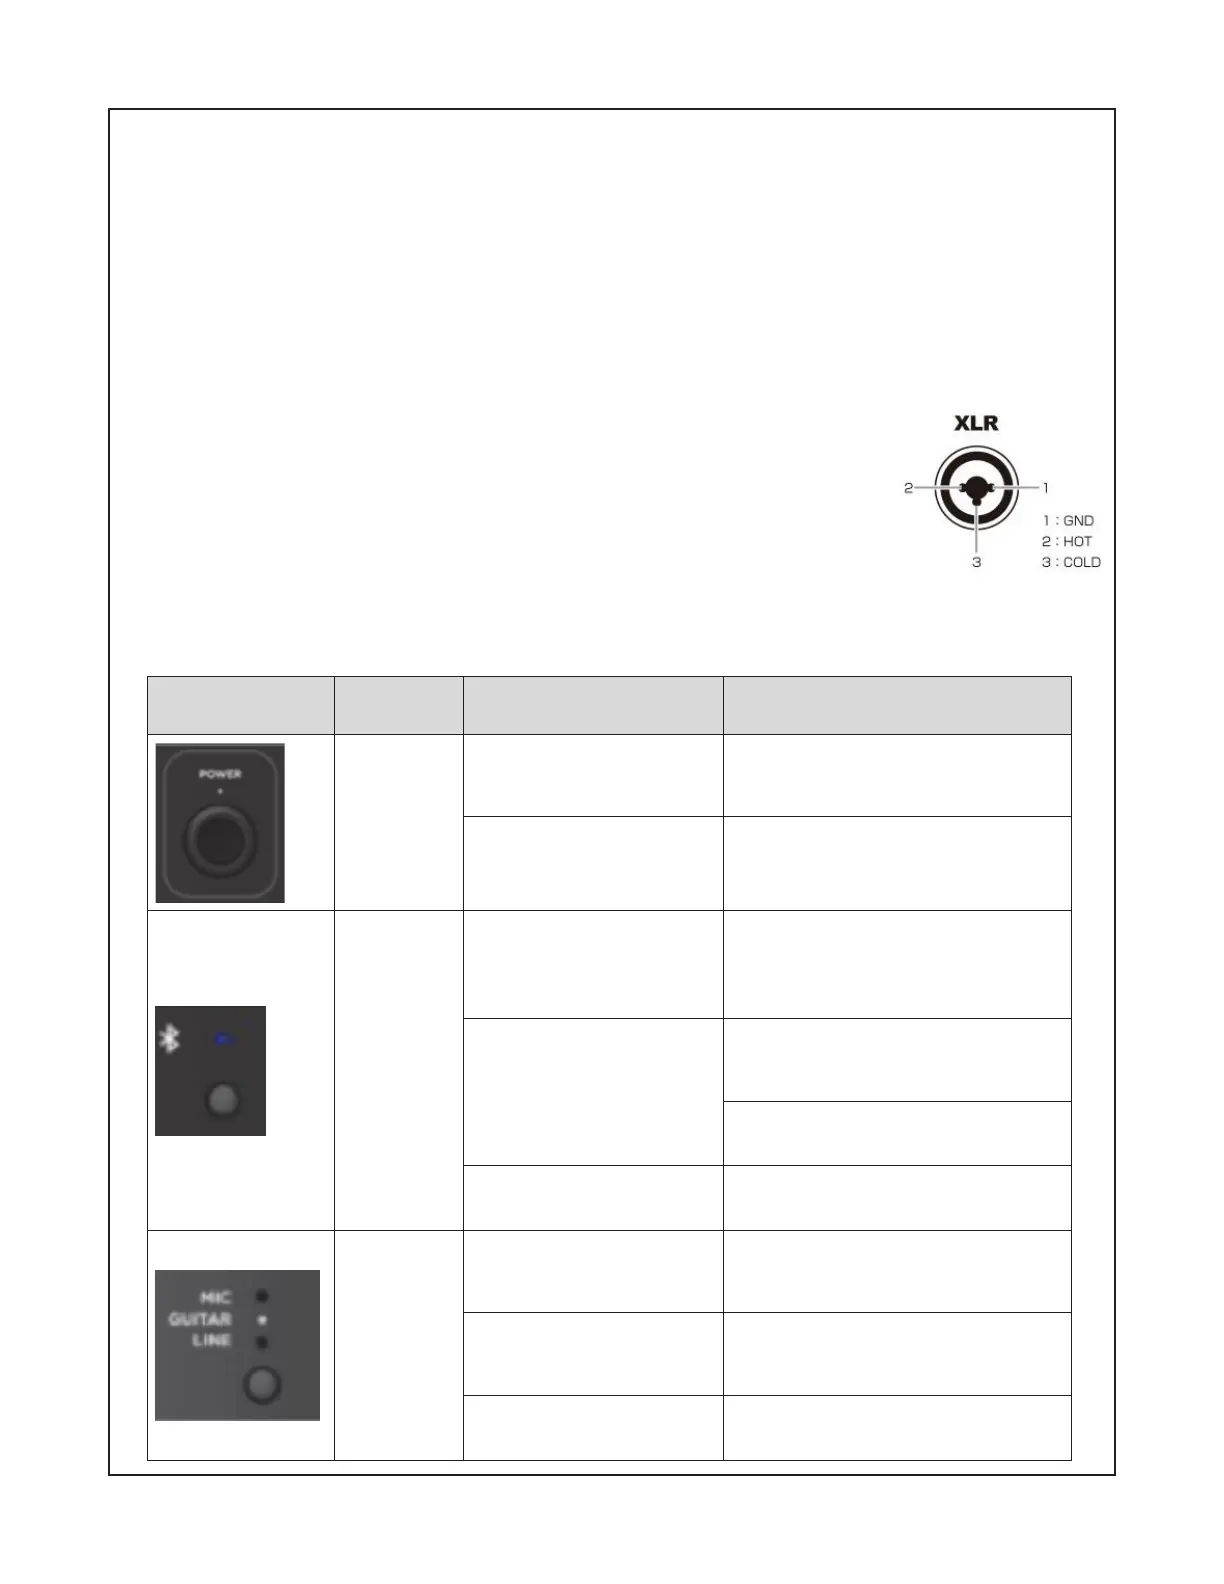
6.3 Using a multi-meter, carefully measure the DC voltage across pins 1 and 2
of the Channel 1 input XLR Combo connector. It should read +48Vdc +/- 5Vdc.
Measure the DC voltage across pins 1 and 3 of the same connector. It should
read +48Vdc +/- 5Vdc. Repeat step for the Channel 2 input XLR connector.
CAUTION: Take care to not short across the pins or you will damage the unit.
7. Button Extended Functions Test
7.1 Perform the button tests below to verify extended functionality of the buttons/controls.
Product I/O User con-
trol
Trigger
User action
Power
button
Short press the power
button when system is
o/on
Power LED on and system power
on/o
Press and hold the but-
ton for 10 sec
All LEDs Iight then all the settings
will be set to default and reboot
the system
BT button
Press and hold the BT
button for 2 seconds
BT LED will blink in 2Hz (0.5 sec
on and 0.5 sec o). Start the BT
pairing/Disconnect any BT con-
nection.
Short press x1
If BT is not connected and pairing
list is not empty, start BT recon-
nect.
If BT pairing in progress, stop BT
pairing mode.
Press and Hold 10 sec-
onds
Bluetooth factory reset and clear
all current devices.
ToneMatch
button
Short press the Tone-
Match button and the
LED to postion-1/2
Microphone/guitar LED will be
ON. Enable EQ for Microphone/
Acoustic guitar
Short press the Tone-
Match button and the
LED to postion-3
Indication Microphone LED will be
ON. Disable EQ
Press and Hold 10 sec-
onds
Factory reset of ToneMatch set-
tings
 Loading...