25
DISASSEMBLY PROCEDURES
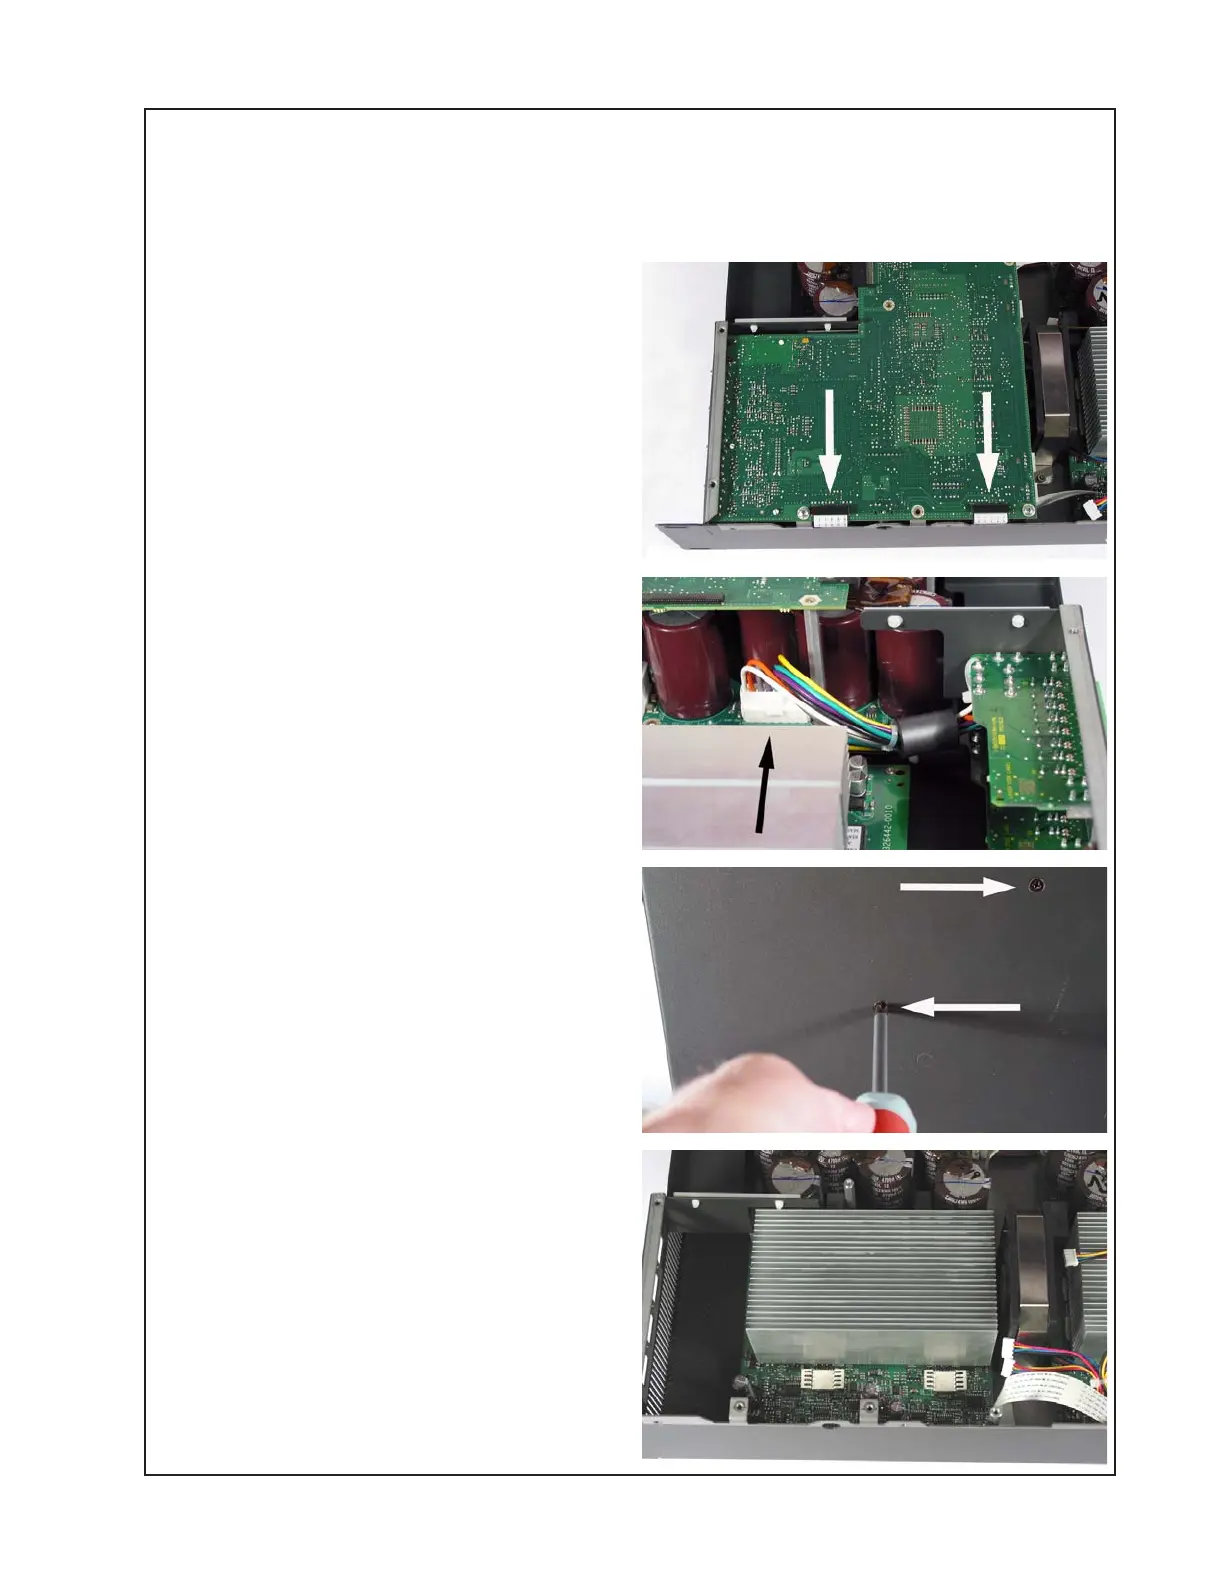
5. Amplifier Board Removal
Note: On 8 channel amplifiers, there are 2 amplifier boards located in the chassis. Amp 1 is
located at the front of the chassis and Amp 2 is located directly behind it. It is not necessary to
remove the digital board to remove Amp 1. 4-channel amplifiers use only one amplifier board.
5.1 Disconnect the chassis from AC mains.
5.2 Wait at least five (5) minutes to allow the
power supply capacitors to discharge.
Perform procedure 1.
5.3 If removing Amp 2, perform procedure 3
first to remove the digital board and to allow
access to the Amp 2 board.
5.4 Unplug the ribbon cable to the digital
board at J-IN-1
and the wiring harness from the power
supply PCB at J-HV.
5.5 On the outside of the unit remove the two
screws that secure the amplifier PCB /
heatsink assembly to the chassis.
5.6 Inside the chassis, remove the six
screws (Amp 1) or two screws and four
standoffs (Amp 2) that secure the amplifier
PCB. Lift out the PCB with the heatsink.
 Loading...


