32
DISASSEMBLY PROCEDURE
4. Woofer Removal
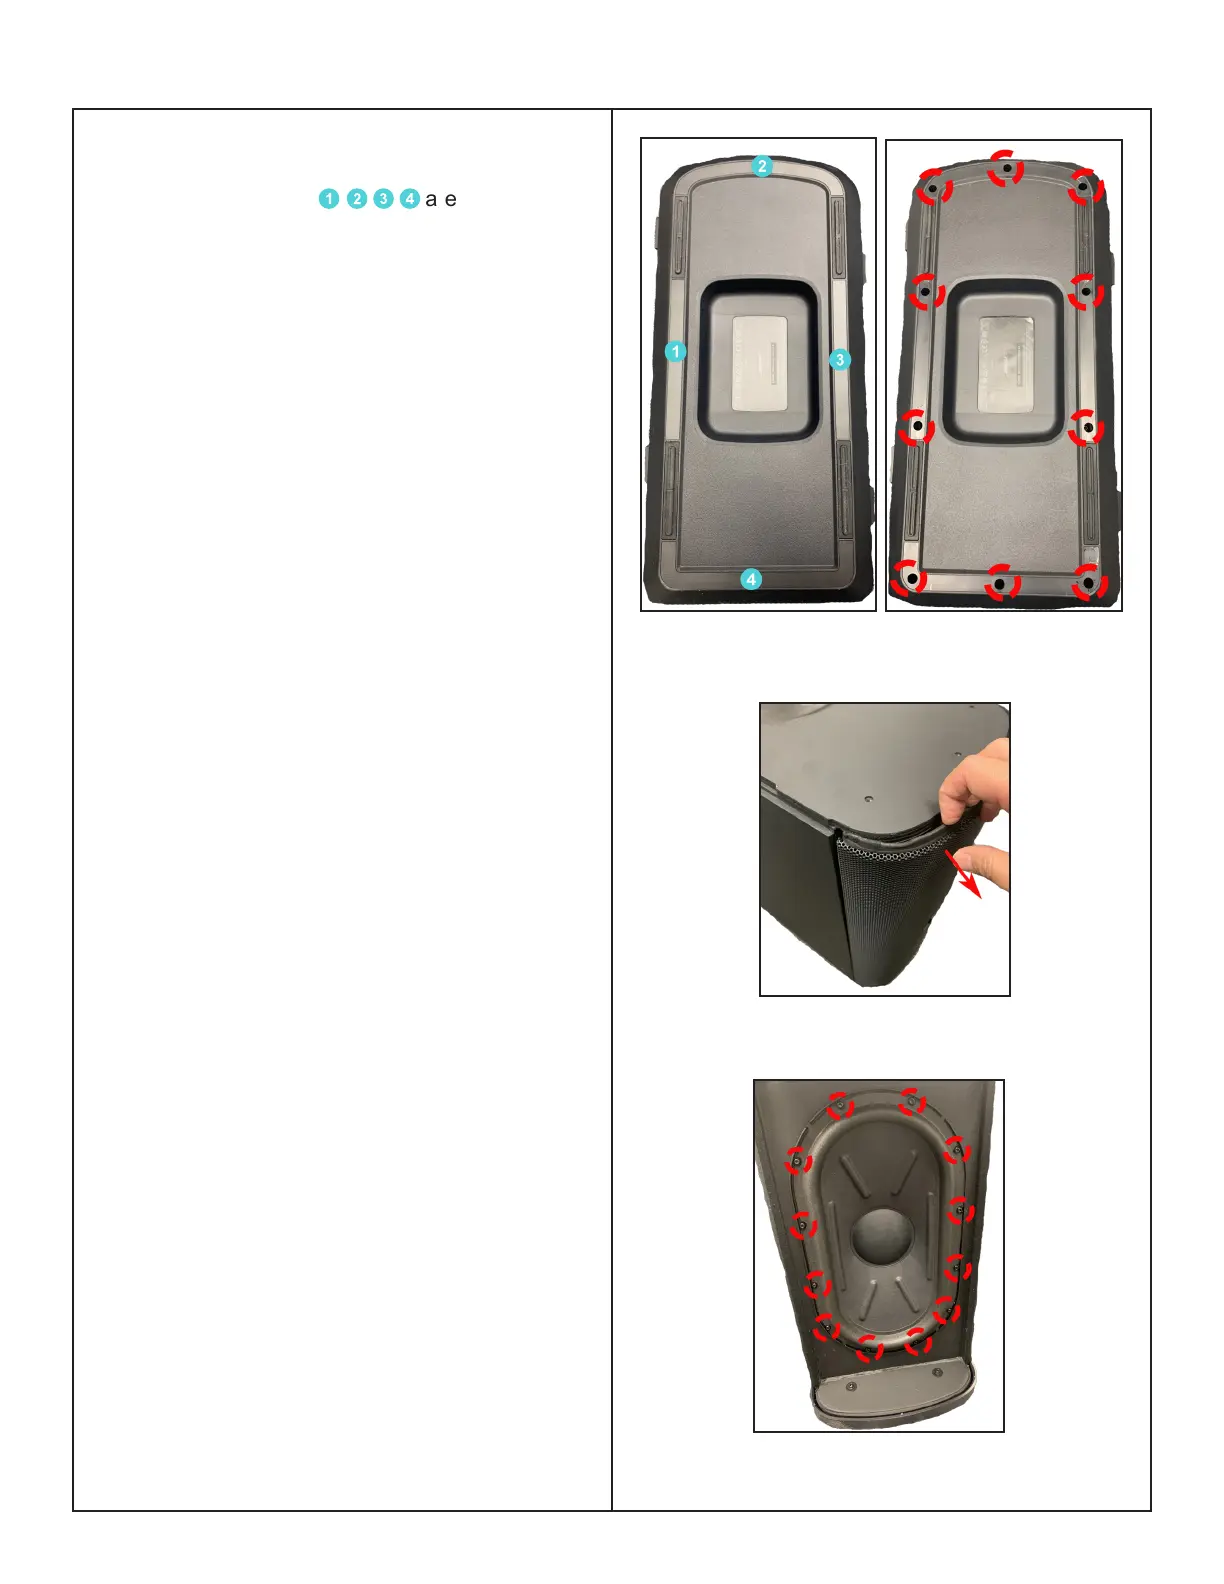
4.1 The PC sheets
1
2
3
4
are secured
with Pressure Sensitive Adhesive - use a
spudger, lift the PC sheets up and grasp and
pull them o. Figure 16 (left).
Re-assembly Note: Be careful to not cause
cosmetic damage to the unit.
Use the new PC sheets to ensure proper
adhesion during reassembly.
4.2 Remove the 12 screws securing the
Bottom Endcap as indicated in Figure 16
(right).
4.3 Pull the Grille out gently. Figure 17.
Note: When installing the Grille, make sure
the Grille inserted into the Grille guides.
.
4.4 Remove the 12 screws securing the
Woofer as indicated in Figure 18.
4.5 Detach the 2 Cable harnesses from the
Woofer by pressing the white fastener.
Note: Be careful the Woofer is very heavy.
Figure 16. PC Sheets & Screws Removal
Figure 17. Grille Removal
Figure 18. Woofer Screws Removal