Panel Descriptions
3
Panel Descriptions
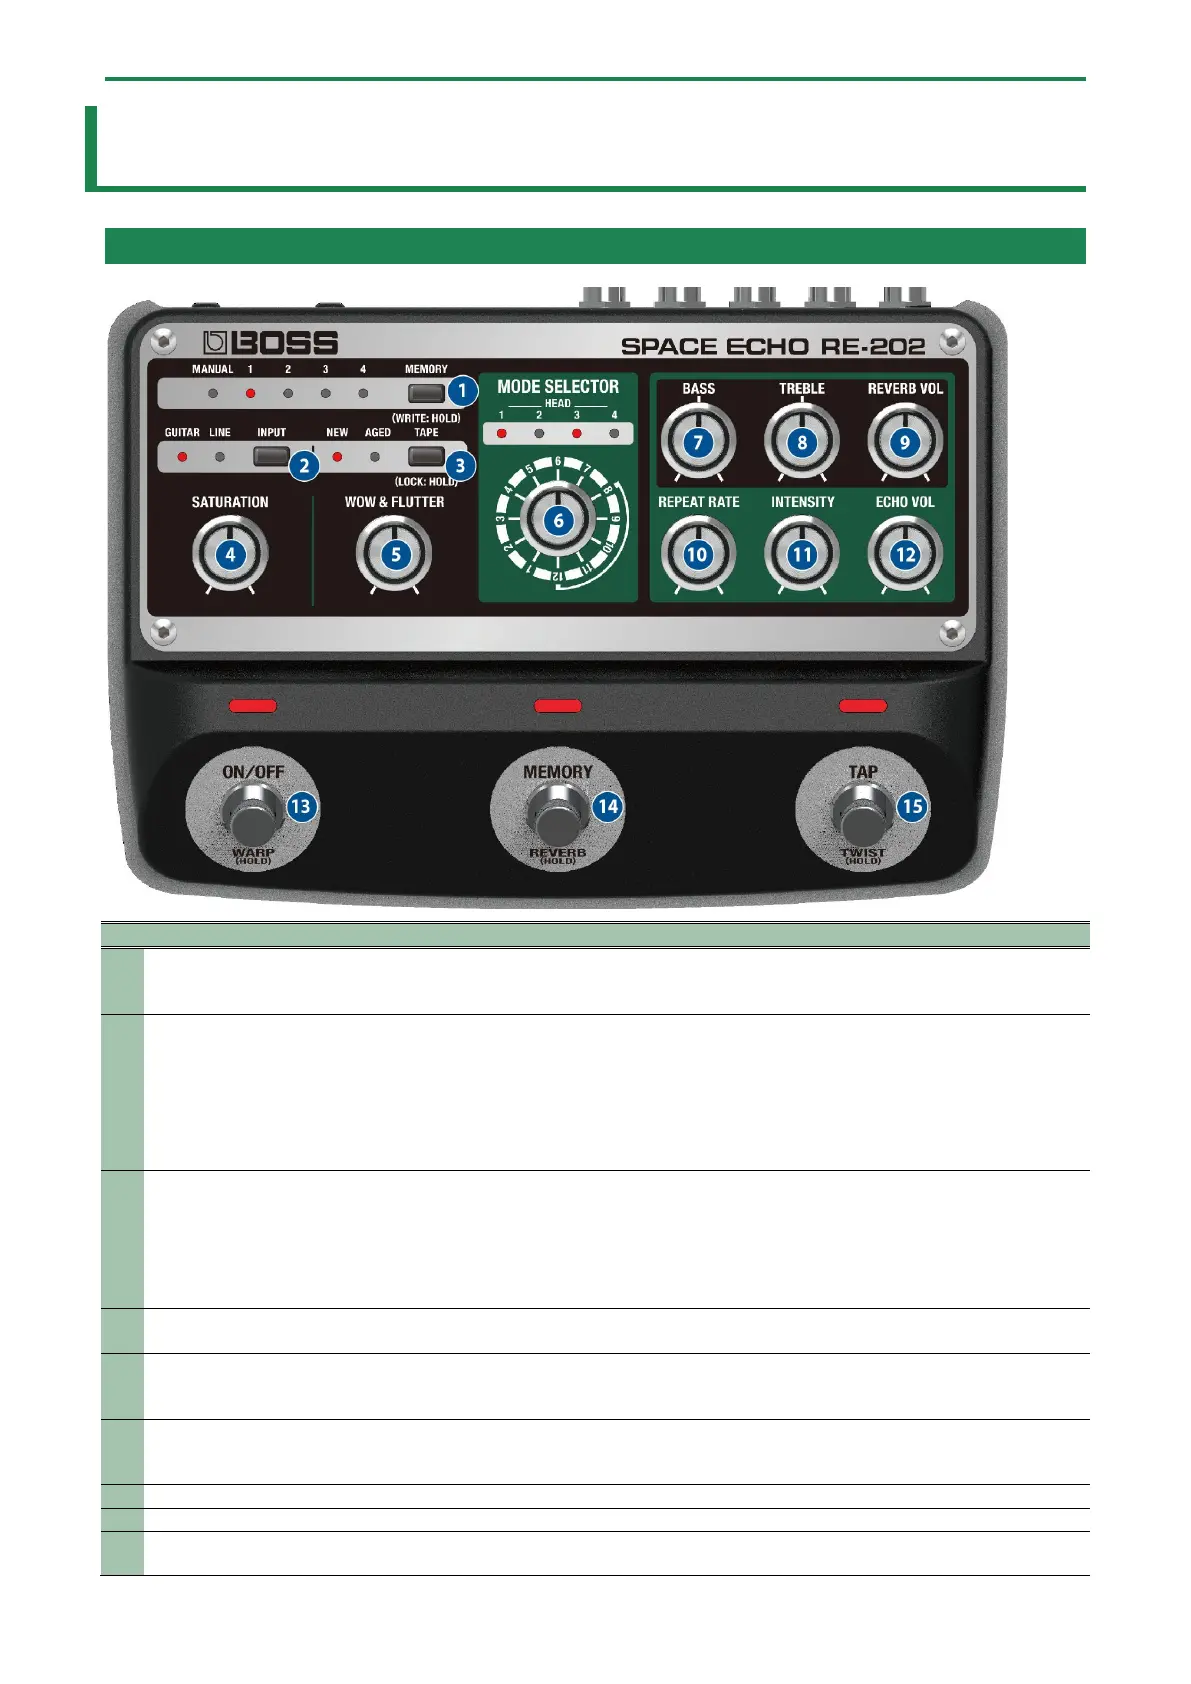
Top Panel
1
button
Switches between or saves memories (MANUAL, 1–4). The currently selected memory number is shown by
the MANUAL and MEMORY 1–4 indicators. When using an external MIDI device to select memories 5–127,
the indicators all remain dark.
2
Use this to select the device that’s connected to INPUT.
GUITAR: Use this when connecting a guitar or bass guitar.
LINE: Use this when connecting a synthesizer, mixer or similar equipment.
* These are system settings, which apply to all memories.
* Long-press the [INPUT] button to configure the expression pedal function.
3
Switches between the sounds of new tape and tape that’s been somewhat used. The tone and wavering of
the sound change.
* By long-pressing the [TAPE] button, you can switch between enabling (unlocking) or disabling
(locking) the knobs and buttons. If you attempt an operation while the unit is locked, the display
blinks.
4
Adjusts the compressed feel, which is caused by preamp distortion and the magnetic saturation of the
tape.
5
FLUTTER] knob
Adjusts the wavering in tape speed, which occurs due to the friction resistance of the tape mechanism,
tape slippage and so on.
Turning this clockwise produces more wavering.
6
SELECTOR] knob
Switches between modes 1–12. The combination of four different playback heads gives you 12 types of
echo.
1.5. Head Combinations for Each Mode(P.8)
Adjusts the echo’s low frequency range.
Adjusts the echo’s high frequency range.
9
Adjusts the volume of the reverb. If the [ECHO VOL] knob is turned all the way counterclockwise, you can
use only reverb.