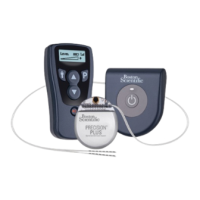
The Charging System
Physician Manual
91098825-02 41 of 337
Charging the Charger
1. Find a convenient electrical outlet, one that will not expose the Charging System
components to water or direct heat.
2. Plug in the Power Supply.
3. Connect the Power Supply to the Base Station.
4. Place the Base Station on a at surface.
5. Finally, place the Charger in the Base Station with the power button facing up
until the indicator light turns green.
Indicator Light Status Description
Green
The Charger is fully charged and ready to charge the
Stimulator.
Yellow
The Charger is partially charged. The Charger may
still be used, but it may not be able to fully charge the
Stimulator. To fully charge the Charger, place it in the
Base Station.
Off
The Charger is off –or– the Charger battery is empty.
If pressing the Power Button does not turn on the
Charger, place the Charger in the Base Station to charge.
Charger Battery Service Life
The charger battery has a typical service life of 500 charging cycles.
Charging the Stimulator
When charging the Stimulator, the patient must use the Charger with either the
Charging Collar or an Adhesive Patch to hold the Charger over the Stimulator. The
Adhesive Patches are made of non-reactive and Latex-free material suitable for most
sensitive skin types.
Using the Charging Collar
1. When the indicator light is green, remove the Charger from the Base Station.
(The indicator light will go off, regardless of the ready status of the Charger.)
 Loading...