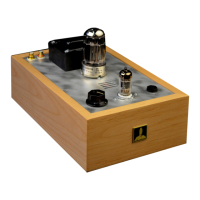
11
Assembly, Part One -
Building up the chassis
Check each step off as you complete it
( )First, check the parts supplied in your kit against the check list on the preceding page. Call us at
360-697-1936, M-F 9-5 PT, if you are missing any components listed on the checklist.
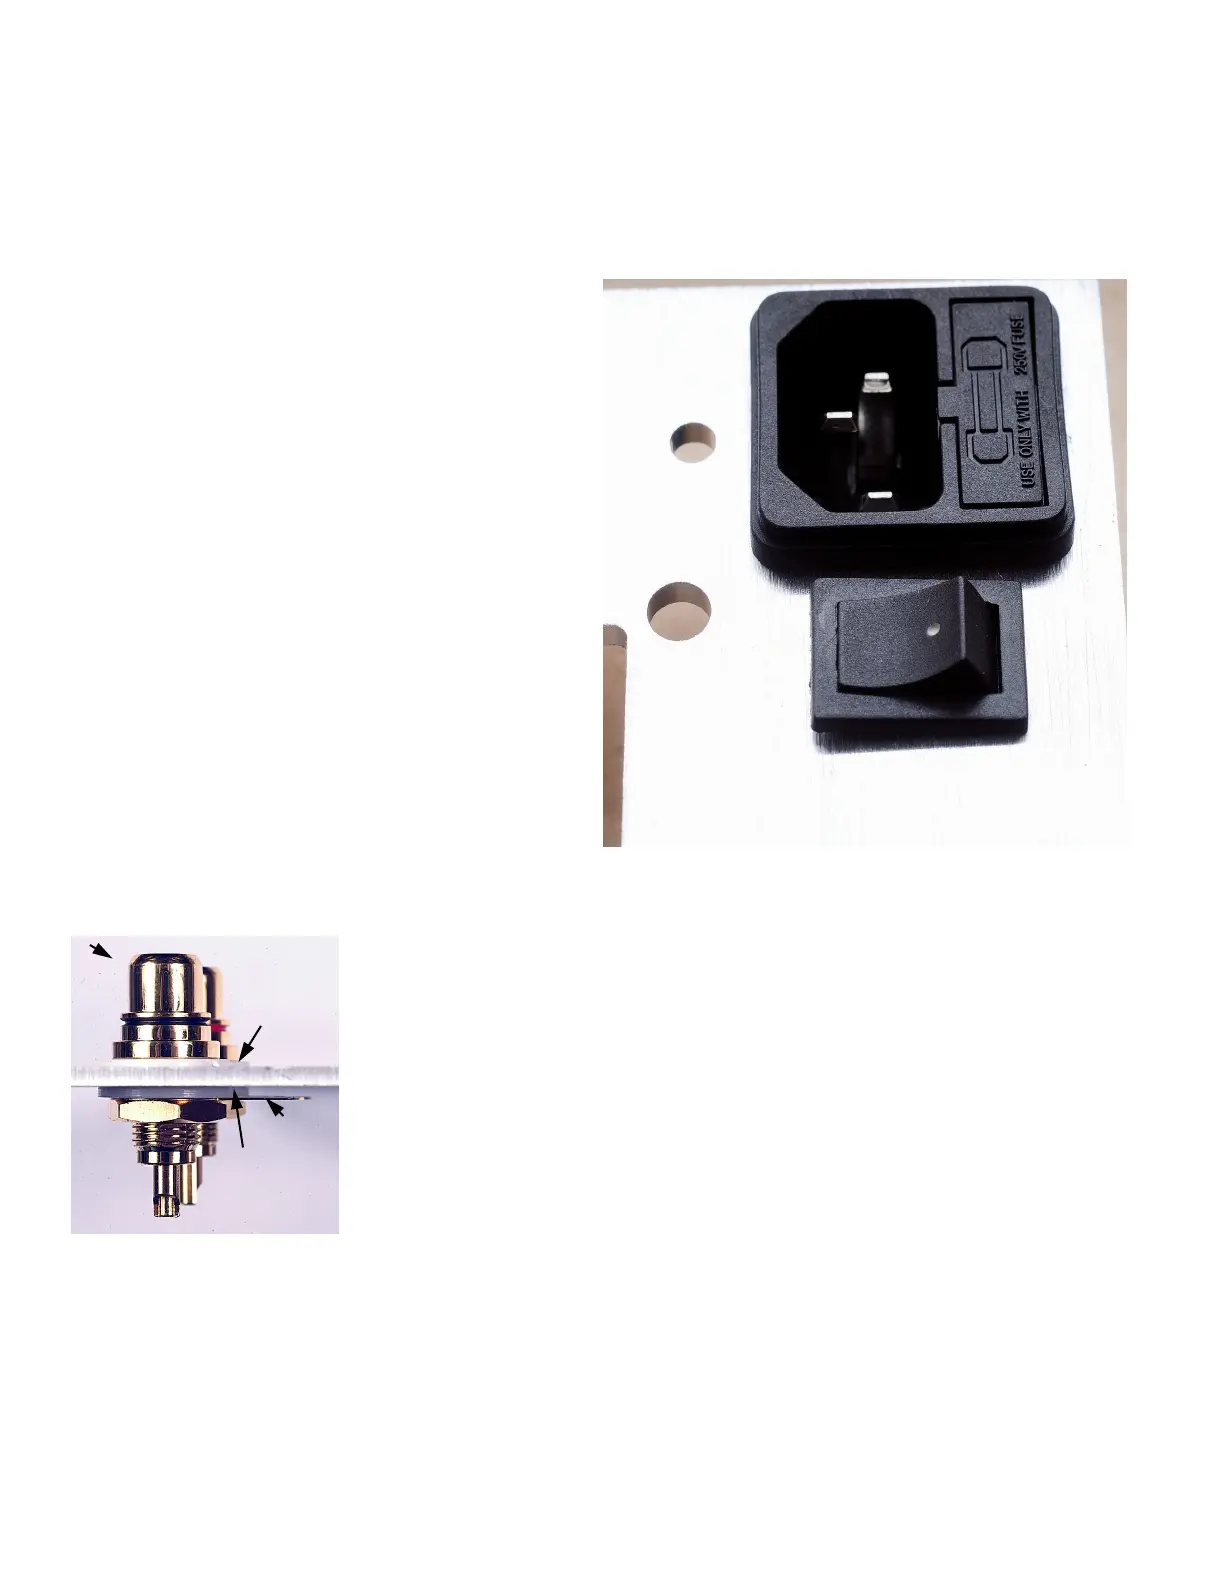
Power Entry and Power Switch
( )Now pick up a chassis plate and set it so that
the round holes for the tube sockets are toward
you, the big rectangular hole for the power trans-
former toward the rear, and the next smaller rec-
tangular hole for the power entry module is to
the right at the rear. You are now looking at the
top of the chassis. It should look like the picture
on page 10.
( ) First install the power entry socket/fuse holder
by snapping it into the large rectangular hole at
the rear of the chassis. Be sure to get the power
cord pins oriented to the inside of the chassis
and the fuse holder to the outside, as shown.
( ) Next snap the power switch into the rectangu-
lar hole in front of the power entry socket. Be
sure that the white dot sits to the outside edge of
the chassis.
RCA jacks
( ) Now install the input RCA jacks in the holes shown in the photo on page
10 (left rear corner of chassis). The black RCA jack goes in the left hole,
and the red RCA jack goes in the right hole as you look at them from the
front of the chassis. First install the white shouldered washer in the hole
from the top, then insert the RCA jack. Flip the chassis over and install the
other white washer, the gold solder tab and one lock nut. Tighten the nuts
securely. Make sure that the solder tabs point toward the front of the chas-
sis
RCA jack
White
shoulder
washer
White
flat
washer
Locknut
Solder
tab