13
Octal Socket
( ) Start by putting a #4-40x3/8”screwinto
the forward octal socket screw mounting hole
from the top side, Slip a terminal strip over
the screw from underneath, and secure
lightly with a #4 nut. Do not use a
lockwasher.
( ) Set the socket into the octal socket hole
from the chassis underside, with the slot of
thesocket’scenterholefacingthefrontof
the chassis.
( )Slip the socket hold-down bracket over the
socket and slide the front prongs under the
nut in the front hole. Tighten the screw
snugly, but not enough to make the bracket
pull away at the rear hole.
( ) Hold a #4 nut in the rear prong and insert
another #4-40x1/4”screwintherearoctal
socket mounting screw hole from the top side.
( ) Tighten the rear screw down into the nut in the bracket flange, then finish tightening the front
screw.
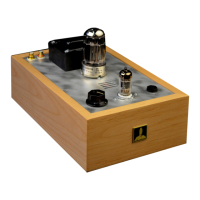
Nine Pin Socket
( ) Set the nine pin socket
into the nine pin socket
hole of the chassis,
through the top. Be sure
to orient the gap in the
circle of pins so that it
faces the volume
potentiometer. Place the
nine pin socket retaining
ring over the socket and
insert a 4-40x3/8”screw
through the rear
mounting hole.
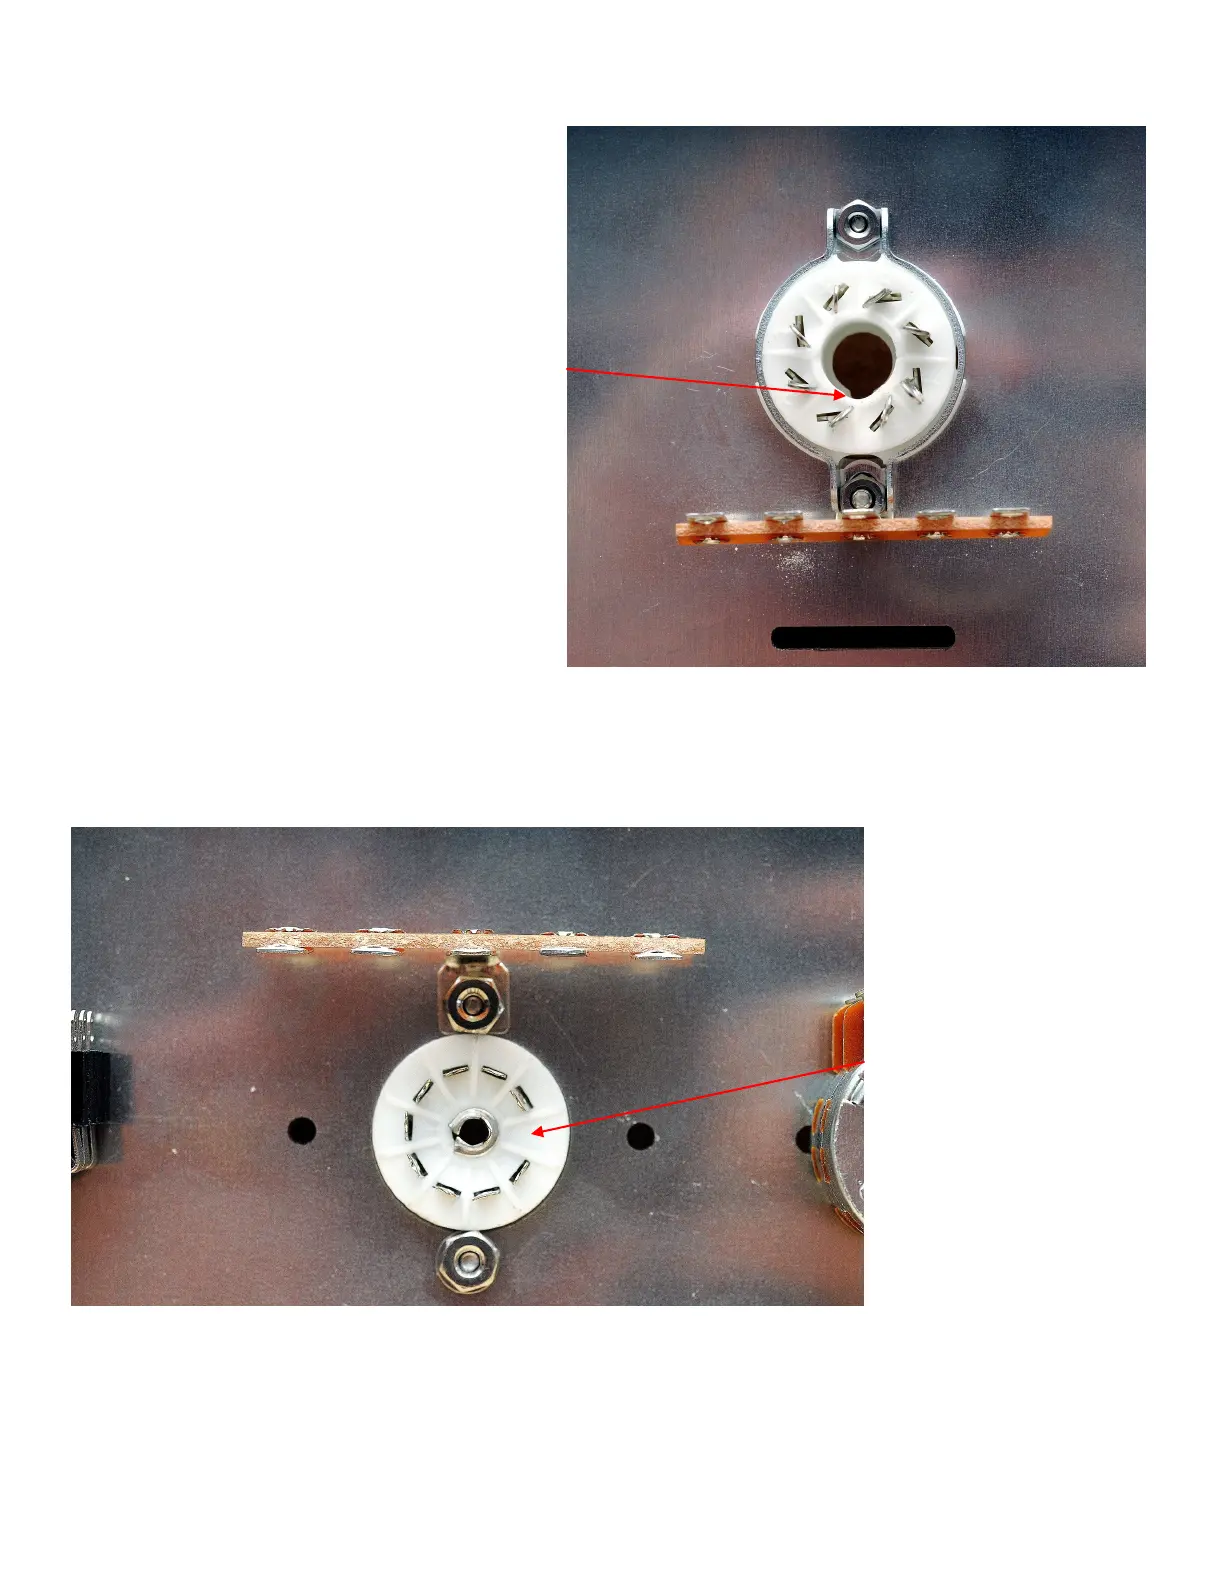
( ) Hold the screw in the
hole while you flip the
chassis plate over, and slide a five lug terminal strip over the screw, oriented as shown in the photo.
Secure with a #4 nut. Slip another #4-40x1/4”screwthroughthefronthole.Slipa#6locknutonthe
screw from the underside and secure with a #4 nut.