123
1. Unplug the AC Power Adapter from the machine.
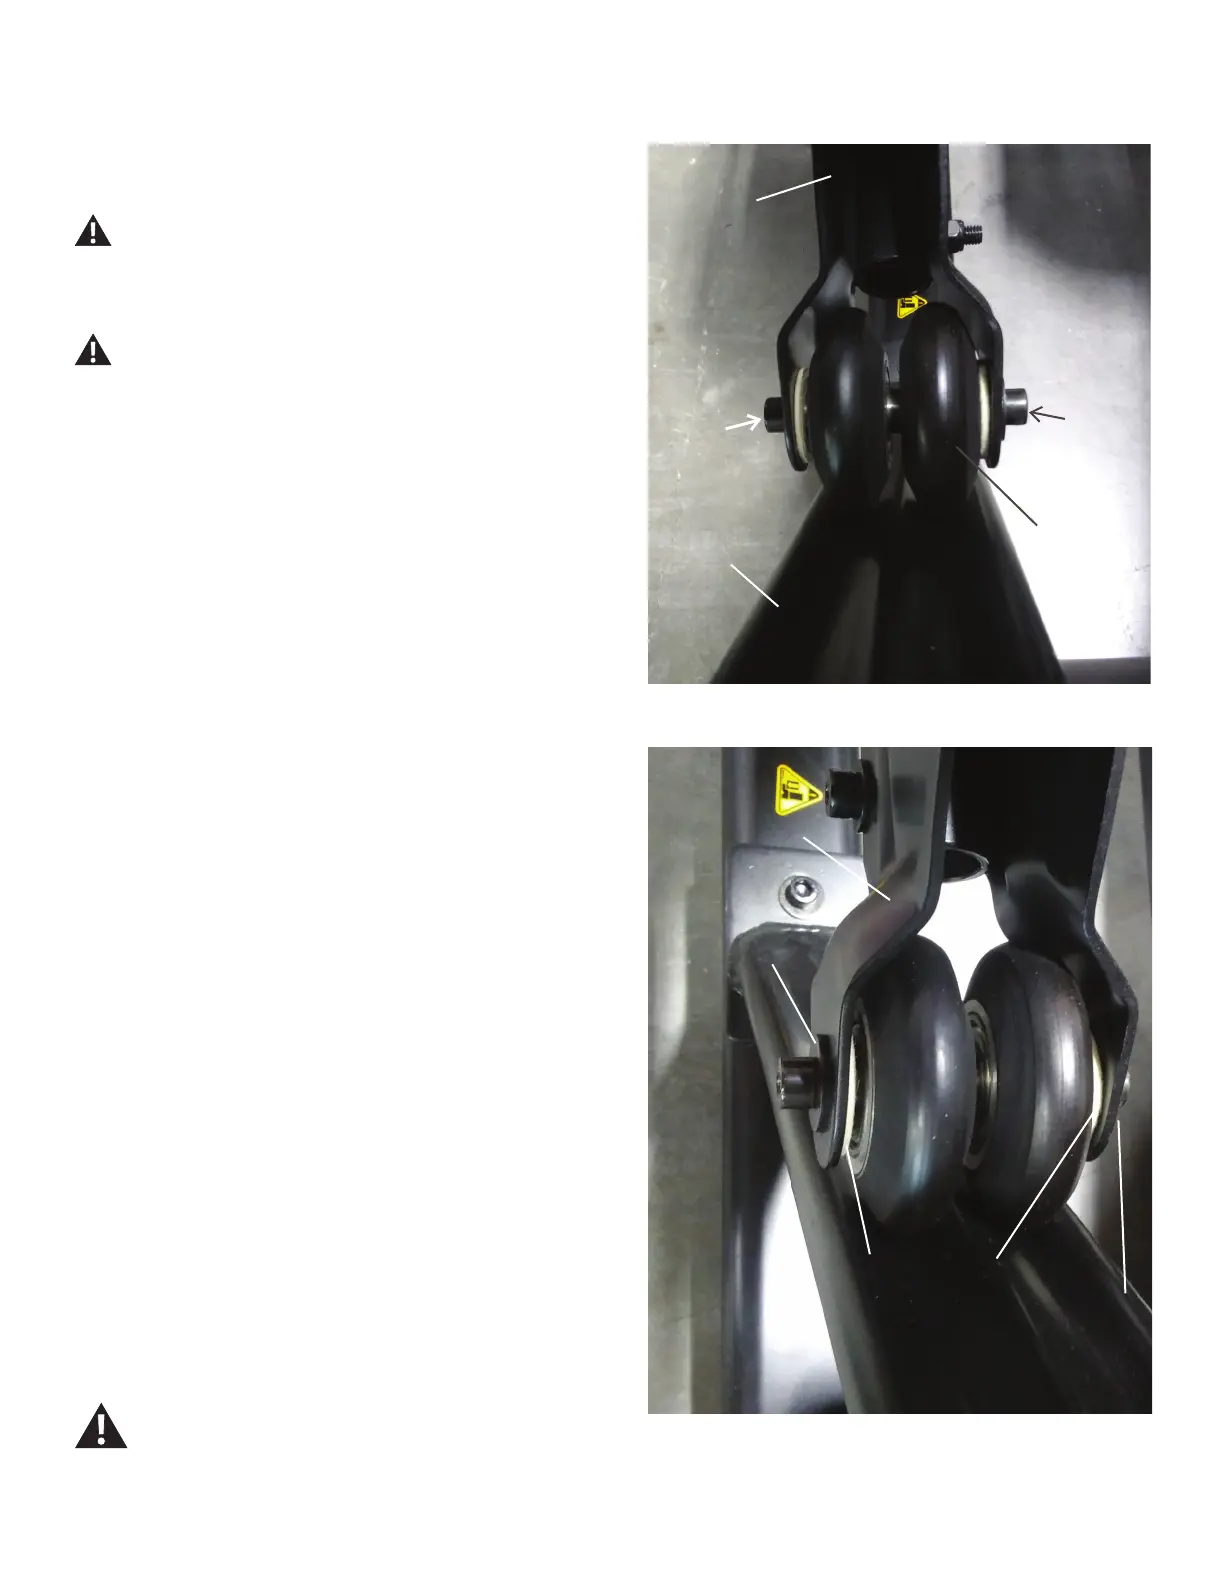
2. Using two 6mm hex wrenches, remove the hardware (indicated by
arrows) from the Roller Wheel Assembly.
In order to avoid possible serious injury when removing the
Roller Wheel Assembly, be careful to avoid ngers or hands
being caught or pinched.
Be aware that the Pedal Arms and the Upper Handlebars
are connected and when either of these parts move the
other does as well.
3. Remove and dispose of the old Roller Wheels, Axle, Screws, and
any Washers that were installed.
Note: Some Washers may stick to the Wheel Bracket on the Pedal
Arm. Be sure to remove them before re-assembly.
4.AttachthenewRollerWheelAssemblywiththeprovidedhardware.
The new Roller Wheel Assembly includes two Small Metal Washers
and two Large Felt Washers. Make sure the Small Metal Washers are
installed on the outside of the Wheel Brackets, while the Large Felt
Washers are on the inside of the Wheel Bracket to the outside of the
Roller Wheels.
Note: The Wheel Bracket is sized so the Axle can only be inserted in
one direction.
5. Final Inspection
Inspect your machine to ensure that all hardware is tight and components
are properly assembled.
Do not use until the machine has been fully assembled and
inspected for correct performance in accordance with the
Owner’s Manual.
Rail Assembly
Pedal Arm
Roller Wheel
Assembly
Large Felt Washer
Small Metal Washer
Wheel Bracket
Small Metal Washer