139
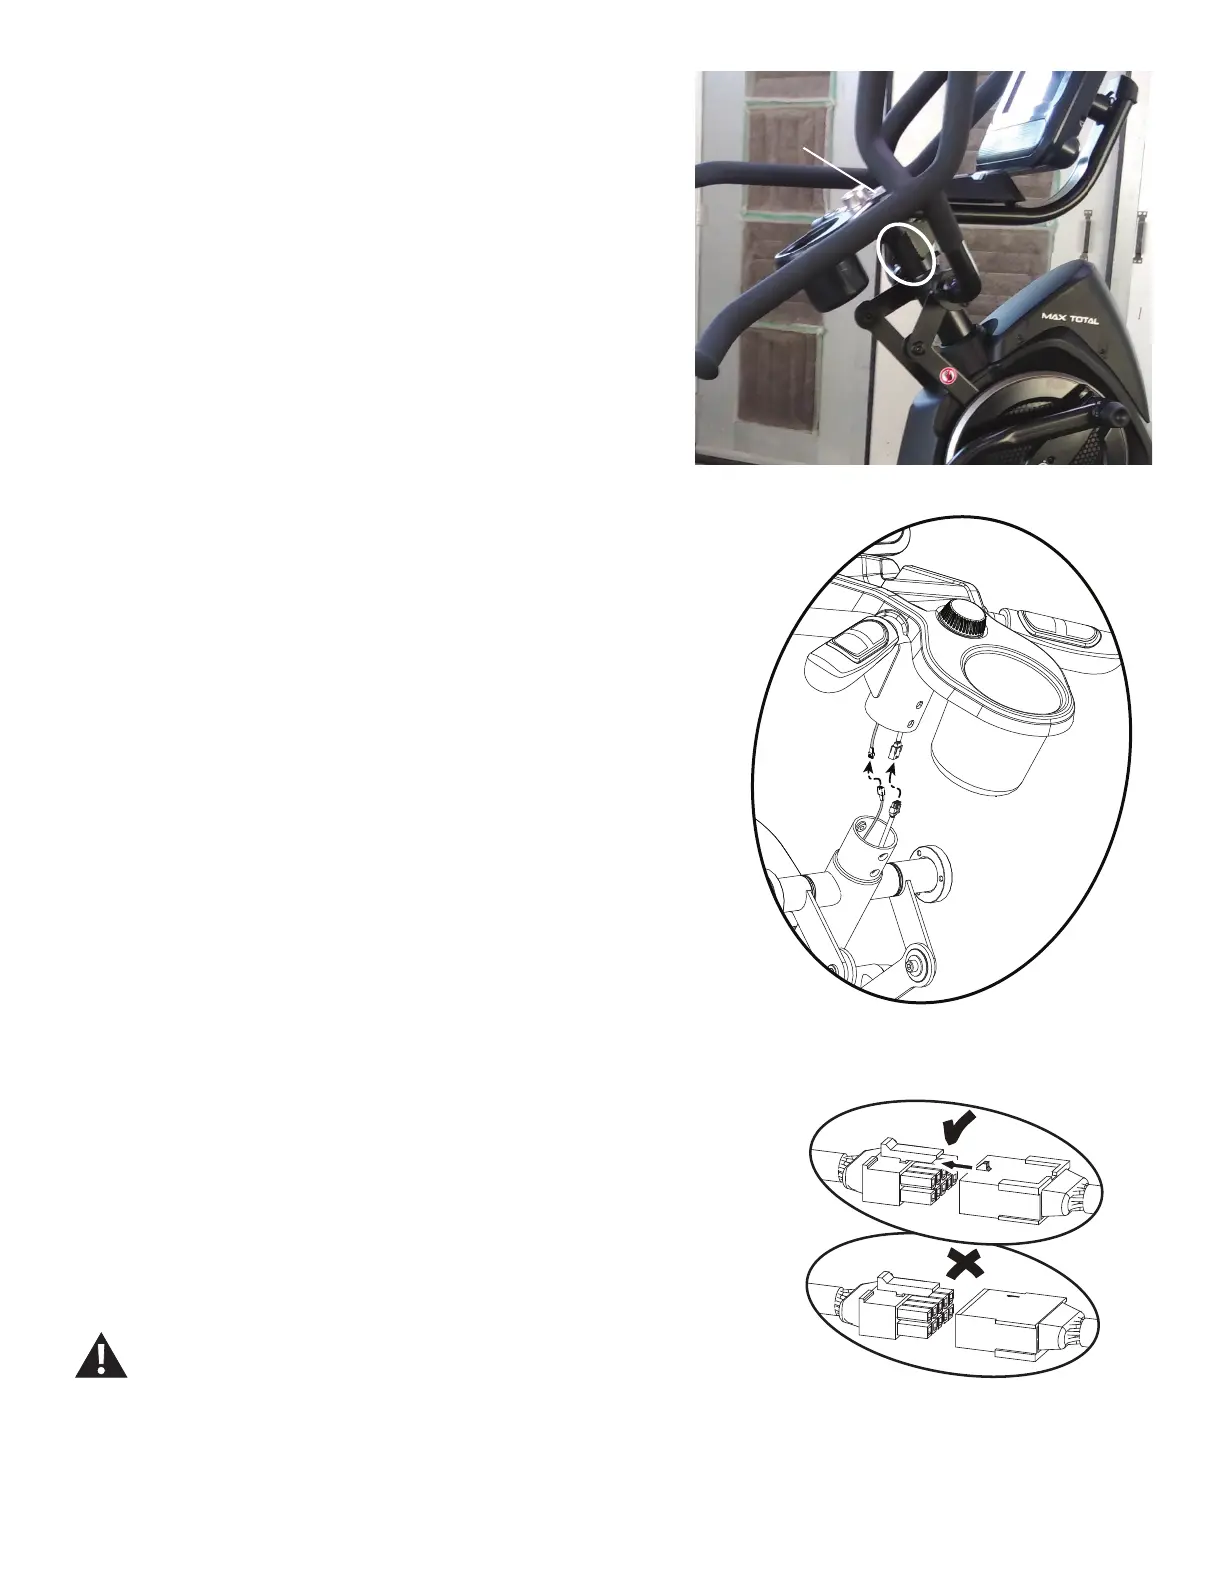
6. Using a 5mm hex wrench, remove the four screws (indicated by oval) from the
Static Handlebar Assembly.
7. Carefully lift the Static Handlebar Assembly and expose the Cable Connec-
tions.
Note: Do not crimp any of the Console Cables. This step may require two
people.
8. Carefully disconnect the Cables while not allowing them to fall into the Console
Mast.
Note: Do not crimp any of the Console Cables.
9. Replace the old Static Handlebar Assembly for the new one.
10. Installation is the reverse procedure.
Note: DonotcutorcrimptheCables.EachCableconnector(3-pin,4-pin,5-pin
and 12-pin) has a corresponding end connector with that many openings. Be sure
to fully connect the cable connectors.
11. Final Inspection
Inspect your machine to ensure that all hardware is tight and components are
properly assembled.
Do not use until the machine has been fully assembled and
inspected for correct performance in accordance with the Owner’s
Manual.
Static Handlebar
Assembly