,'
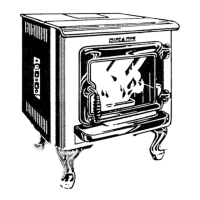
INSTALLATION
Pre-Installation Procedure
Note: Before
unit
is installed
it
is recommended
that it be pre-burned to verify the operation. This
will also allow
it
to
bum
off
sub-surface oils that
may be present, and
to
help cure the paint. The
"Pre-Installation Procedure" should be done in a
well ventilated
ar~a
as follows:
I.
Plug the stove into a grounded outlet (using a
circuit tester, verify the electrical outlet for
proper ground and polarity
where
the unit will
be installed. failure to do so could result in
damage to the electrical components and void
the warranty).
2.
Switch on
power
by pressing OFF/ON switch
(lower rocker switch) upward to the
"ON"
position.
The
LED (light emitting Diode) light
will come
on
and
glow
red (early production
models
glow
green). The Draft
Fan
will come
on.
3.
Look
down
into the
Hopper
and
make
sure
nothing is obstructing the auger. Pour
114
bag
of
pellets in
the
Hopper.
4. Set Feed
Rate
Control Switch to
low
or
medium-low setting.
5. Press auger Jog/Start switch (upper rocker
switch)
downward
to initiate 12 minute start
cycle. The
LED
lamp
will
now
appear orange
during this 12 minute period. This will bypass
the
low
temperature limit disc (snap switch) and
allow the
auger
to feed pellets to firepot at the
feed rate setting selected.
6.
Apply
nonvolatile lighting material to the pellets
and light
it
with
a match.
Let
the
fuel burn for
five minutes leaving the
door
slightly ajar.
7.
If
the stove
has
not
warmed
sufficiently after the
12 minutes
(LED
will revert
back
to red
glow-
earlier
models
glow
green) to keep auger
dropping pellets
(low
limit thermostat will not
have reached set temperature to close contacts
and complete the auger circuit), merely repress
rocker
switch
to
restart 12
minute
cycle.
During this
time
the
feed rate
should
become
automatic.
8.
Pressing Auger/Initiate switch upward will
manually engage auger.
This
can occur only
after start cycle is started
or
stove is at operating
temperature.
This
would be used to more
quickly get the
auger
to start pellets dropping
when hopper is refilled after running out
of
pellets.
8.
Set Fuel rate
switch
to desired
heat
output by
turning the
knob
clockwise. This will increase
the burn rate from low to
medium-low
to
medium-high to high.
9. Once ru1ming, observe the stove operating for
15-30
minutes.
1
0.
J\s
the stove temperature rises, the Room J\ir
Fan
will automatically be engaged.
11.
Once the stove is operating properly, complete
filling the
Hopper
and run the unit for 30
minutes.
Paint
Cure-In
Period
Your stove finish is a high temperature paint that
requires time and temperature for the silicon resin
in the paint to completely cure. Depending on your
use, this may take a few hours
or
a few days. The
paint manufacturer
recommends
you ventilate the
house during the initial burns.
Although
the
emission is primarily Carbon Dioxide, there are
other components emitted
which
make
it smell bad
and may irritate
some
people.
Do
not
place
anything on the
stove
surface until
the
paint is
completely cured, as it will
become
soft during this
process.
Do
not
attempt
to repaint the stove until
the paint is completely cured.
If
the surface later
becomes stained
or
marred, it
may
be
lightly
sanded and touched
up
with spray
paint
from the
same paint manufacturer:
Paint
is available at your
local dealer.
KEEP YOUR HOUSE
WELL
VENTILATED.
DURING
THE
CURING PROCESS.
THE
CHEMICAL
SMELL
AND BLUISH HAZE
EMITTED
BY
THE
CUIUNG PAINT CAN BE
QUITE
NOTICEABLE AND MAY SET OFF A
SMOKE DETECTOR.
Page 6