8
3. Getting started
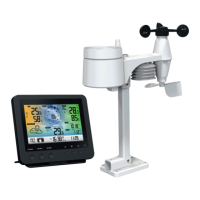
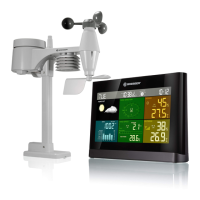
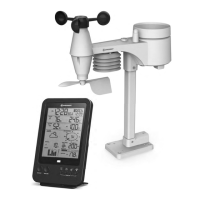
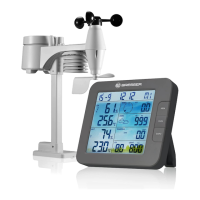
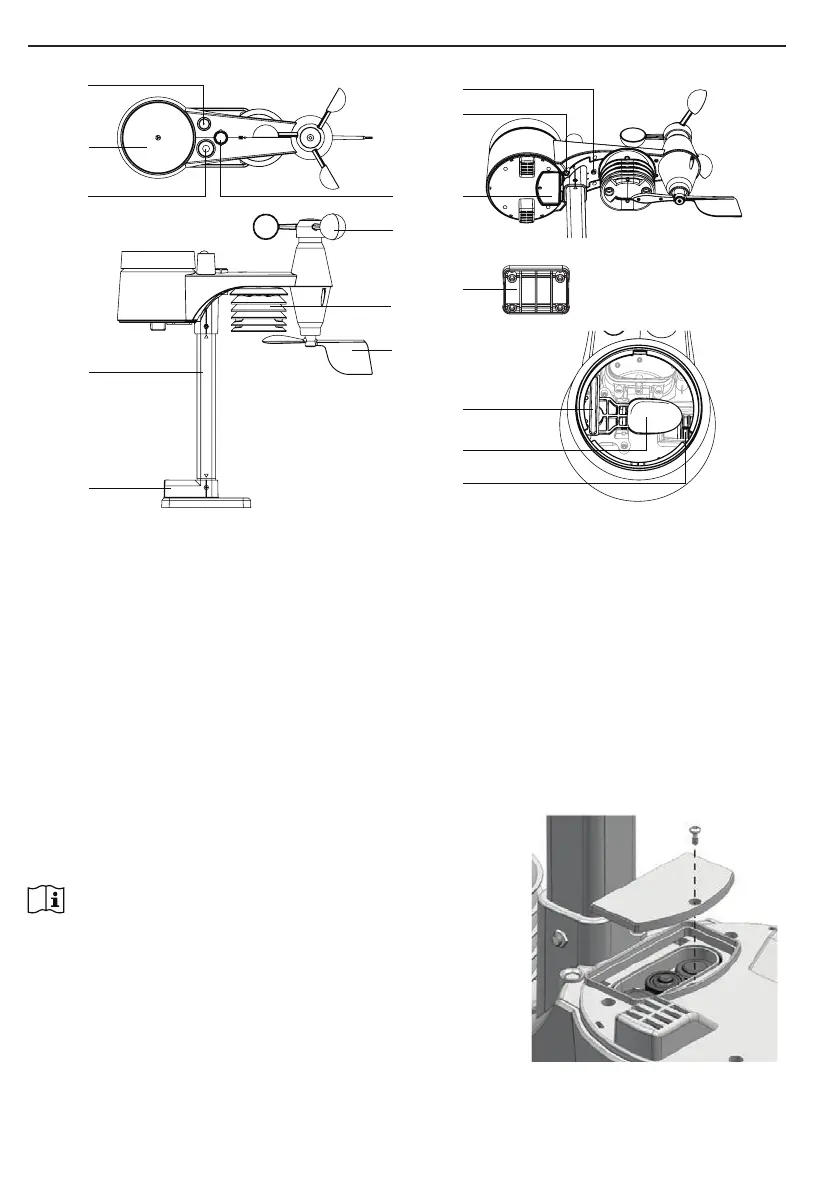
3.1 Wireless 7-in-1 sensor
2
3 6
1
4
5
7
9
8
12
13
14
11
15
16
10
1. Antenna
2. Rain collector
3. UVI / light sensor
4. Mounting pole
5. Mounting base
6. Balance indicator
7. Wind cups
8. Radiation shield
9. Wind vane
10. Red LED indicator
11. [ RESET ] key
12. Battery door
13. Mounting clamp
14. Rain sensor
15. Tipping bucket
16. Drain holes
3.2 Install Wireless 7-IN-1 sensor
Your wireless 7-IN-1 sensor measures wind speed, wind direction, rainfall, UV index, light
intensity, temperature and humidity for you. It’s fully assembled and calibrated for your easy
installation.
3.2.1 Battery and installation
Unscrew the battery door at bottom of unit and insert the
batteries according to the +/- polarity indicated.
Screw the battery door compartment on tightly.
Note:
- Ensure the water tight O-ring is properly aligned in place to ensure
water resistant.
- TheredLEDwillbeginashingevery12seconds.
 Loading...