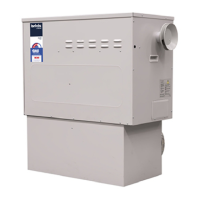
Rinnai 27 Ducted Gas Heater IM
9. COMMISSIONING AND CONTROL SETTINGS
All Brivis heaters have been factory tested. However, they should be commissioned and adjusted in accordance with
the following instructions to ensure efficient and optimal heating performance.
Remember:
• Switch the mains power OFF before touching any wiring
• All these steps must be carried out by a qualified tradesperson
• If the heater cannot be adjusted to operate in accordance with these instructions, then contact the Customer
Service Centre (contact details are on the back cover of this manual)
9.1 COMMISSIONING INSTRUCTIONS
With a correctly designed and installed ducted system, generally the balancing damper in an outlet register should
be initially set as follows:
• Living areas: 100% open
• Bedrooms: 50% open
• Bathrooms, ensuite & Laundry: 25% open
9.2 START & CHECK SUPPLY PRESSURE
1. Turn OFF the 240 Volt ac power supply at the xed switched socket outlet adjacent to the unit.
2. Ensure the gas cock adjacent to the heater is in the OFF position.
3. Locate gas valve inlet pressure test point, remove the grub screw and insert your test point tting (hose tail 1/8”
NPT).
4. Attach a manometer to the test point.
5. Ensure that all air has been purged from the gas piping and then turn ON the gas cock adjacent to the unit.
6. Turn on the 240 Volt ac power supply adjacent to the unit.
7. Go to the Thermostat, turn it ON and increase the temperature setting so that it calls for heat.
8. The unit will now attempt to ignite.
9. Once the ignition is successful allow the unit to run for one minute, ensuring the gas supply pressure does not
fall to below 1.1kPa while other gas appliances are operating at their full capacity.
10. If the reading is below 1.1kPa, then the incoming gas supply is inadequate (check supply pipe for blockage, and
check pipe sizing and gas meter sizing).
11. Turn the unit OFF at the thermostat, isolate the gas and the 240 Volt power supply adjacent to the unit.
12. Remove and replace test point with the grub screw.
If the unit does not ignite on the rst attempt it may be a result of all air not being purged from the
gas supply line. The heater will attempt to ignite up to ve times before locking out, after which
it will require a power reset.
If the heater does not attempt ignition at all:
• Check the Lighting Procedure again and if it still fails to light, by-pass the Thermostat by removing cables from
the terminal block at the unit and link (bridge) terminals "R" and "W". If it then lights, there is a fault with the
wires to the Thermostat or in the Thermostat itself. If it does not light, check the overheat switch has not tripped
or the 2 amp fuse has not blown.
9.3 START & CHECK BURNER PRESSURE
1. Repeat steps 1 to 7 in Section 9.2. For step 3 locate the burner pressure test point tted on the gas valve or the
burner manifold.
2. Take a manometer reading of the test point pressure and conrm it is equal to the gure shown on the appliance
data label. If the pressure reading is not correct, adjust the gas valve pressure regulator either up or down to
match the required test point pressure. If the pressure is lower than the required amount and cannot be adjusted
any higher, this indicates that the incoming supply pressure is not sucient (check supply pipe for blockage, and
check pipe and gas meter sizing).

 Loading...