Decorative Stitching 109
3
— — — — — — — — — — — — — — — — — — — — — — — — — — — — — — — — — — — — — — — — — — — — — — — — — — — —
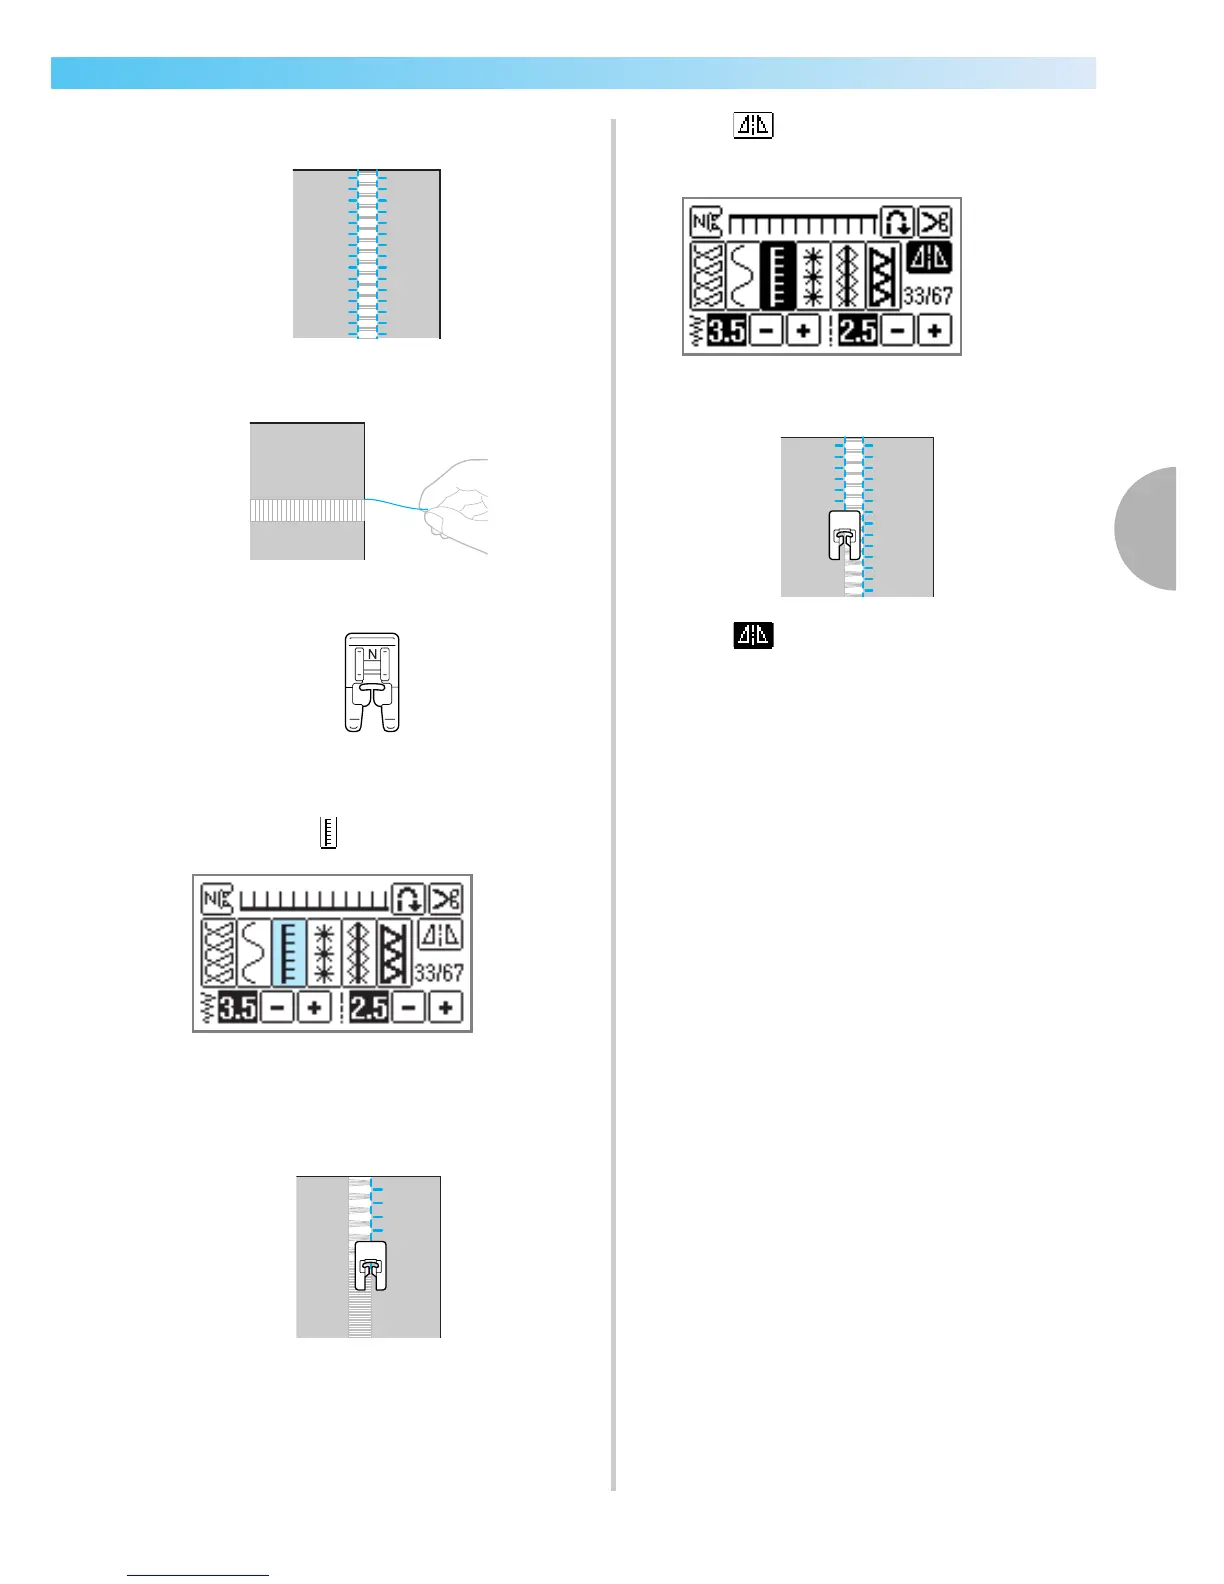
■ Drawnwork (Example 1)
a
Pull out several threads from the fabric.
b
Attach monogramming foot "N".
• For details, refer to "Replacing the presser
foot" (page 38).
c
Select stitch
33
.
• For details, refer to "Selecting stitching" (page
45).
d
With the right side of the fabric facing up, sew
along the right edge of the frayed section.
e
Press on the LCD.
X The pattern is flipped.
f
Sew along the other edge of the frayed section
so that it looks like the previous stitching.
g
Press , and set the horizontal mirror
image key back to OFF.
N
N



 To Next Page