Installing the Driver & Software
18
STEP2
Macintosh
®
USB
Macintosh
®
For USB Interface Users
For Mac OS
®
X 10.2.4 or greater
Important
Make sure that you have finished the
instructions from Step 1 Setting Up the
Machine on page 4-9.
Note
For Mac OS
®
X 10.2.0 to 10.2.3 users, upgrade to
Mac OS
®
X 10.2.4 or greater. (For the latest
information for Mac OS
®
X, visit
http://solutions.brother.com
)
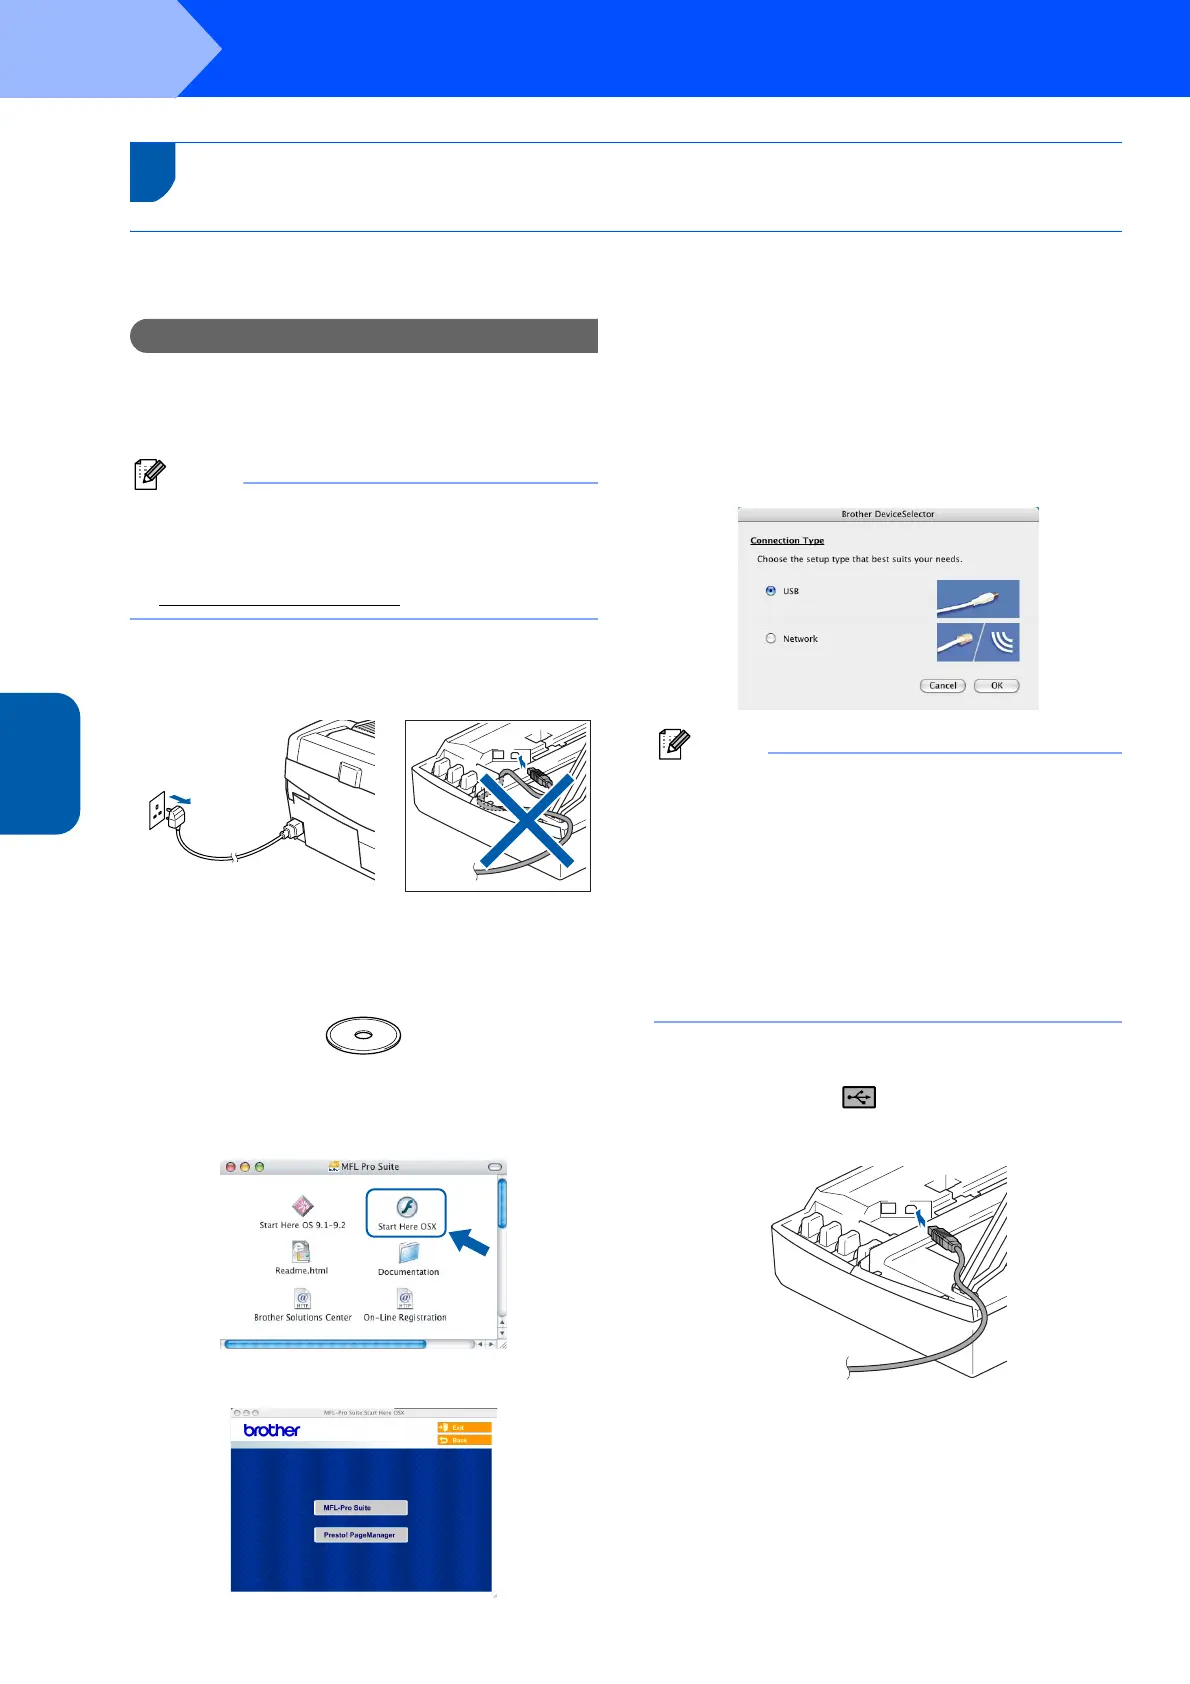
1 Disconnect the machine from the power socket
and from your computer, if you already
connected an interface cable.
2 Turn on your Macintosh
®
.
3 Put the supplied CD-ROM into your CD-ROM
drive.
4 Double-click the Start Here OSX icon to install
the drivers and MFL-Pro Suite. If the language
screen appears, choose your language.
5 Click MFL-Pro Suite to install.
6 Follow the on-screen instructions, and restart
your Macintosh
®
.
7 Lift the scanner cover to its open position.
8 After the DeviceSelector window appears
connect the USB interface cable to your
Macintosh and then to the machine.
Note
The DeviceSelector window will not appear if you
have connected a USB interface cable to the
machine before restarting your Macintosh
®
or if
you are overwriting a previously installed version
of the Brother Software. If you encounter this
problem continue with the installation but skip 13.
You should choose your Brother machine from the
Model pop-up menu in the main screen of
ControlCenter2. For details, see the Software
User's Guide on CD-ROM.
9 Connect the USB cable to the USB socket
marked with a symbol. You will find the
USB socket above and to the left of the ink
cartridge slots, as shown below.

 Loading...