3-74
Confidential
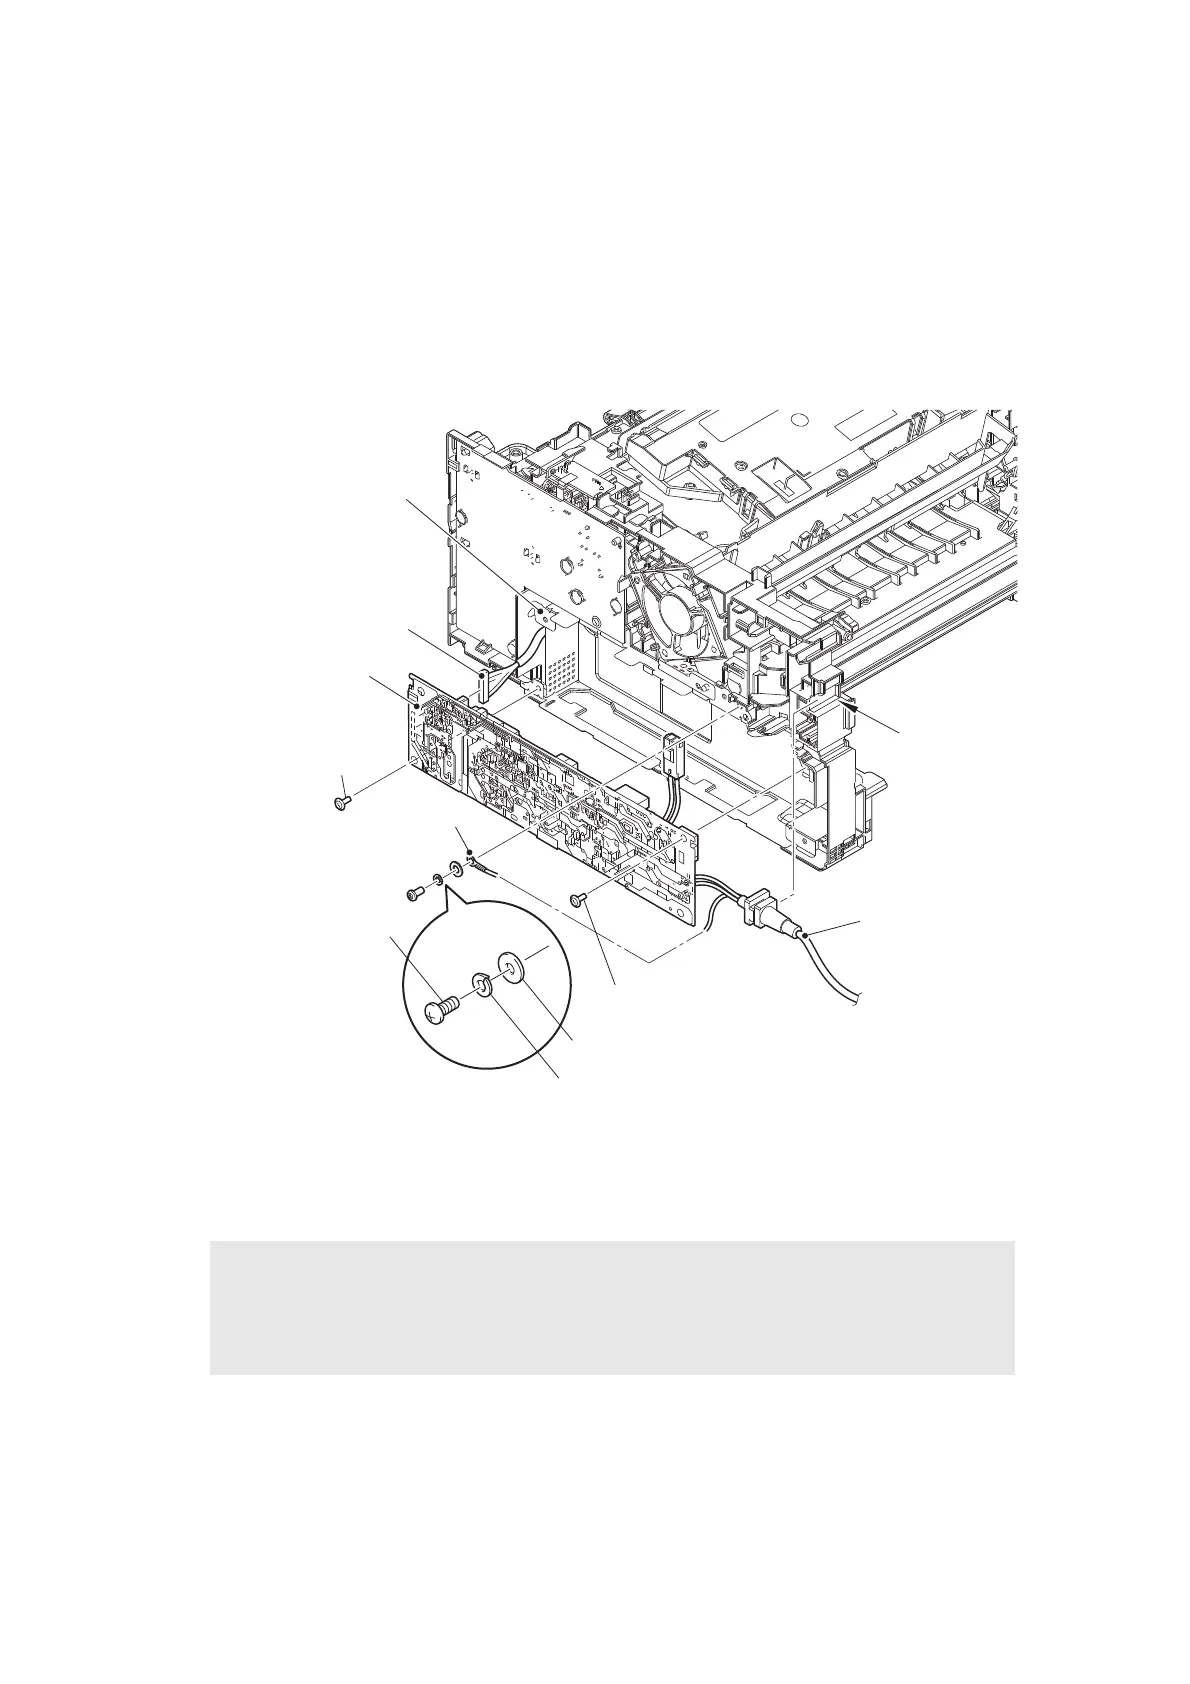
(2) Remove the Screw pan M4x8 screw, the Washer spring 2-4, and the Washer 5, and
remove the Ground harness from the LVPS shield plate.
(3) Release the Ground harness from the securing fixtures.
(4) Remove the Power cord from the Mounting position and release it from the securing
fixtures.
(5) Remove the two Screw cup M3x8 (black) screws to remove the Low-voltage power supply
PCB ASSY. Disconnect the LVPS harness from the back of the Low-voltage power supply
PCB ASSY.
Fig. 3-69
Harness routing: Refer to “8. Rear side of the machine”.
Assembling Note:
• After the replacement, refer to “2. IF YOU REPLACE THE LOW-VOLTAGE POWER
SUPPLY PCB ASSY” in Chapter 4 to reset irregular power supply detection counter of
the Low-voltage power supply PCB ASSY.
LVPS shield plate
LVPS harness
Low-voltage power
supply PCB ASSY
Screw cup M3x8 (black)
Power cord
Ground harness
Mounting position
<Back side>
Screw pan M4x8
Washer spring 2-4
Washer 5
Screw cup M3x8 (black)
 Loading...