3-94
Confidential
Fig. 3-93
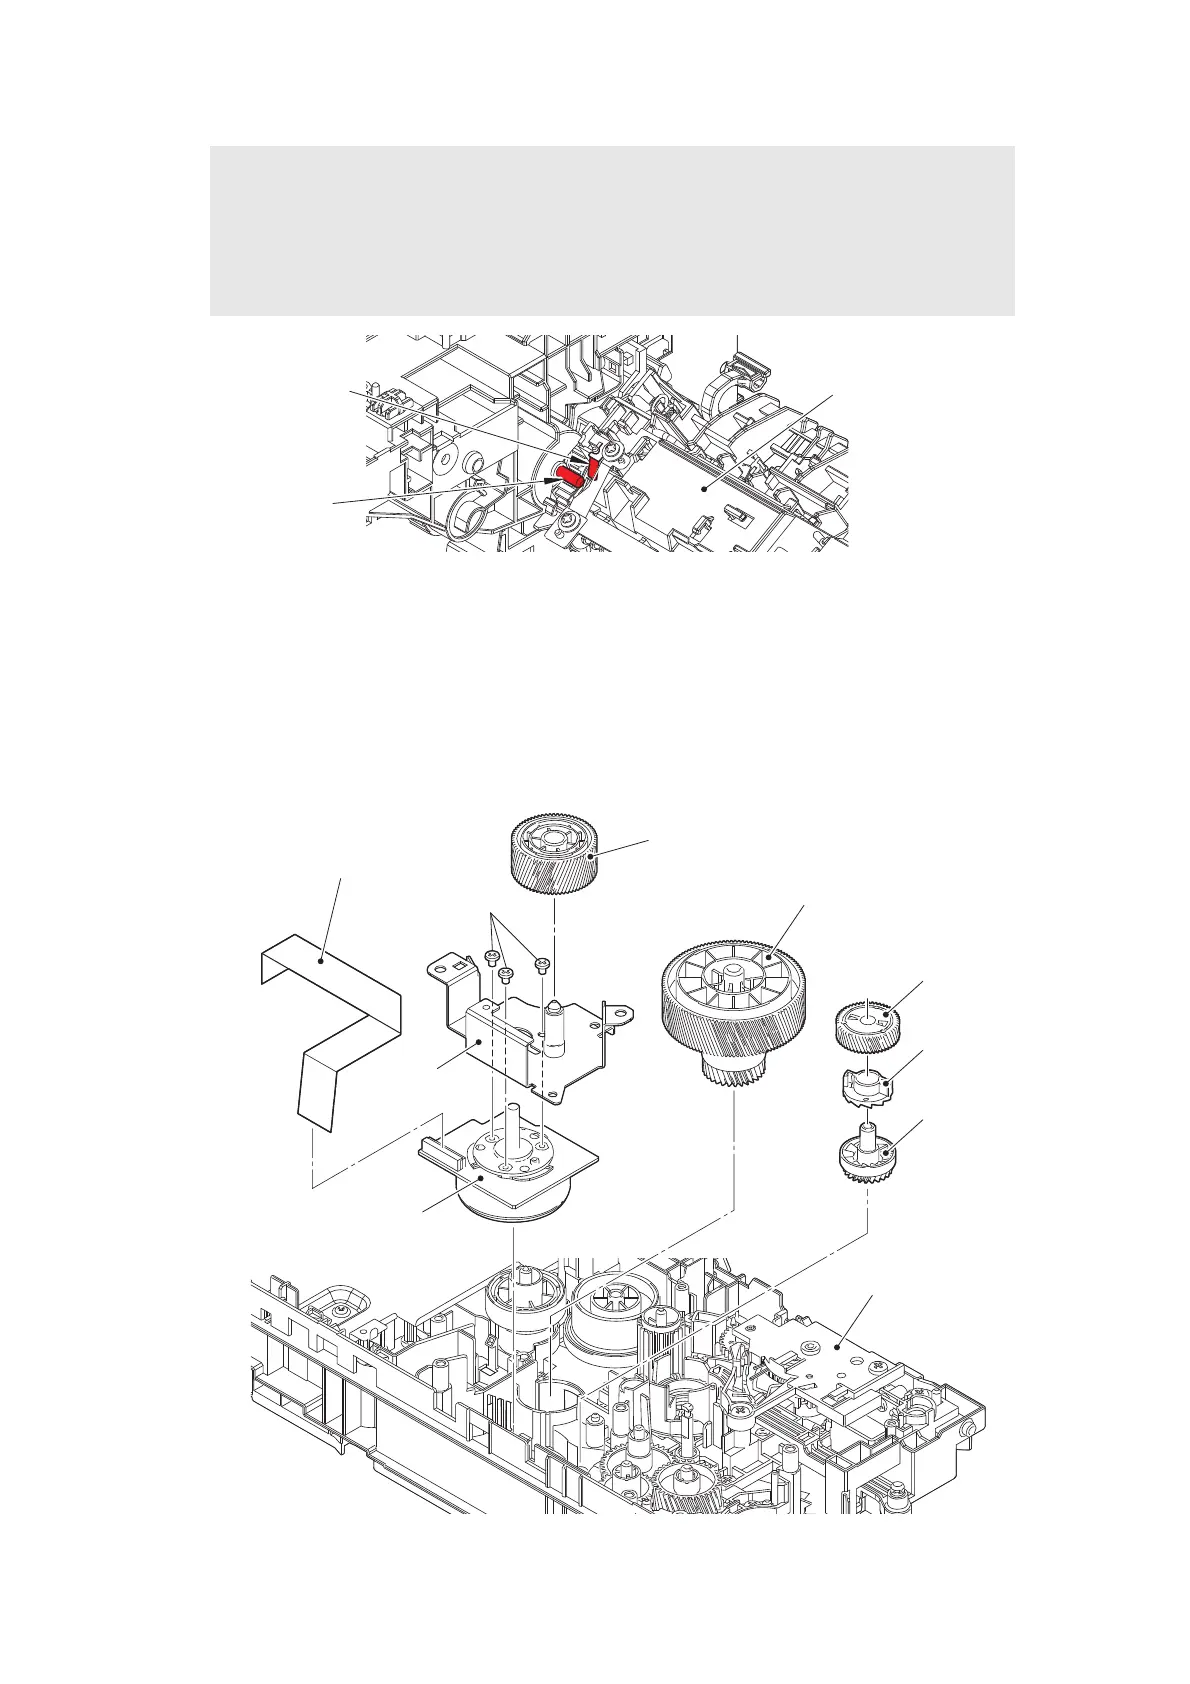
(5) Remove the Gear115L 30L drum, the Gear 50L PF, the Clutch PF, and the Gear 23R PF
from the Frame L unit.
(6) Remove the Gear 68R drum idle from the Motor plate ASSY, and remove the Motor plate
ASSY from the Frame L unit.
(7) Remove the three Screw bind M3x4 screws, and remove the Paper feed motor from the
Motor plate ASSY.
(8) Disconnect the Paper feed motor flat cable from the Paper feed motor.
Fig. 3-94
Assembling Note:
• If you removed the Motor drive sub ASSY while the Fuser unit was attached on the
machine, remove the Fuser unit once (refer to “9.18 Fuser unit”) and reattach it after
attaching the Motor drive sub ASSY.
The Conductive leaf spring of the Fuser unit may be deformed by the Calking shaft.
If they are not in contact properly, a ghost may occur in the printed image.
Fuser unit
Conductive leaf
spring
Calking shaft
Frame L unit
Screw bind M3x4
Gear 68R drum idle
Gear115L 30L drum
Gear 23R PF
Paper feed motor flat cable
Paper feed motor
Gear 50L PF
Clutch PF
Motor plate ASSY
 Loading...