Home > Scan > Scan Using the Scan Button on Your Brother Machine > Scan Multiple Business Cards and
Photos (Auto Crop)
Scan Multiple Business Cards and Photos (Auto Crop)
Related Models: MFC-J895DW
You can scan multiple documents placed on the scanner glass. The machine will scan each document and use
the Auto Crop feature to create separate files or a single multi-page file.
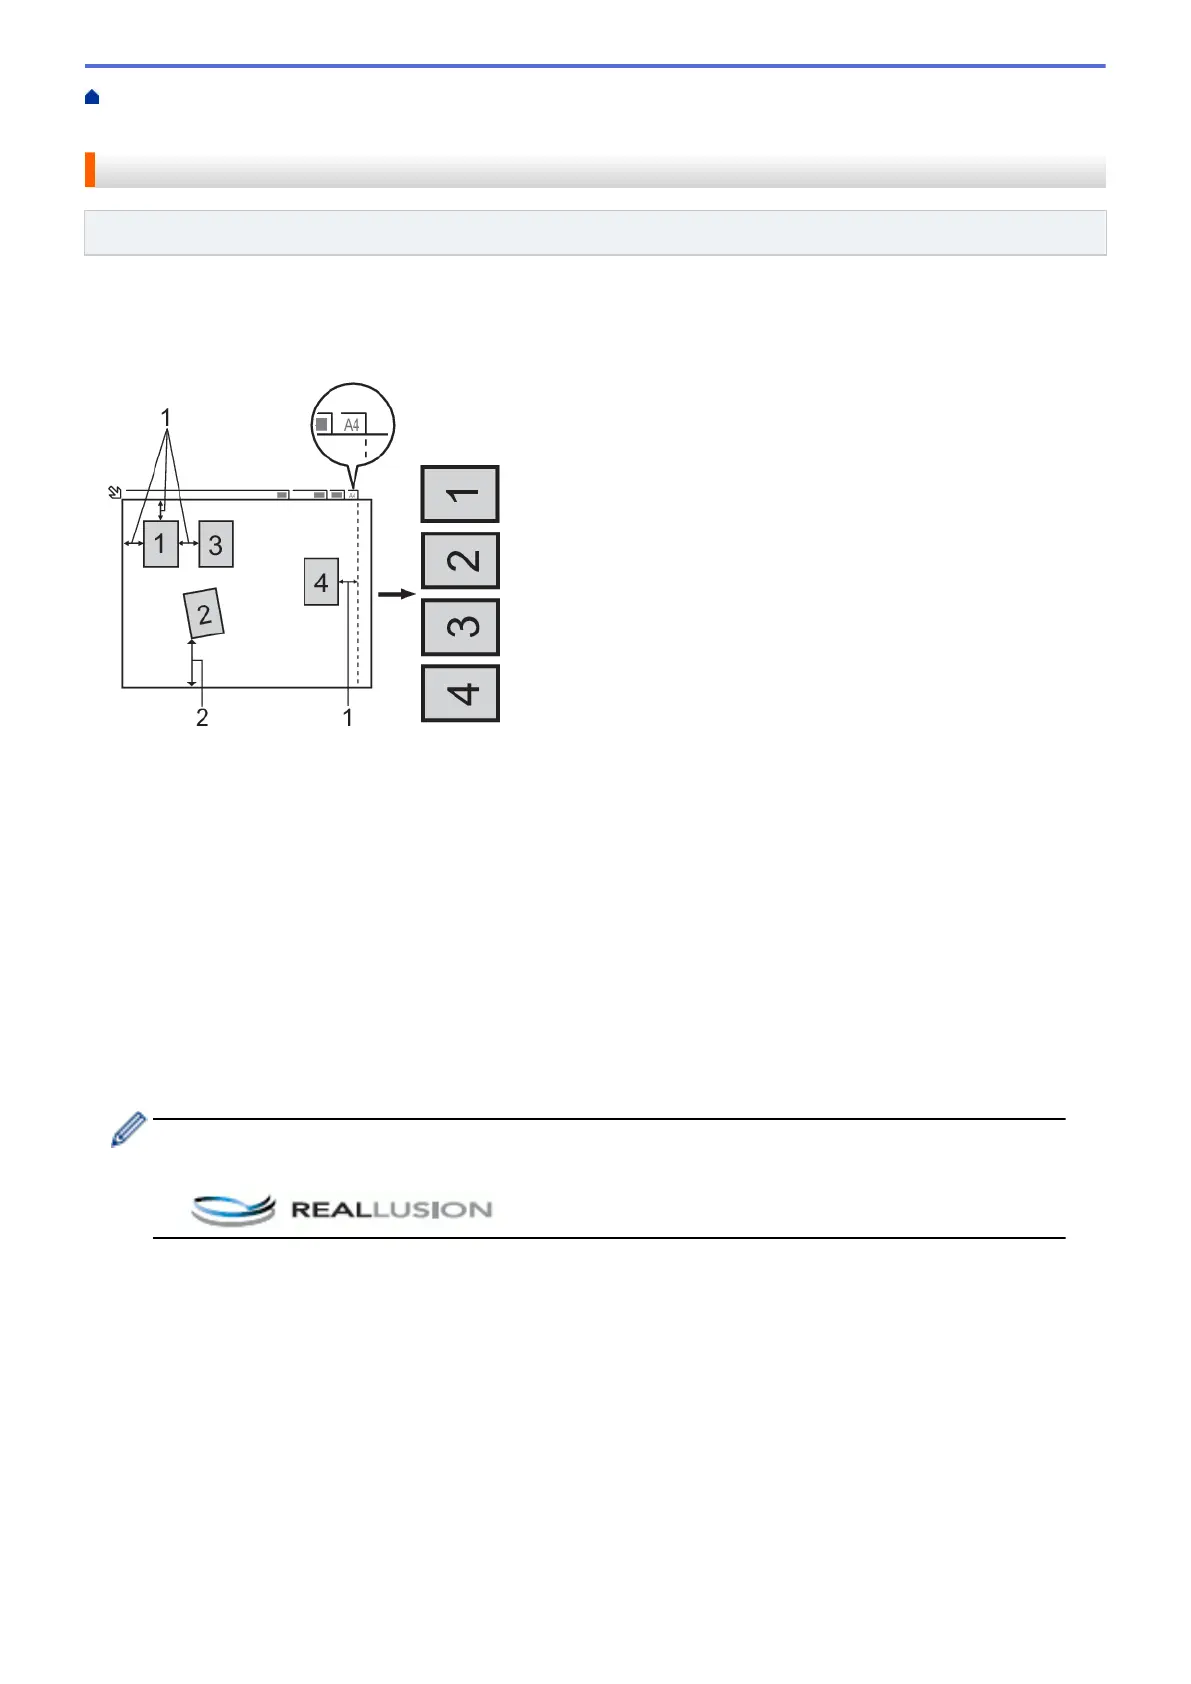
Guidelines for Auto Crop
1. 0.4 in. (10 mm) or greater
2. 0.8 in. (20 mm) or greater (bottom)
• This setting is available only for documents that are rectangular or square.
• If your document is too long or wide, this feature will not work as described here.
• You must place the documents away from the edges of the scanner glass as shown in the illustration.
• You must place the documents at least 0.4 in. (10 mm) away from each other.
• Auto Crop adjusts the skew of the document on the scanner glass; however, if your document is skewed
more than 45 degrees at less than 300 x 300 dpi or 10 degrees at 600 x 600 dpi, this feature will not work.
• The ADF must be empty to use Auto Crop. (ADF models only)
• The Auto Crop feature is available for a maximum of 16 documents, depending on the size of the documents.
1. Load documents on the scanner glass.
• To scan documents using the Auto Crop feature, you must put the documents on the scanner glass.
• The Auto Crop feature is supported by technology from Reallusion, Inc.
2. Open the machine's media slot cover.
3. Insert a memory card or USB flash drive into your machine.
The LCD screen automatically changes.
4. Press [Scan to Media] > [Options] > [Auto Crop].
5. Press [On].
6. Press [OK].
7. Press [Start].
The machine starts scanning. Follow the LCD instructions to complete the scanning job.
110

 Loading...