140
UTILITY STITCHES — — — — — — — — — — — — — — — — — — — — — — — — — — — — — — — — — — — — — — — — — — —
Entering the pattern data
Follow the pattern drawn on the grid sheet and
program the pattern into the sewing machine.
a
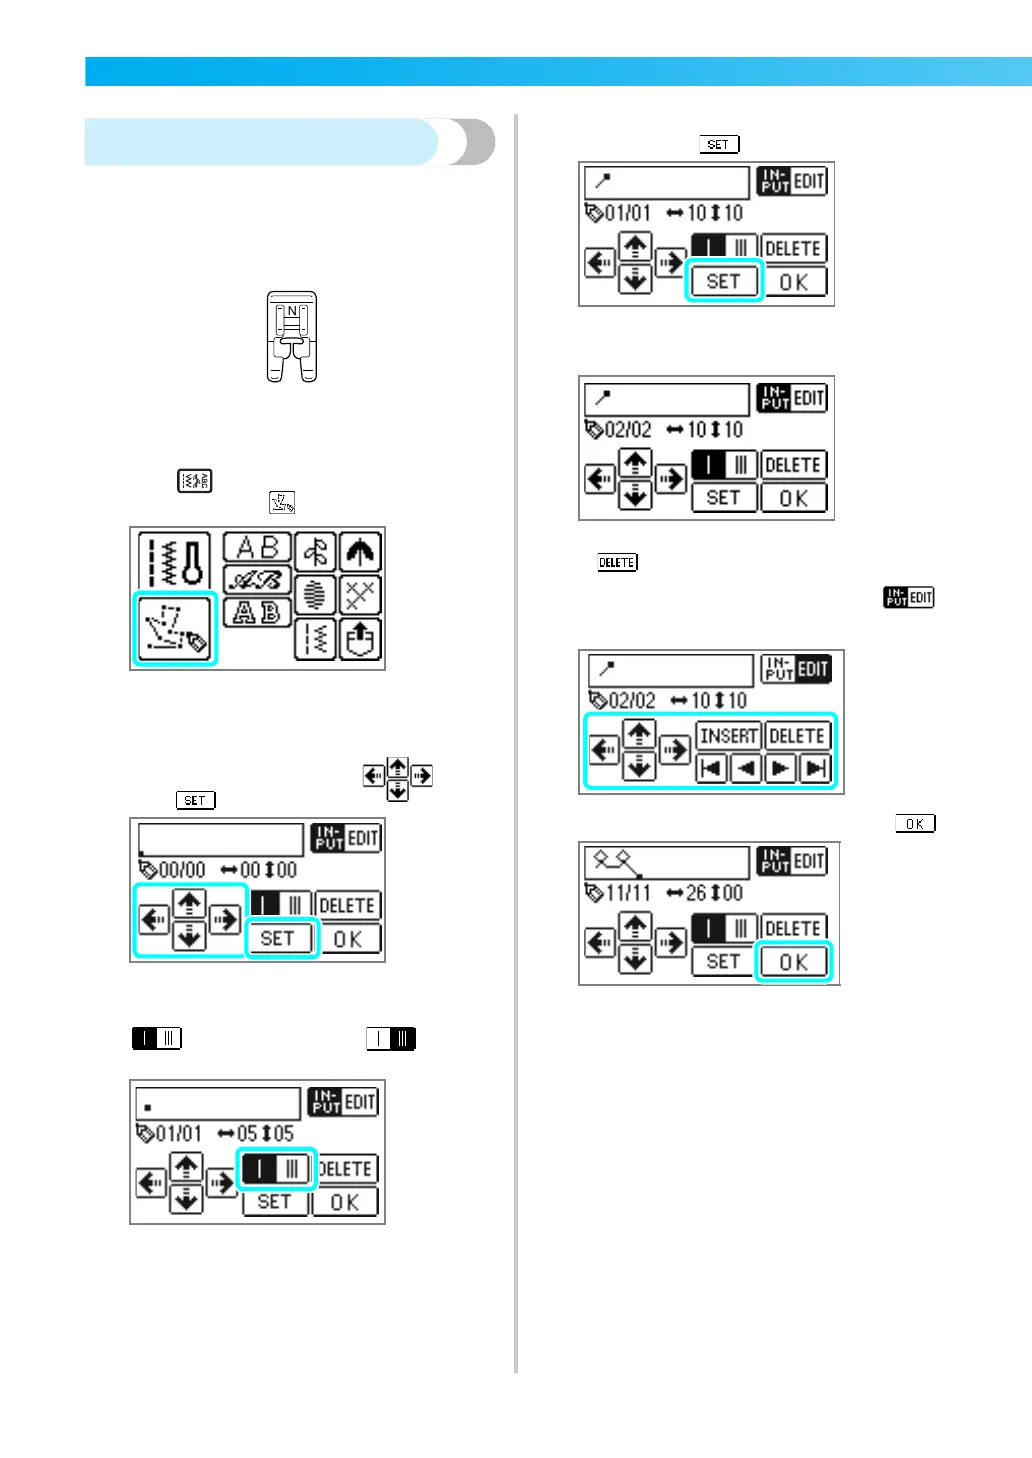
Attach monogramming foot “N”.
• For details, refer to “Replacing the presser
foot” (page 44).
b
Press (Utility stitch key) on the operation
panel, and select .
X The screen for entering a pattern appears.
c
Check the grid sheet set, and specify the
coordinates of the first point.
Specify the coordinates using , and
press .
d
Specify whether single stitching or triple
stitching will be sewn between the points.
is single stitching, and gives
triple stitching.
e
Specify the coordinates of the second point,
and then press .
f
Repeat steps d through e to specify each
point.
• If you make a mistake entering a point, press
, and the previous point is erased.
• To correct the content entered, press .
You can insert, delete and move points.
g
After all points have been entered, press .
X The sewing screen appears.