7
IMPORTANT! Be sure to save all of the shipping straps, brackets, and screws in case you
need to ship the tool to another facility in the future.
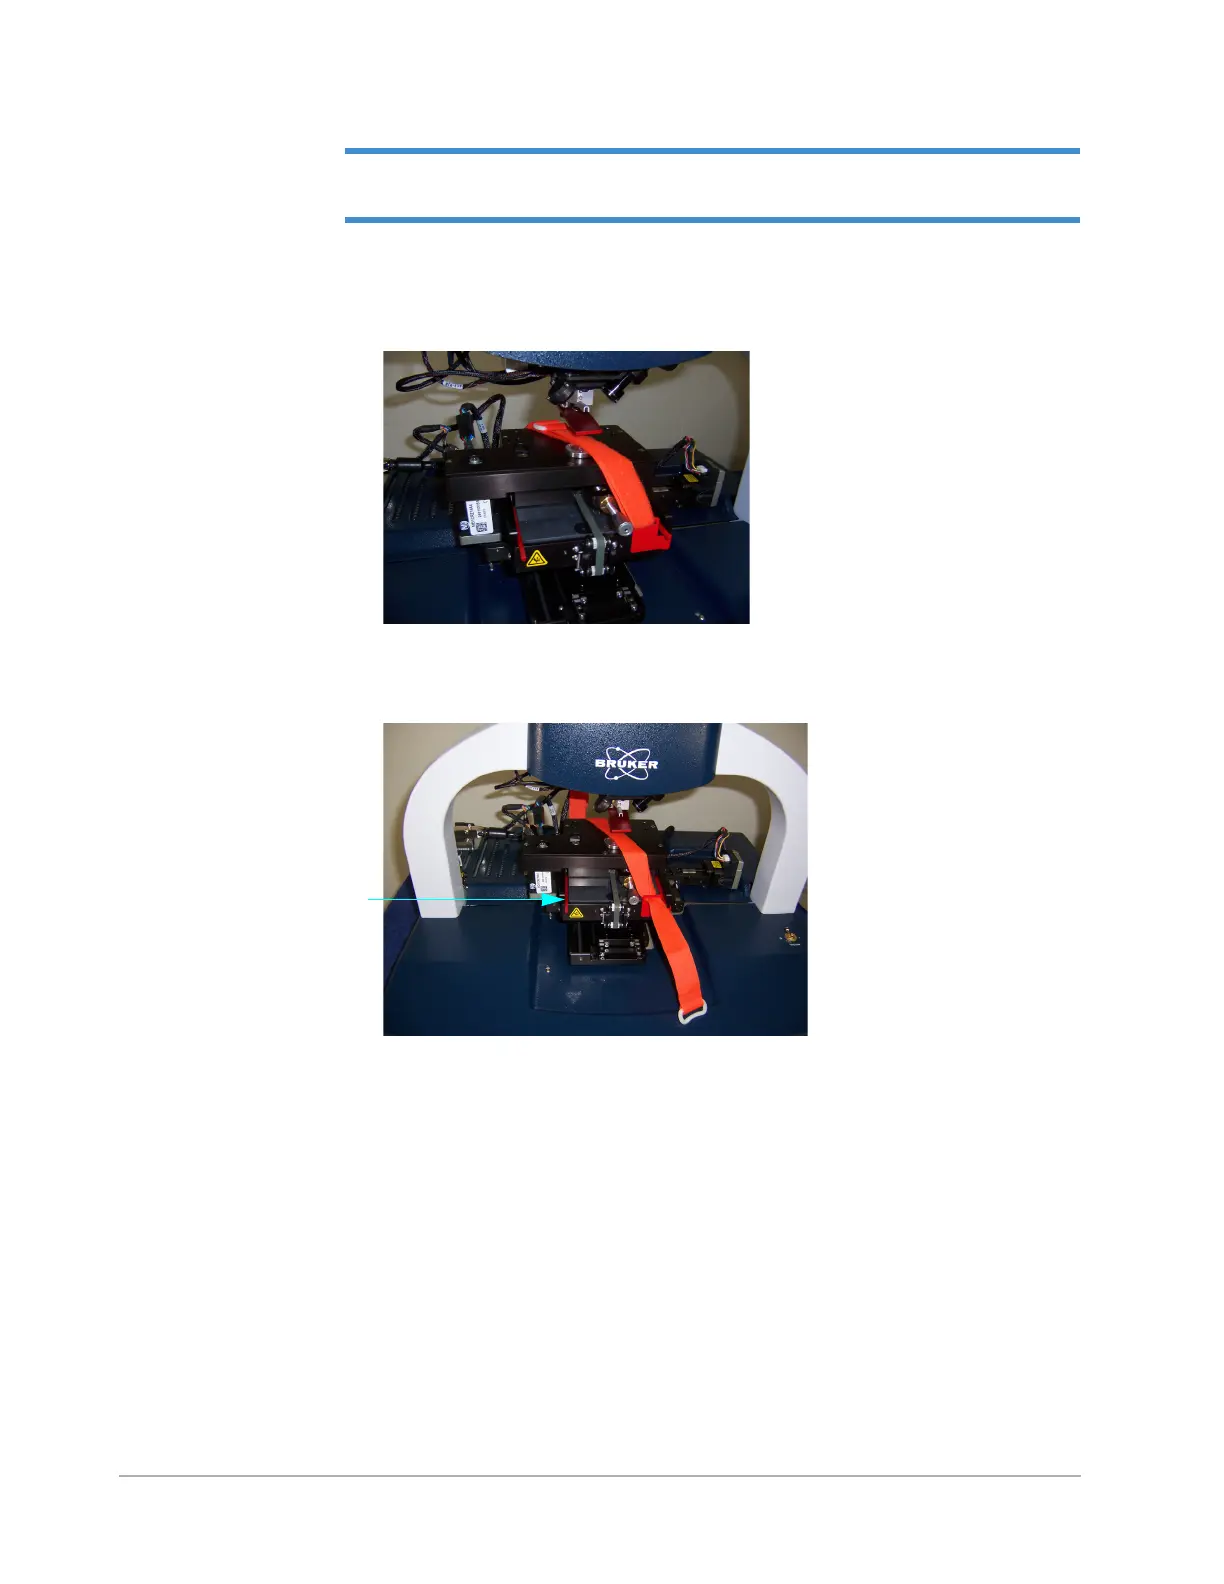
1 Loosen the orange Velcro shipping strap that is attached to the top of the stage. Then slide it out of the
slots in the two red shipping brackets and set it aside.
2 Remove the shipping bracket on the front of the stage by loosening the screw with a hex head wrench. The
wrenches are in the box that contains the computer documentation and cable (see the previous section).
3 Retighten the screw, since it is part of the stage assembly.
4 On top of the glass block, you will see two red plastic brackets (see the picture above). One is located on
the front, and the other is located at the side. Carefully slide these brackets out, allowing the stage to rest
on the glass block. Make sure you don't leave any fingerprints or other debris on the glass. If you see any
dust on it, use clean air to blow it off.
5 Go to the back of the tool, where you will see the rear shipping bracket and a cable with a small black
plastic cable clamp. Remove the screw from the bracket and set the bracket aside.
Red plastic bracket on top of
the glass block on the front
of the tool
 Loading...