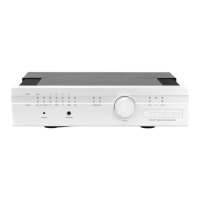
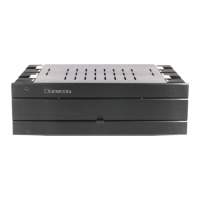
SP3 PREAMP / PROCESSOR
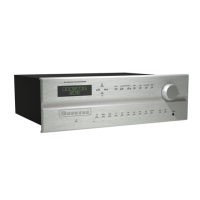
A: ALPHA NUMERIC DISPLAY
B: MENU NAVIGATION Buttons
C: FUNCTION & OPERATION Buttons
D: VOLUME CONTROL
E: HEADPHONE JACK
F: OUTPUT SELECT Buttons
G: INPUT SELECT Buttons
H: STANDBY Button
A: ALPHANUMERIC DISPLAY
This is a dot matrix display that can display graph-
ics as well as 4 lines of alpha-numeric characters.
The brightness of the display can be set in 4 steps
from 25% to 100% using the DISPLAY button (see
section “C” below). A default brightness level
can also be set in the SystemSetupmenu as can
the automatic time-out period (from 30 to 600
seconds).Whenthetimeoutperiodexpiresthe
display will extinguish automatically. To reawaken
the display press the currently illuminated Source
Select button (section “G” below). Pressing any
button or turning the rotary encoder (Volume
control knob) will also wake up the display but
will also effect a change (e.g. rotating the volume
control clockwise will increase the volume, etc.).
B: MENU NAVIGATION BUTTONS
This cluster of 4 buttons are used to navigate the
menus on the Alpha-numeric display. After the
unit has powered up a status screen is
displayed like that at the right. Press
the right arrow button () to enter the
main menu. Use the left arrow button
() to step back up through the menus. The up
() and down () buttons are used to move up
and down through the menu items. The rotary
encoder (volume control) can be used to set
most parameters, even on/off choices. The two
SurroundMode buttons can also be used to
choose from preset value options.
Up () and/or down () arrows may be dis-
played at the right hand side of the display to
indicate that more items are listed either above
and/or below the current screen. Use the up ()
and () down buttons to go to these items.
See also MENU MAP on page 8
C:
FUNCTIONS & OPERATIONS BUTTONS
DISPLAY
Selects display brightness in four steps: 25%,
50%,75%&100%.Tosetanautomatictimeout
for the display to extinguish, set the options n
the SYSTEM SETUP -> MISC. menu. Choosing
DISP+LED TOUT instead of DISP TIMEOUT will
apply the display timeout value to all front panel
indicator LEDs as well as the dot-matrix display.
Once a value for DISP+LED TOUT has been set
the front panel DISPLAY button will also facilitate
extinguishing all LEDs plus the dot-matrix display.
SURROUND MODE
TheseLeft&rightSurroundMode( &) but-
tons allow for selection of up to 8 different sur-
round modes including: PLIIx-Music, PLIIx-Movie
, Neo-6 Music, Neo-6 Cinema, PLIIx-Natural, Pro
Logic, Club , Party, Stereo-7. These modes derive
surround modes from stereo (2 channel) analog
DVD inputs. If a 5.1 surround signal is selected as
the input, some surround modes can derive the
7.1 format Back channels from the left and right
surround channels. These buttons can also be
used to select values in the menu system.
See Appendix for more information about the
various surround modes.
DIGITAL
Sets the source select button (G) to select from 1
of the 4 SPDIF inputs (RCA [phono] jacks, one of
two AES
HDMI
Sets the source select buttons (G) to select one
of 8 HDMI inputs. The audio content will be
processed through the SP3’s DSP but the video
content will simply be passed through to the two
(parallel) HDMI outputs.
FRONT PANEL
 Loading...
