iValve Lift Control Valve 6 Installation and commissioning
19/32
300-I-9010544-EN-01/10.2014
6.2.2 Electrical installation
DANGER!
Dangerous voltage
Leads to death or serious injuries.
Before starting electrical installation works, disconnect all power
to the control cabinet.
1. Check whether the 24VDC output of the lift control meets the
requirements of the iCon (see Planning Information 9010542)
When the 24VDC output of the lift control meets the requirements of
the iCon:
2. Execute the cabling acc. to the diagram (see Planning Information
300-D-9010452)
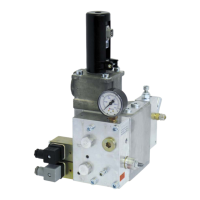
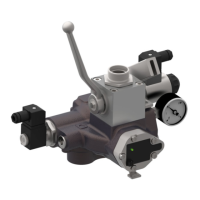
I Plug the grey connector (B) onto the solenoid UP/DOWN,
plug the black connector (A) onto the solenoid UCM/A3
When the 24VDC output of the lift control does NOT meet the require
ments of the iCon:
3. Install the optionally available power supply unit and execute the
wiring acc. to the diagram (see Planning Information
300-D-9010452)
I Plug the grey connector (B) onto the solenoid UP/DOWN,
plug the black connector (A) onto the solenoid UCM/A3
ATTENTION!
Unexpected behaviour of the lift
Air in the iValve can cause unexpected behaviour of the lift such
as
- severe starting jolt UP
- no start DOWN
Make sure that the connections between the iValve and the tube
to the pump(P) as well as the hoses to the tank(T, HP) are tight
and that there will be no venting and hence draining of the tube
or of the hoses.
6.2.3 Installation of the ParamCard
The ParamCard is a memory card which stores installation specific para
meters and data. The ParamCard is plugged onto the iCon. There is no
travel without ParamCard.
If the iCon needs to be replaced the ParamCard will be pulled off the old
iCon and plugged onto the new iCon. Hence all installation specific pa
rameters and data will be available to the new iCon from the first travel
on.
B
A
Reference: 300-I-9010544-EN-01
 Loading...