6
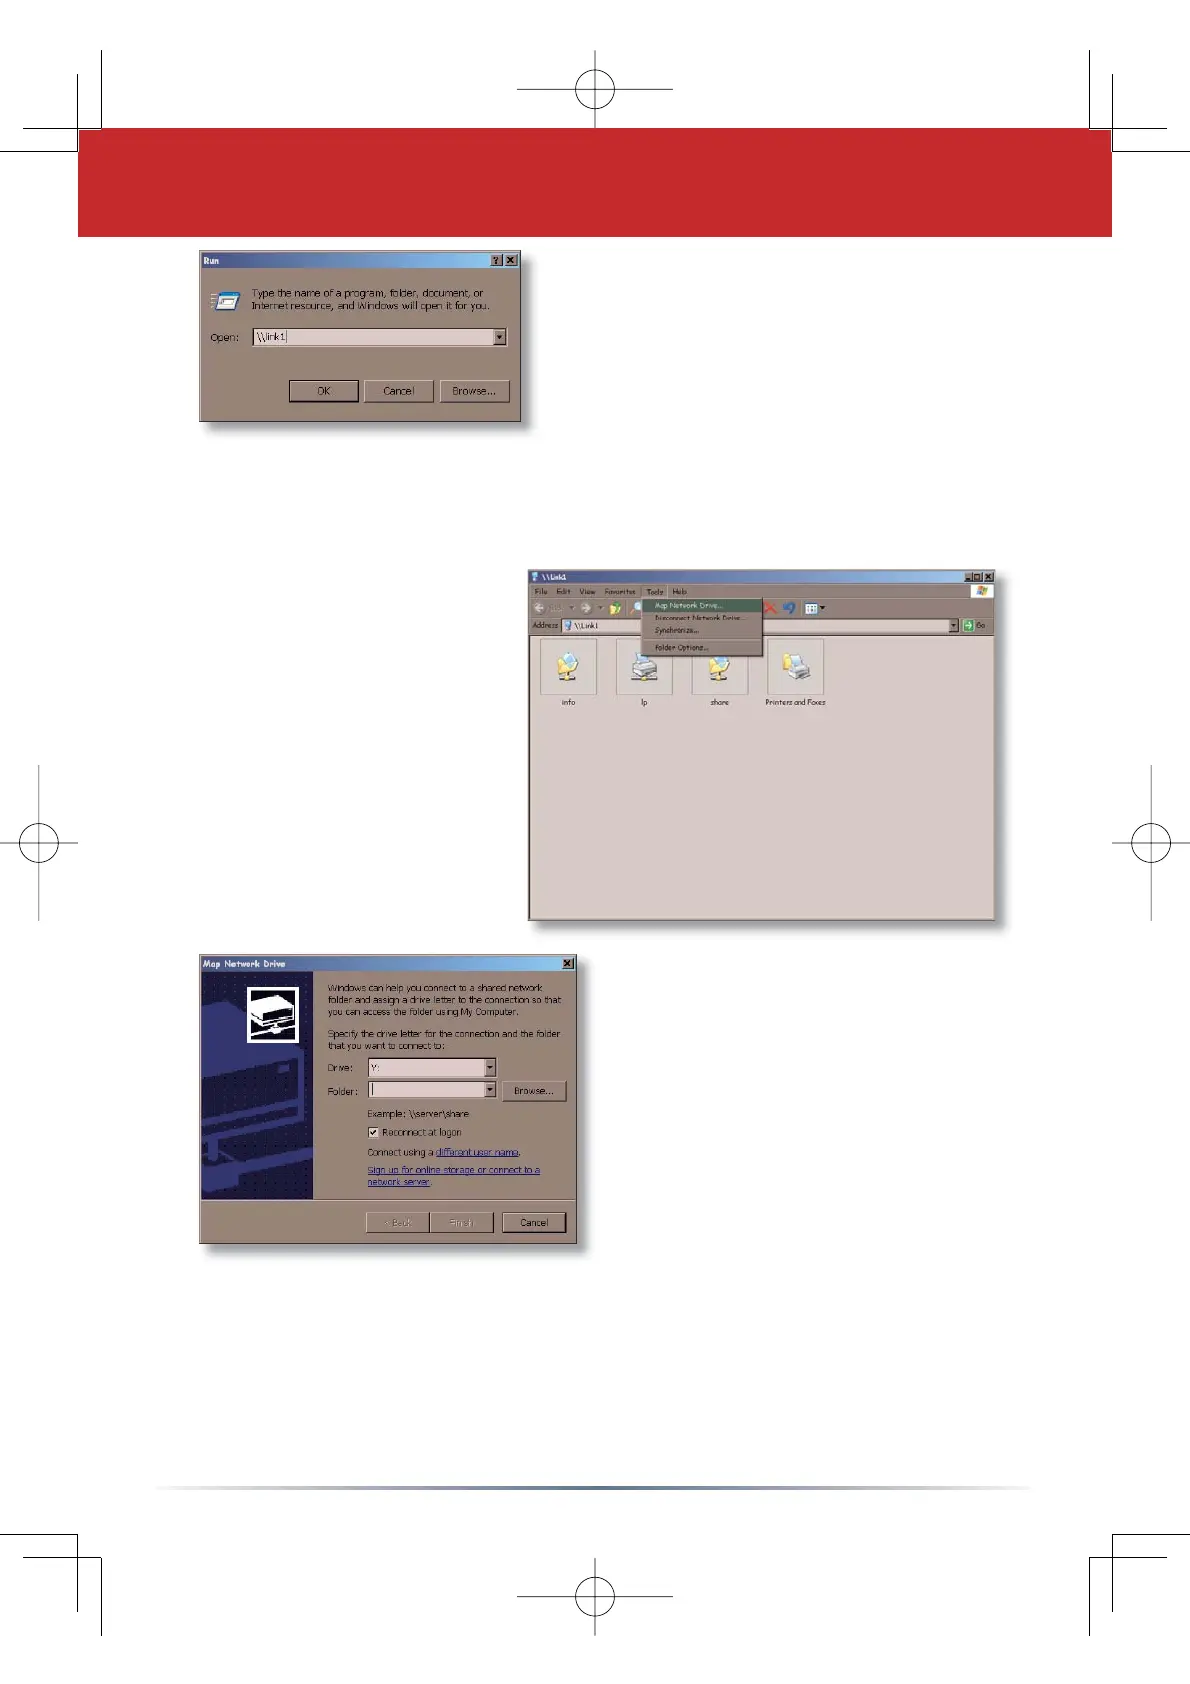
To access your TeraStation’s data, it’s
convenient to have the TeraStation’s
shared folder(s) (folders you can store
data in) mapped to a drive letter. Begin
by clicking
Start and then Run.... In
the Run dialog box, type
\\TeraStation_
Name
where TeraStation_Name is the
friendly, easy-to-remember name that you entered into the
TeraStation
Hostname
¿HOGRQ3DJH3UHVVOK to continue. If you cannot access
WKH7HUD6WDWLRQSOHDVHGLVDEOHRUUHFRQ¿JXUH\RXUVRIWZDUH¿UHZDOOV
TeraStation’s root
directory will appear.
You’ll see all of the
FRQÀJXUHGVKDUHG
folders, including
share,
WKHSUHFRQÀJXUHG
shared folder that we’re
going to map a drive
letter to. From the pull-
down menu, click
Tools,
and then
Map Network
Drive
.
Select the drive letter you
want to map
share to from the
Drive: list box. In the Folder:
ÀHOGHQWHU
\\TeraStation_Name\share,
where TeraStation_Name is
the friendly, easy-to-remember
name you gave your TeraStation
on Page 5. If you set up other
shares on your TeraStation, you
may map them by substituting
their share name for “share” in the
Folder:ÀHOG<RXFDQDOVR
browse for a shared folder by pressing the
Browse button and
searching through the
Entire Network and then the Microsoft
Windows Network
. Check the Reconnect at logon checkbox to
have Windows connect to your mapped drive every time it starts.
:KHQÀQLVKHGSUHVVWKH
Finish button.
Step 6: Map a Driveletter to your Share