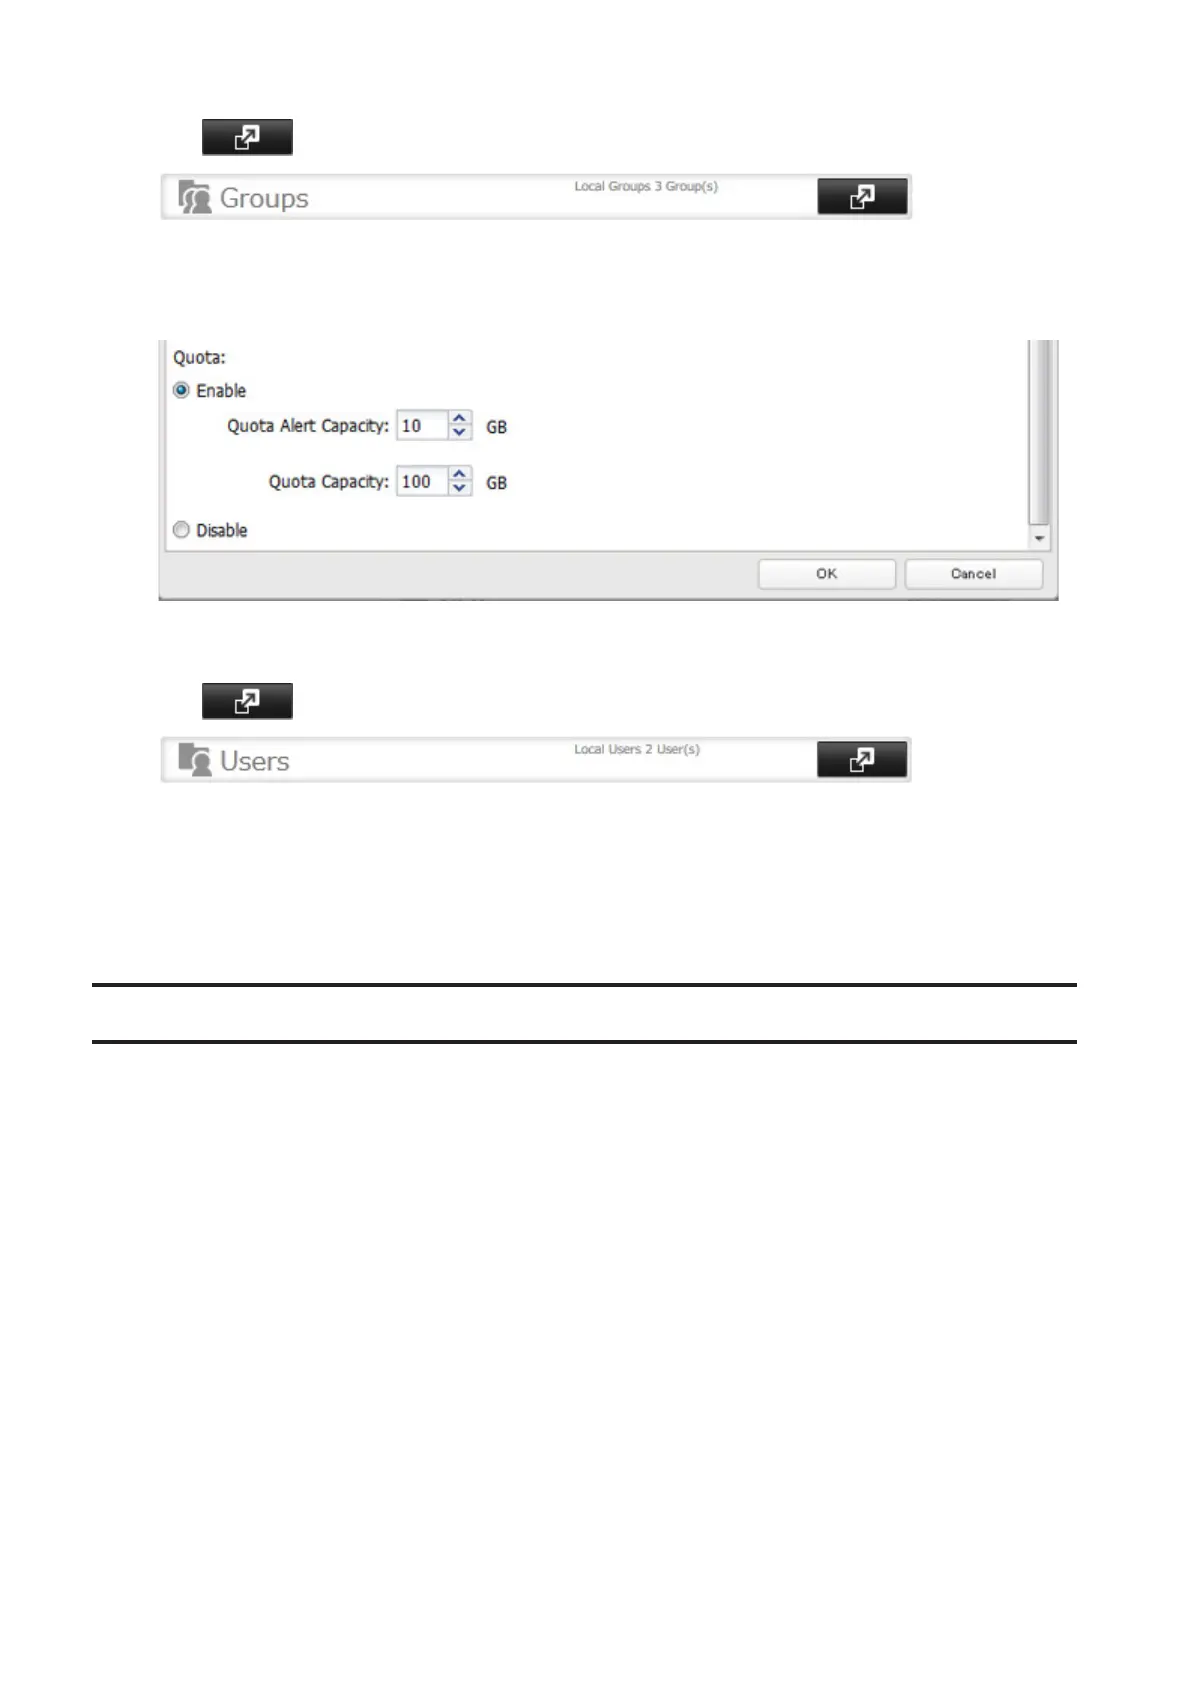
2 Click to the right of "Groups".
3 Select the group whose space will be limited.
4 Enable quotas, choose the maximum space the group is allowed, and click OK.
5 Click Close.
6 Click to the right of "Users".
7 Select the user who will inherit the group quota settings.
8 Change the user's primary group to the group with the quota, then click OK.
9 Click OK.
Hard Drive Replacement
If a drive fails, NAS Navigator2 and Settings will show an error message. Follow the instructions below to replace a
failed drive with a new drive and rebuild the RAID array.
Replacing the hard drive will require the following 2-step procedure:
• Step 1 - Replace the failed drive with a new drive.
• Step 2 - Rebuild the RAID array.
Notes:
• Do not unplug a running drive. Dismount it first or shut down the TeraStation before swapping a working drive. If
you remove the drive without properly dismounting it, data may be lost or the TeraStation may malfunction.
• For the replacement drive, use a Buffalo OP-HDBST series drive for TS1200D and TS1400D, and a OP-HDS series
drive for TS1400R. The new drive should be the same size (if using RMM) or larger. If a larger drive is used, the
extra space will not be usable in a RAID array.
• Because TS1000 series TeraStations do not support media cartridges, you cannot connect hard drives that were
used as media cartridges in another TeraStation.
• If sending a defective drive to Buffalo for replacement, please keep the cartridge as Buffalo will only replace the
hard drive and not the cartridge.
47