For Linux:
mount -t nfs 192.168.11.10:/mnt/array1/share /mnt/nas
For Windows Service for Unix 3.5:
mount 192.168.11.10:/mnt/array1/share z:
For Solaris 10:
mount -F nfs 192.168.11.10:/mnt/array1/share /mnt/nas
Notes:
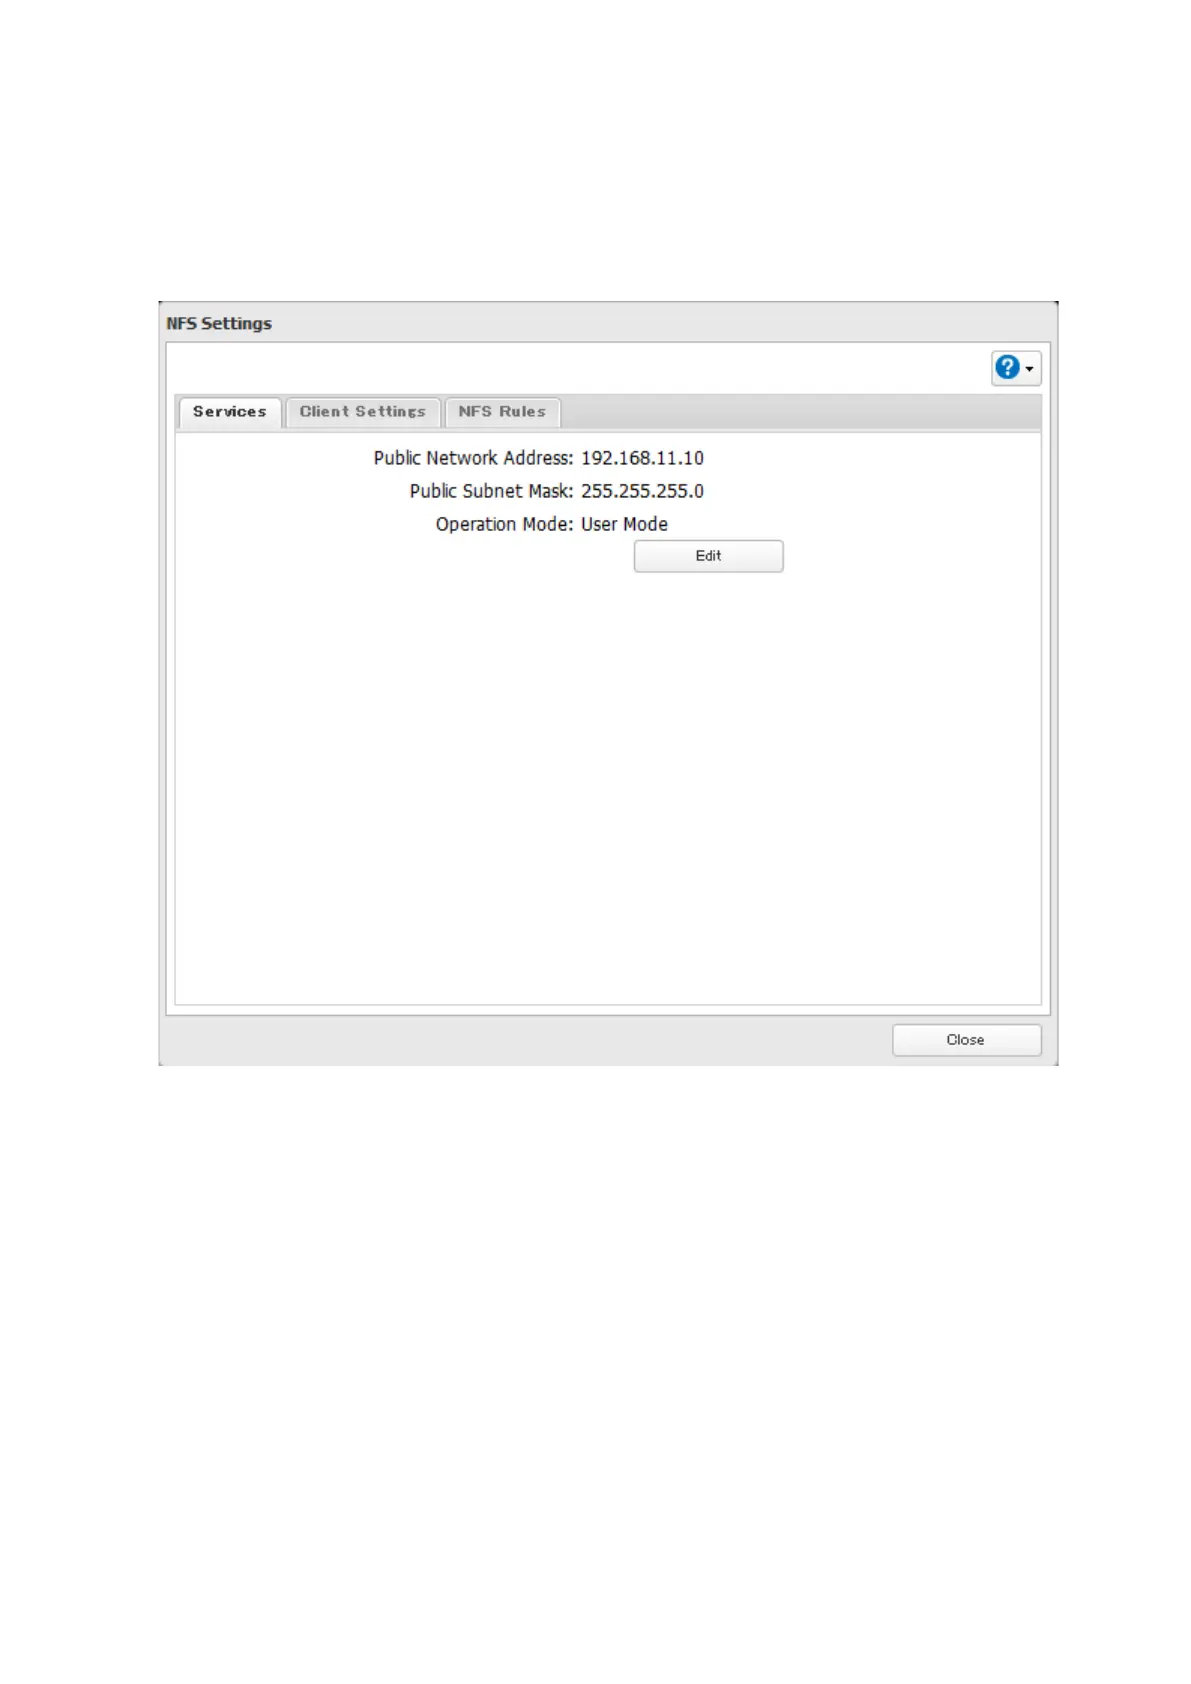
• To restrict NFS access to a specific network or client, navigate to File Sharing - NFS - Services and click Edit. Enter
the address of the network. For example, if your local network subnet has a router at 192.168.1.1 and clients
with IP addresses in the range from 192.168.1.2 through 192.168.1.48 with subnet mask 255.255.255.0, then the
"Public Network Address" would be 192.168.1.0 and the "Public Subnet Mask" would be 255.255.255.0. This would
mean that only clients on this local network would be able to access the NFS share. If the default settings are used
(0.0.0.0 for both the public network address and the public subnet mask), then access to the NFS share will not be
restricted.
• To use NFS folders with VMware ESX/ESXi or Citrix, navigate to Services - Edit and change the operation mode
from "User Mode" to "Kernel Mode".
• Async is the default for NFS rules. Sync is available only when the device is in kernel mode.
• To restrict access to a NFS share for specific clients, navigate to File Sharing - NFS - NFS Rules and click Add Rule.
Choose the folder to restrict access to, and enter the clients that will have restricted access in the "Hosts" field.
Clients may be entered by hostname, IP address, or IP address range. Wildcards are supported. Separate multiple
94