39
5) AssemblyofHeatFabSaf-TVentEZSeal:
a) Saf-TVentGeneralNotes:
• TheseinstructionscovertheinstallationofSaf-TVentEZSeal.Saf-TVentEZSealpipinghasintegralgaskets
installedinthefemaleendsofthepipewhichsealthejoints.
• Ingeneral,Saf-TVentpipesectionsmaynotbecut.ExceptionstothisaretheSaf-TVentslipconnectorand
connectionstotheboilerventcollar.Inthesecases,useasharppairofaviationsnips,anabrasivecut-off,ora
plasmacutter.SeetheSaf-TVentinstructionsforinformationoncuttingtheslipconnector.
• OrientSaf-TVentcomponentssothatthearrowsonthepipinglabelsareinthedirectionofuegasow.
• Supporthorizontalpipingsectionsatintervalsof6feetorless.
• VerticalventingsystemsmustbesupportedbyatleastoneHeatFabsupport.Anadditionalverticalsupportis
requiredafteranyoffset.
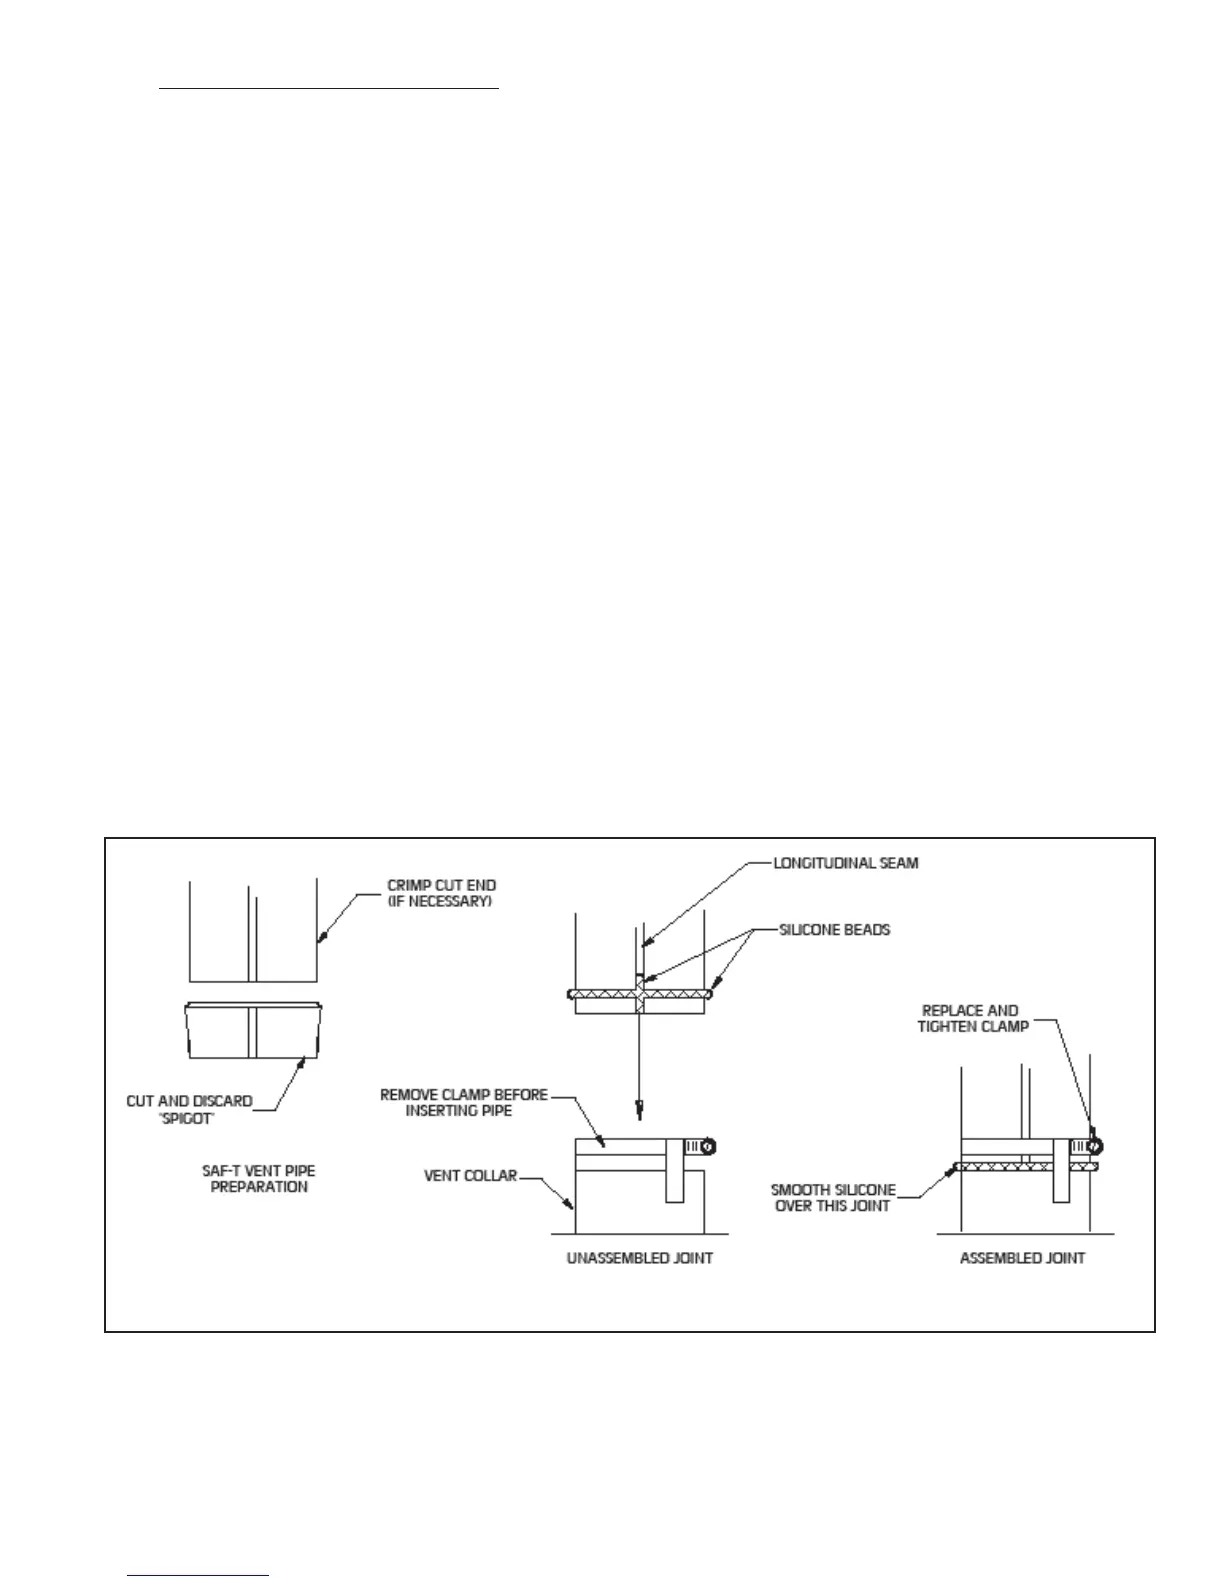
b)ConnectiontoBoiler–Startassemblyoftheventsystemattheboiler.RemovethehoseclampshippedontheFCM
ventcollar.Bendthethreehoseclamptabsonthiscollaroutwardslightly.Cutthe“malespigot”offoftherstpiece
ofpipe(Figure7.49).Ifnecessary,crimpthecutendofthepipesothatitcanbeinsertedatleast1”intothecollar.
Cleantheexteriorofthemaleendoftherstpieceofpipeandtheinsideoftheventcollarontheboilerwithan
alcoholpad.Onthemaleendofthepipe,applya¼”widebeadofhightemperaturesiliconeapproximately½inch
fromthemaleendofthepipe.Alsoapplya¼”beadofsiliconealongtherst2½”ofthelongitudinalweld.Insert
themaleendofthepipeintotheboilerventcollaruntilitbottomsout.Applyanadditionalbeadofsiliconeoverthe
outsideofthejointandsmoothout(Figure7.49).Replaceandtightentheclampontheventcollar.
c)AssemblyofSaf-TVentEZSealVentComponents-Cleanthemaleendofthenextpieceofpipewithanalcohol
padandmakesurethatitisfreeofburrs.Checkthefemaleendoftherstpieceofpipetomakesurethatthegasket
isinplaceandisundamaged.Usingaslighttwistingmotion,insertthemaleendofthesecondttingintothefemale
endofthersttting,takingcarenottodislodgeorcutthefactorygasket.Inextremelyaridconditions,itmaybe
easiertoassemblethesettingsifthegasketismoistenedwithwaterpriortoassembly.Bendthelockingtabsoverthe
lockingringontheadjacentpieceofpipe.RepeatthesestepsfortheremainingSaf-T-Ventcomponents.
FIGURE 7.49: SAF-T VENT EZ SEAL CONNECTION TO VENT COLLAR