40
6) AssemblyofProtechFasNSeal
a) FasNSealGeneralNotes:
• Donotcut4”FasNSealpipe.ConsultFasNSealinstructionsformethodofcuttingother3”pipe.
• OrientFasNSealventcomponentssothatthearrowsonthepipinglabelsareinthedirectionofuegasow.
• Supporthorizontalpipingsectionsatintervalsof6feetorless.
• VerticalventingsystemsmustbesupportedbyatleastoneFasNSealsupport.Anadditionalverticalsupportis
requiredafteranyoffset.
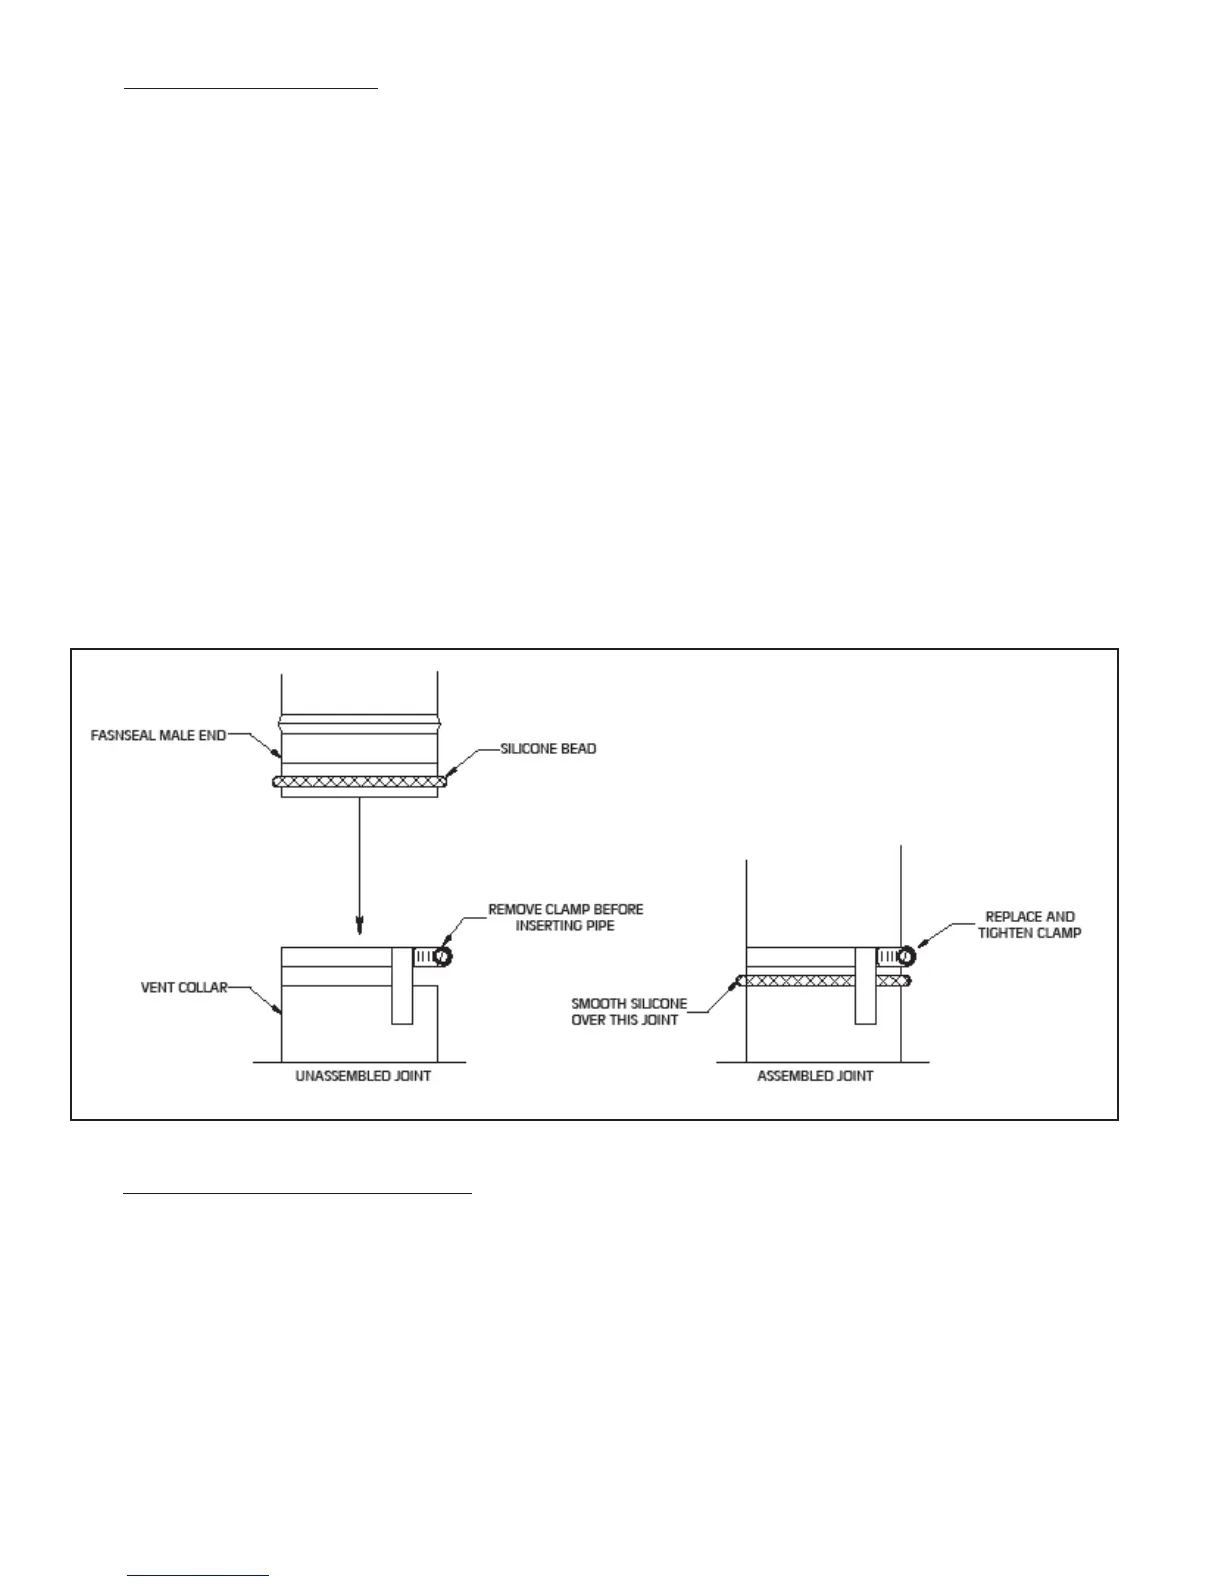
b)RemovethehoseclampshippedontheFCMventcollar.Bendthethreehoseclamptabsonthiscollaroutward
slightly.Cleantheexteriorofthemaleendoftherstpieceofpipeandtheinsideoftheventcollarontheboiler.
Removedirt,grease,andmoisturefromthesurfacestobesealed.Onthemaleendofthepipe,applya¼”widebead
ofhightemperaturesiliconeapproximately¼"fromthemaleendofthepipe.Insertthemaleendofthepipeintothe
boilerventcollaruntilitbottomsout.Applyanadditionalbeadofsiliconeovertheoutsideofthejointandtheseams
ontheventcollarandsmoothout(Figure7.50).Replaceandtightentheclampontheventcollar.
c)AllotherjointsintheFasNSealventingsystemrelyonagasketinthefemaleendofthepipeforaproperseal.
d)Alignthelongitudinalseamofbothpipes.Insertthemaleendofthesecondpipeintothefemaleendoftherstpipe
untilthebeadonthemaleendcontactstheareonthefemaleend.
e)Tightenthelockingbandwithanutdriver.
f) Repeat(d)and(e)fortheremainingFasNSealcomponents.
g)Allowthesiliconetocureperthesiliconemanufacturer’sinstructionsbeforeoperatingtheboiler.
7) InstallationofHorizontalExhaustTerminal:
a)Whenstainlesssteelventingisused,useU.S.BoilerstainlessexhaustterminalP/N8110701.Theouteredgeofthis
terminalmustbebetween6and12inchesfromthesurfaceofthewall.The joint between the terminal and the last
piece of pipe must be outside of the building.
b)Maleendofterminalwilltintothefemaleendofanyoftheapprovedstainlessventsystems.
c)Applyaheavybeadofsiliconetothemaleendoftheterminalbeforeinsertingitintothelastpieceofpipe.Orientthe
terminalsothattheseamintheterminalisat12:00.
d)Smooththesiliconeovertheseambetweentheterminalandthelastpieceofpipe,applyingadditionalsiliconeif
necessarytoensureatightseal.
e)Allowthesiliconetocureperthesiliconemanufacturer’sinstructionsbeforeoperatingtheboiler.
FIGURE 7.50: FASNSEAL CONNECTION TO VENT COLLAR