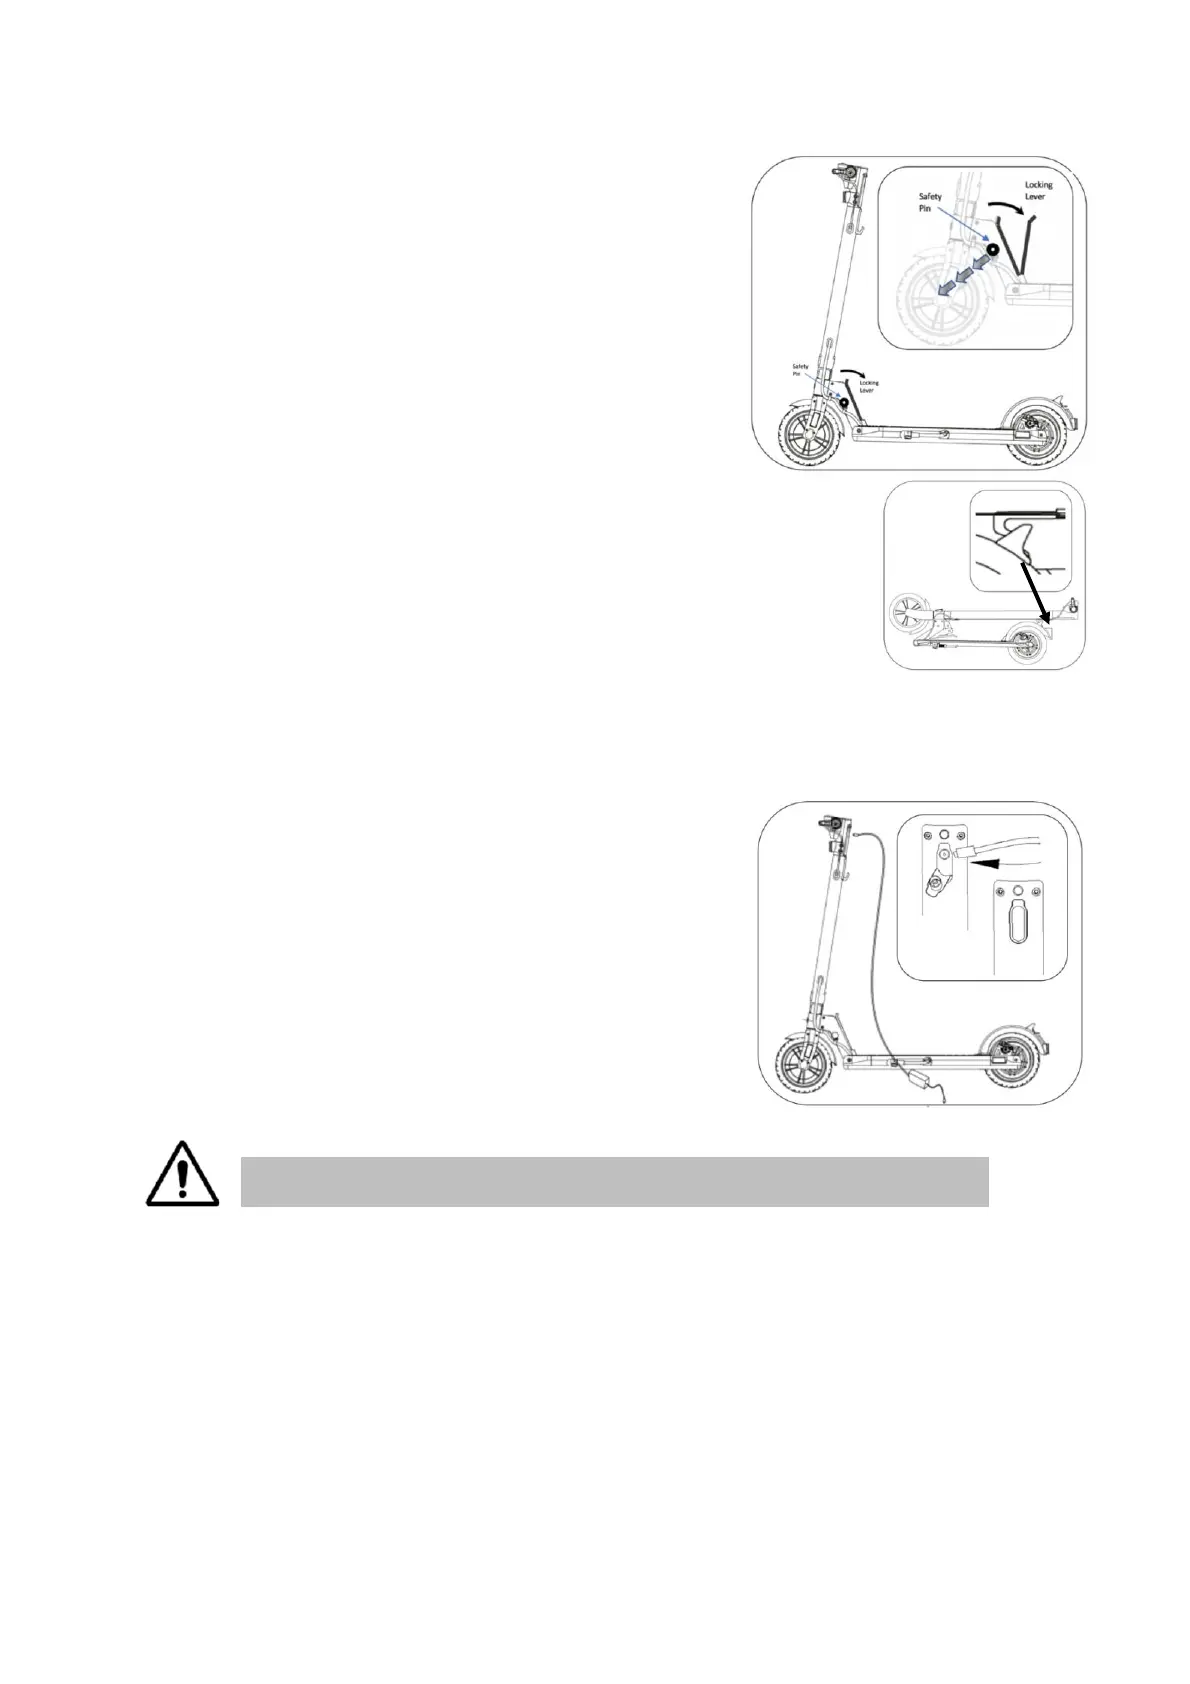
Attention: Take control of the handlebar stem as it
collapses to the folded position.
Folding the Busbi Wasp:
Note:
If the safety pin is not pulled fully out, the locking
lever will not move and you will be unable to fold the
handlebars; this is a safety feature.
•
Ensure the Busbi Wasp is powered off.
•
Hold the handlebar stem.
•
Fold the kickstand away.
•
Pull the safety pin on the left hand side of the
frame, and with the safety pin held in the out position, firmly
pull the locking lever down towards the foot deck of the
scooter.
•
As the handlebar stem folds down, guide it to ensure the
locking hook engages with the locking buckle
3.4 Charging.
Before first use, please fully charge your e-scooter.
(See further guidance on page: 16)
Before charging ensure the charging, port is dry and free from debris.
3.4.1 Connect the Charger
Use the included charger and connect it to the charging
port. Now connect the 3 pin plug to the mains outlet.
Observe the charging light on the charger.
3.4.2 Charging Complete.
When fully charged, a
green light
on the
charger indicates charging is complete.
Disconnect the power supply from the charging port and
ensure the charging port cover is closed securely.
Failure to observe safe charging conditions.
Risk of fire, explosion and Injury.
•
Charge in a well-ventilated space.
•
Do not attempt to charge - if the charging port or power adaptor is wet.
•
Only use charger specified by the manufacturer.
Manufacturer: Shenzhen Fuyuandian Power Co., Ltd., Model: FY4202000
•
Ambient temperature must be 0-40 C during charging.
•
The battery will not charge outside of these temperature limits.
•
Risk of Fire: Do not attempt to disassemble the charger.
•
No user serviceable parts.
 Loading...