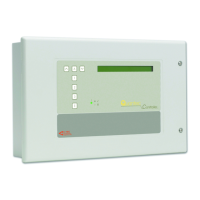
QT601-2 Quantec Controller
Programming Methods
The Controller can be programmed using two methods:
(1) Using its front panel buttons and LCD display
Although time consuming, all aspects of programming can be
undertaken using this method and no other piece of
equipment is required.
(2) Using the Quantec upload/download software (QT707)
Allows quick and easy input of data and routing
arrangements via an IBM compatible PC. This method is much
quicker than method 1 and provides the added bonus of
allowing off-site programming (if the relevant details are
available) and the archiving of programming information for
future reference.
Only the first method is covered in detail in this manual.
Information on how to program Quantec using its upload
/download software can be found in the separate instructions
and help files supplied with the QT707 software.
The efficiency with which the programming function is carried
out depends on:
• The accuracy of information received regarding the
wiring and devices fitted.
• The freedom of the installation from faults and errors.
• The completeness of the information received from the
client/specifier as regards text information and the
manner in which the equipment is to operate.
The only factor normally within the control of the
programmer is the final item and even if this is done perfectly,
the quality of the installation will always be based upon the
quality of the first two factors.
To help ensure that the information received is complete as
possible, we recommend the installing contractor is provided
with a copy of this document before starting the job. This
document contains sections which should be completed by the
installing contractor prior to system handover, specifically in
the System Wiring Overview section and Pre-Commissioning
Instructions (Appendix 7).
Typical Programming Sequence
A full explanation of Quantec’s programming functions can
be found on Pages 16 to 25 of this manual. The actual
commissioning sequence used will vary depending on the
information available and personal preference. However we
recommend it follows a similar pattern to that described in
the next column:
(1) Power up the system and assign the devices on the limbs.
Experience shows the easiest way to do this is using the
C
ontroller's AutoScan function. This sequentially assigns the
next available ID location to unassigned devices as they are
operated and allows the system to be programmed very
quickly. Refer to Assigning Multiple Devices section 1.2.
H
int: When autoassigning the system, plan your route around the building
on a drawing, marking on it the device numbers you anticipate will be
assigned to each networked device. It is advisable to assign each limb one
a
t a time, periodically stopping the autoassign function to check that a
p
articular device is programmed as anticipated. A handy way of doing this
i
s to program a Display and then press the A button which will display its
ID number. Whilst the autoassign function is active, pressing a call button
on any unassigned device will automatically assign the next available device
n
umber to it.
(2) Verify that the devices are programmed correctly by
checking the last assigned number at the Controller, or by
using the Display Device function section 3.1. Once a device is
programmed, it retains its ID even when power is removed. If
programmed by mistake, you must reset the ID to unassigned
by shorting the two Reset ID pins on the networked device
PCB whilst it is powered up. Note: Once a device's ID number
has been reset, it enters the unassigned state. At this point the
old ID number must be deleted from the Controller as it will
try and scan for the device and not be able to find it. Refer to
Editing Existing Devices section 1.3.
(3) Print off a list of devices. If you don't have a printer you
must write this information down by scrolling through the
Device Assignment Table at the Controller. This initial list (if
you are using a printer) will show no names attached to the
devices and can be given to the client so they can write down
what they wish to call each device. Note: 45 custom and 40
pre-set place names are available. Refer to Editing Custom
Texts section 1.7.
(4) Discuss with the client all the routing options for calls (i.e.
night mode operation, splitting of network into manageable
areas, routing of calls to different Displays, divert / autodivert
functions, timeouts, logging options, etc). Most options are
highlighted in the Quantec Concept section of this manual.
(5) Program in the names and operating modes, routing
tables, etc. as agreed with the client (refer to sections 1.3 -
Editing Existing Devices, 1.5 - Assigning or Editing Area/Group
Relationships, 1.6 - Setting up Addressable Overdoor Lights
and Sounders, 1.7 - Editing Custom Texts and section 2 - The
System Setup Menu. Note: All Call Points / Monitoring Points
default to Area A; all Displays default to Group 1 and all
Addressable Overdoor Lights / Sounders default to Zone 1.
Group 1's routing equation defaults to Area A, Group 2’s
routing equation defaults to Area B, etc. Zones have no
routing data by default.
(6) Print off a full list of the system devices and programming
set-up data and verify it is as planned. Correct any errors as
necessary. Print and keep a copy of the set-up for reference.
Hint: If you don’t have a printer, the above lists must be derived manually
by scrolling through the Controller menus and writing the list down.
PROGRAMMING QUANTEC
Before programming commences, we recommend you read
'The Quantec Concept' section on Pages 5 to 7.
Commissioning is the most critical part of the installation and
a basic understanding of how Quantec works and the
concept behind it is essential.
Installation & Programming Manual • Approved Document No. DNU6012001 Rev 5 • Page 15 of 42