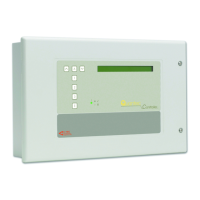
QT601-2 Quantec Controller
Installation & Programming Manual • Approved Document No. DNU6012001 Rev 5 • Page 17 of 42
Access Level 3 Programming Functions
1.0 The Assignment Menu
The Assignment Menu allows the introduction of unassigned
devices onto the network and the setting up of routing
arrangements for Areas, Groups and Zones. It also allows the
p
arameters of any existing device, including its name, to be
changed.
1
.1 Assigning Individual Devices
Move through the menus to the Assignment Menu and select
the ‘New Device’ prompt. The next unused ID number will be
presented:
This can be altered if required using the scroll keys, but it is
usual to accept this prompt. (Network devices can be assigned
any ID number from 2 to 255. Address 1 is always allocated to
the Quantec Controller.) After pressing the Accept key, the
next prompt is to activate the new device:
When the unassigned device is activated, the Controller will
respond by showing the type of device in code form, e.g.
Use the scroll and Accept keys to enter the appropriate Area,
Group or Zone with reference to the Device Assignment Table
on Pages 36 to 38. Once the relevant Area, Group or Zone has
been accepted, a location prompt will appear:
Using the scroll and Accept keys, the device can now be given
a place name from the list of locations (refer to Appendix 1
for a list of Quantec's 40 pre-set place names and note that it
is also possible to program up to 45 custom place names using
the 'Edit Custom Texts' function described in section 1.7). On
pressing the Accept key, your choice will be confirmed, e.g.
By using the scroll and Accept keys, four single alphanumeric
characters can now be tagged onto the end of the place
name.
All four terms must be accepted, even if they are blank (e.g. a
TV room in the East Wing could be TV Room EW01). When
the final character has been accepted, the ‘Assign New Device’
prompt reappears. Note: Exiting this option before the final
character has been accepted will cancel the description
change.
1.2 Assigning Multiple Devices
A
ssigning many individual devices using the 'New Device'
function can be very time consuming. Therefore, an
'AutoScan' method is available for assigning multiple devices.
Move through the menus to the Assignment Menu and Accept
the 'AutoScan' prompt. The Controller will then wait for a call
from any unassigned device:
Activate the first unassigned device in the sequence to be
programmed, at which point the Controller will assign the
next available ID number from 2 to 255. (Address 1 is always
allocated to the Controller.)
In Autoscan mode the Area, Group or Zone set membership
and location description data is not entered immediately.
Instead all outstanding devices can be activated sequentially.
As each device is activated it is assigned an ID number
automatically and, for reference purposes, the last device ID
number is displayed on the Controller.
HINT: When programming a site with many devices, it is
recommended you keep a list of each ID number as each
device is activated and check at regular intervals with the
Controller that the last ID numbers entered correspond. If they
do not, either a mistake has been made or someone has
operated an unassigned device elsewhere in the building. (If
this is the case, refer to sections 1.3 - Editing Existing Devices
and 3.1 - Display Device.)
When the Autoscan sequence is complete exit the Autoscan
option. At this point all assigned devices have default set
memberships and no location descriptions. To add/change
these refer to section 1.3 - Editing Existing Devices.
New Device
Number to be 002
Activate Device
002 or ESC
Device 002 CLPT
Select Area A
(CLPT = Call Point; DISP = Display;
MNPT = Monitoring Point; ZNID = Addressable
O
verdoor Light or Sounder)
Device 002 CLPT
--------------------
Device 002 CLPT
TV Room ----
AutoScan Mode
Waiting for call

 Loading...