52
12345678901234567890123456789012123456789012345678
1
234567890123456789012345678901212345678901234567
234567890123456789012345678901212345678901234567
234567890123456789012345678901212345678901234567
234567890123456789012345678901212345678901234567
234567890123456789012345678901212345678901234567
234567890123456789012345678901212345678901234567
8
12345678901234567890123456789012123456789012345678
12345678901234567890123456789012123456789012345678
1
234567890123456789012345678901212345678901234567
234567890123456789012345678901212345678901234567
234567890123456789012345678901212345678901234567
234567890123456789012345678901212345678901234567
234567890123456789012345678901212345678901234567
234567890123456789012345678901212345678901234567
8
12345678901234567890123456789012123456789012345678
PRO FARMER TRIPLEXPRO FARMER TRIPLEX
PRO FARMER TRIPLEXPRO FARMER TRIPLEX
PRO FARMER TRIPLEX
PRO FARMER / TS • GENIUSPRO FARMER / TS • GENIUS
PRO FARMER / TS • GENIUSPRO FARMER / TS • GENIUS
PRO FARMER / TS • GENIUS
STANDARD FOXSTANDARD FOX
STANDARD FOXSTANDARD FOX
STANDARD FOX
USO E MANUTENZIONE USO E MANUTENZIONE
USO E MANUTENZIONE USO E MANUTENZIONE
USO E MANUTENZIONE
OPERATING AND SERVICEOPERATING AND SERVICE
OPERATING AND SERVICEOPERATING AND SERVICE
OPERATING AND SERVICE
Rev. 02
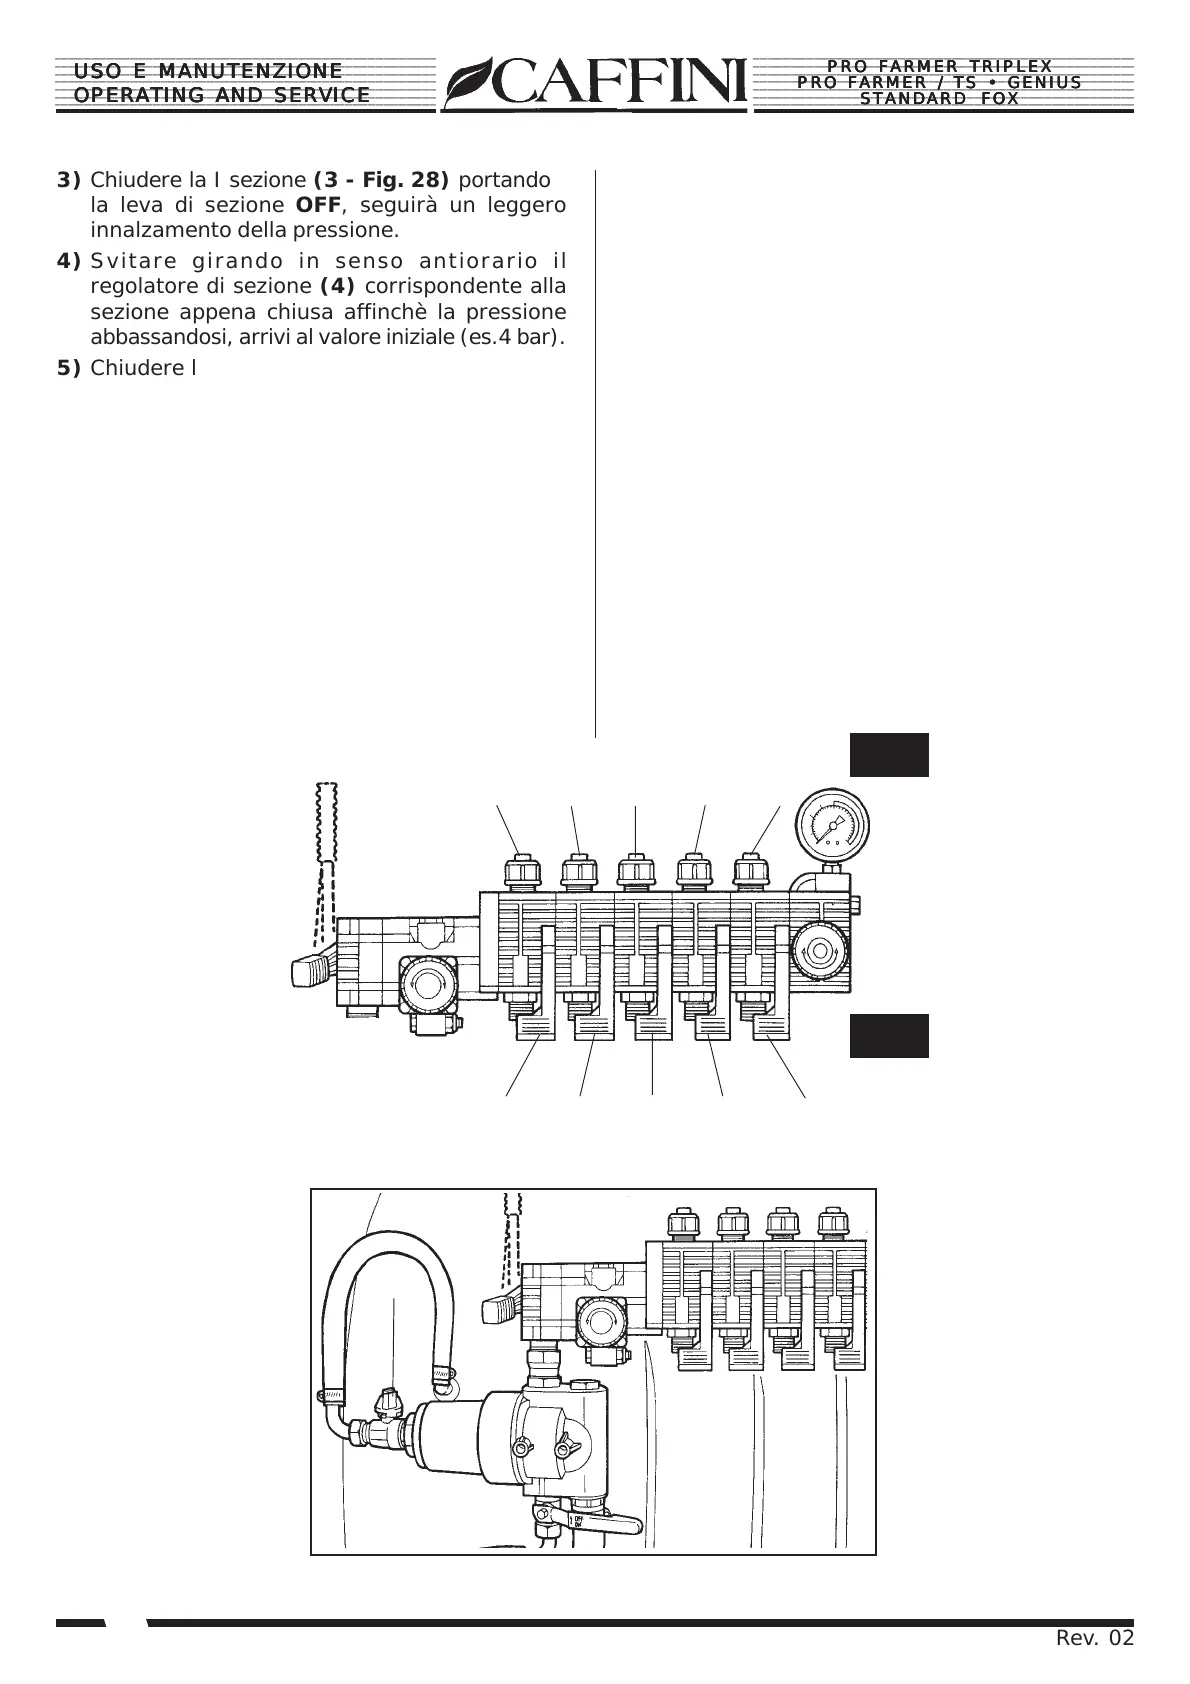
3) Chiudere la I sezione (3 - Fig. 28) portando
la leva di sezione OFF, seguirà un leggero
innalzamento della pressione.
4) Svitare girando in senso antiorario il
regolatore di sezione (4) corrispondente alla
sezione appena chiusa affinchè la pressione
abbassandosi, arrivi al valore iniziale (es.4 bar).
5) Chiudere la II sezione (3) portando la leva di
sezione in posizione OFF, seguirà un leggero
innalzamento della pressione; procedere come
al punto d.
6) Eseguire la regolazione su tutti i settori
della barra. Ultimata la regolazione si no-
terà che aprendo o chiudendo uno o più
settori della barra non si avranno varia-
zioni di pressione.
La taratura è stata eseguita ad un determinato
valore di pressione:
Variando la pressione, non sarà necessario ripe-
tere la taratura. Sarà invece necessario rifare la
taratura se si utilizza un tipo di ugello diverso.
C
Fig. 29
3) Close the first section (3 - Fig. 28) by moving
the section lever to the OFF position; a slight
pressure increase will follow.
4) Unscrew the section regulator (4), correspo-
nding to the just closed section,
counterclockwise, so that the pessure, by falling,
reaches the initial value (for instance 4 bar).
5) Close the second section (3) by moving the
section lever to the OFF position; a slight
pressure increase will follow. Proceed as
described in point d.
6) Carry out the adjustment in all spraying boom
sections. At the end of the adjustment, you
will note that, by opening or closing one or
more spraying boom sections, no pressure
change will occure.
The calibration was carried out at a determined
pressure value. By changing the pressure, it will
be not necessary to repeat the calibration. On
the contrary a new calibration will be necessary
if you use a different type of nozzle.
Fig. 28
33
3
3
3
OFF
4
44
4
4
ON