Do you have a question about the CalAmp LMU-30 Series and is the answer not in the manual?
Statement on radio frequency radiation exposure requirements and compliance for the device.
Precautions regarding Electrical Over-Stress (EOS), storage, and shipping of the device.
Lists the general, location, electrical, and physical specifications for the LMU-30xx/CVF-3030.
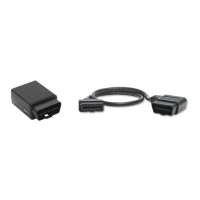
Outlines the general specifications for the OBD-II Extender Cable.
Lists the required materials for the proper installation of the device and cable.
Instructions for removing vehicle panels to access the OBD-II port and install the device.
Steps to connect the OBD-II Extender Cable to the vehicle and the LMU-30xx/CVF-3030 device.
Instructions for reassembling the vehicle panels after the device installation.
Procedure to scan the device's Air ID or ESN using the mobile app.
Procedure to enter vehicle information into the mobile application.
Steps to test the device installation and communication through the mobile app.
Procedure to assign default alerts and geozones to the vehicle within the app.
| Brand | CalAmp |
|---|---|
| Model | LMU-30 Series |
| Category | Cables and connectors |
| Language | English |