CalAmp | LMU-30xx/CVF-3030 & OBD-II Extender Cable Install
Guide
MBUD-0268v1.4 Page 11
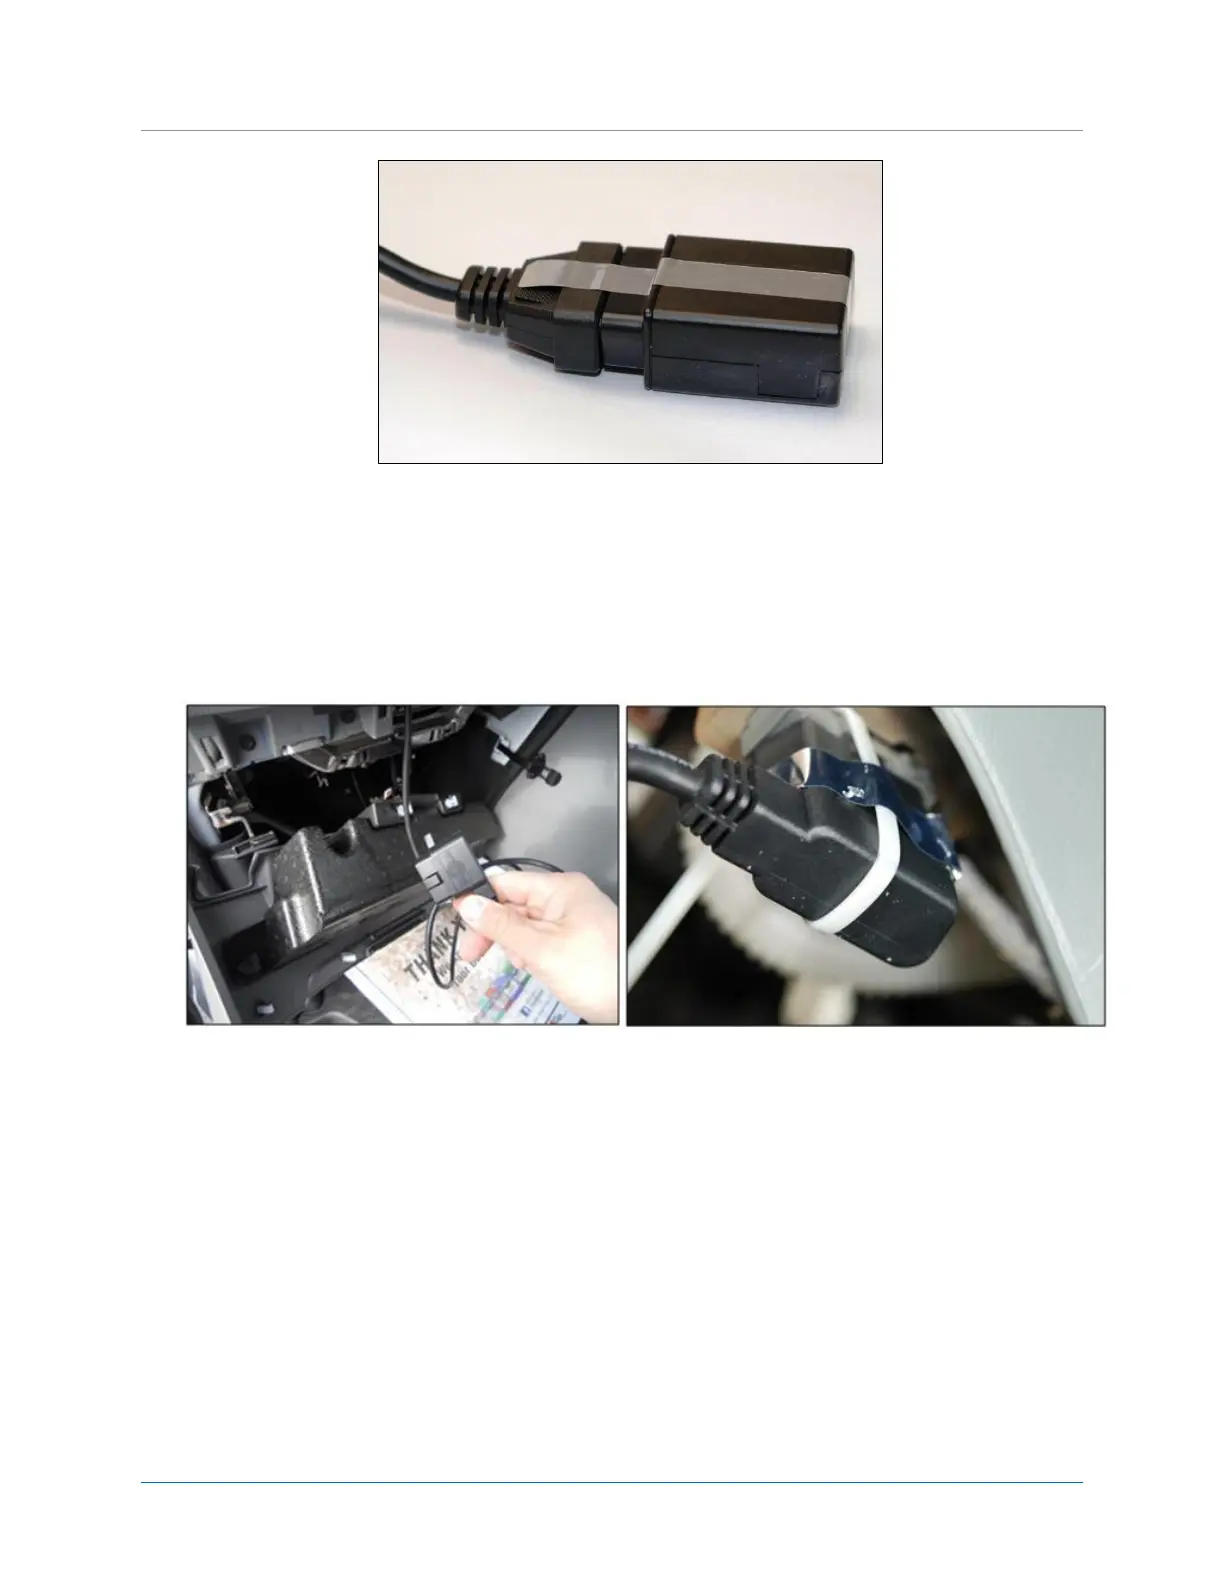
Figure 9: Tamper Tape over LMU-30xx/CVF-3030 and OBD-II Extender Cable Connection
4. To deter potential device tampering, apply a piece of tamper tape over the connection.
When the tamper tape is removed, the tape self-destructs to indicate removal and leaves behind a
residue on the device.
5. Place a female-side (loop-side) piece of Velcro on the LMU-30xx/CVF-3030 device.
Place tamper tape and Velcro on non-label side of the LMU-30xx/CVF-3030 device.
Figure 10: Plug Male Connector of OBD-II Extender Cable into OBD-II port.
6. Plug the male connector of the OBD-II Extender Cable directly into the vehicle’s OBD-II port.
7. To deter potential device tampering, apply a zip-tie and a piece of tamper tape over the connection.
8. For LMU-3000 devices only, review the status LEDs on the device for successful installation. For all
other LMU-30xx/CVF-3030 devices, review device communication status using the FO MobileInstall
app.
Note: The LMU-3030/CVF-3030 has one LED to indicate power up of the device. It does not report
device communication or status.
After you plug in the OBD-II Extender Cable, the LMU-3000 LEDs go through a boot-up cycle. After
the boot-up cycle completes, the orange and green lights blink before turning solid. The red light is
not active.
 Loading...