CalAmp | LMU-30xx/CVF-3030 & OBD-II Extender Cable Install
Guide
MBUD-0268v1.4 Page 17
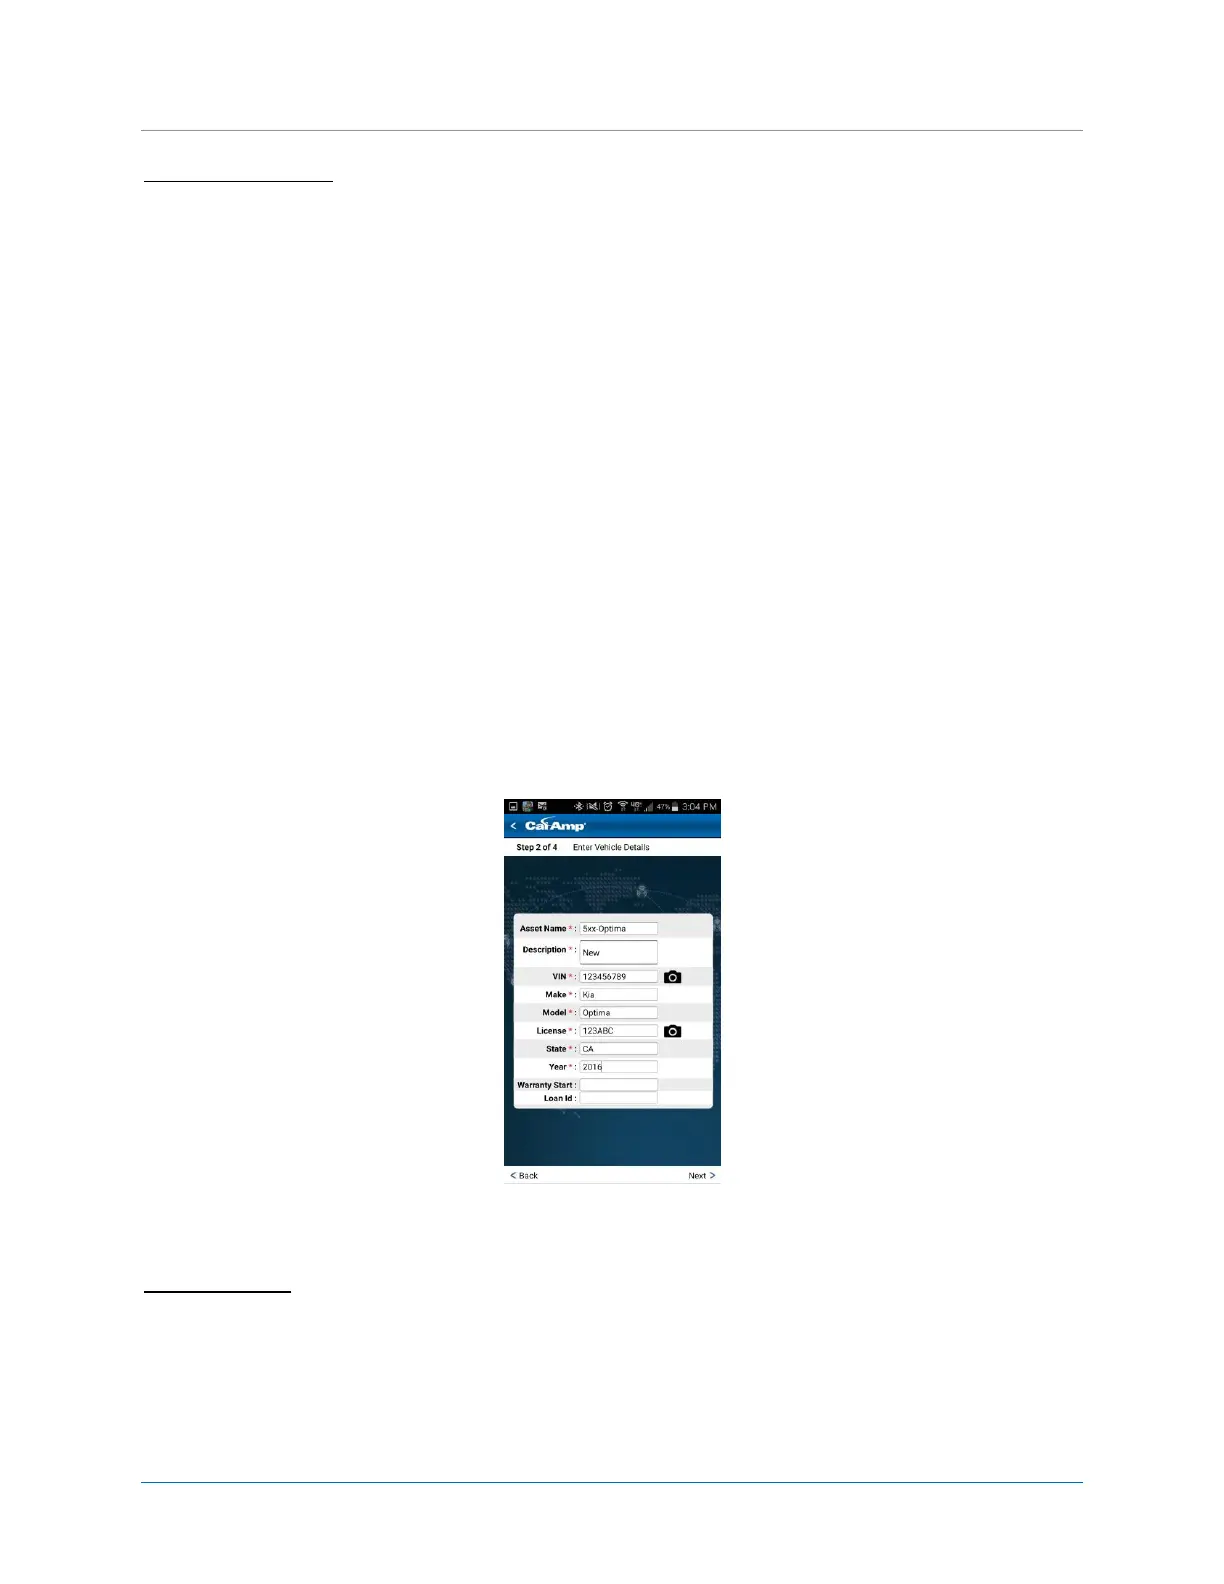
Enter Vehicle Details
1. Tap in the Asset Name field, and then enter the vehicle name.
* This name is used to identify the vehicle throughout LenderOutlook.
2. Tap in the Description field, and enter a short vehicle description.
3. Tap the Camera icon next to the VIN field, and then hold the mobile phone or tablet’s camera over
the vehicle’s VIN. You can also tap in the VIN field, and then enter the VIN using the keypad.
* After the vehicle’s VIN is scanned, MobileInstall automatically populates the Make and Model fields.
You can manually edit these fields if necessary.
4. Tap the Camera icon next to the License field, and then hold the mobile or tablet’s camera in front of
the vehicle’s license plate. Tap or press the OK button on your mobile phone or tablet to save the tag
number in the License field.
5. Enter the State and vehicle’s Year.
* Depending on your organization, you may have two additional fields. These are user-defined fields.
6. Tap Next at the bottom of the screen.
Figure 17: Enter Vehicle Details
Test Your Install
At the top of this screen, MobileInstall displays if the device is communicating, number of GPS satellites
that the device has acquired and the device’s cellular signal strength. Additionally, the device’s last
reported location is displayed. Tap the Refresh icon to update the device’s location. Note: Each time you
 Loading...